The document provides assembly instructions and operational information for the APEX PRO/4 height-adjustable desk frame from DESKHAUS.
Function Description
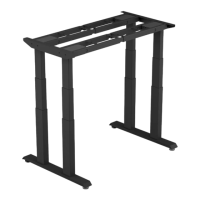
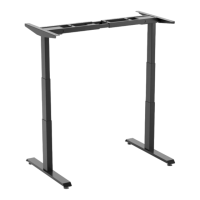
The APEX PRO/4 is a height-adjustable desk frame designed to allow users to easily switch between seated and standing positions. It consists of four columns, two top supports, two feet, two collapsing channels, a control box, a hand switch, and a power cord. The frame is designed to be fastened to a desk surface (not included) and includes features for height calibration, memory settings, activity reminders, and upper/lower limit adjustments. The desk is operated via a SmartPaddle hand switch connected to a control box, which manages the movement of the columns.
Important Technical Specifications
Parts Included:
- Columns: 4
- Top Supports: 2
- Feet: 2
- Collapsing Channels: 2
- Control Box: 1
- Hand Switch: 1
- Power Cord: 1
- M6 14mm Screws: 24
- M6 10mm Screws: 32
- 7/8" Wood Screws: 14
- 16mm Wood Screws: 2
- Feet Pads: 4
- Cable Ties: 20
- Cable Extensions: 4
Tools Needed for Assembly:
- Phillips Bit
- Cordless Driver
- Tape Measure
- 4mm Hex Key (included)
Screw Types and Usage:
- M6 10mm Screws (shorter): Used for assembling columns to collapsing channels (4 per column, 16 total) and locking adjustable channels (8 per channel, 16 total).
- M6 14mm Screws (longer): Used for assembling top supports to columns (4 per top support, 8 total) and connecting feet to columns (8 per foot, 16 total).
- 7/8" Wood Screws: Used for fastening the frame to the desk surface (14 total).
- 16mm Wood Screws: Used for securing the control unit to the desk surface (2 total).
- Wood Screws (included with hand switch): Used for attaching the hand switch (2 total).
Weight Limit: The desk has a specified weight limit, and exceeding it can lead to error codes (E02).
Duty Cycle: The control box has a duty cycle. Continuous movement of columns for over 4 minutes can trigger an H01 error, requiring the desk to rest for 16 minutes. High room temperature can also affect heating elements and trigger this error.
Usage Features
Assembly Process:
- Assemble Columns to Collapsing Channels: Use M6 10mm screws (shorter, 4 per column). Channels may need to be extended to expose screw holes. Ensure correct orientation of screw holes.
- Assemble Top Supports to Columns: Use M6 14mm screws (longer, 4 per top support).
- Fasten Frame and Control Box to Desk Surface: Use 7/8" wood screws for the frame (14 total) and 16mm wood screws for the control unit (2 total). Center the base on the desk surface, leaving 2" on the right and left sides. Pre-drilling is required for solid wood tops and optional for HPL tops.
- Connect Feet to Columns: Use M6 14mm screws (longer, 8 per foot).
- Lock Adjustable Channels: Use M6 10mm screws (shorter, 8 per channel). Ensure the control box and hand switch are placed so cables connect without tension.
- Connect Power Cords: Connect the hand switch, four column power cords, and the main power cord to the control box. Use column cable extensions if needed.
- Attach Hand Switch: Secure with two wood screws (included with the hand switch). Secure all cables with included cable ties. Flip the table over (with two people) and plug the power cable into an electrical outlet.
Important Assembly Note: Do not tighten machine screws fully until the end of each step to allow for proper centering.
Operation Information:
-
Raising the Table: Hold the paddle up; release to stop.
-
Lowering the Table: Hold the paddle down; release to stop.
-
Height Calibration:
- Hold the down button (SmartPaddle) until the desk reaches its lowest height, then release.
- Measure the height from the floor to the top of the desktop. If it doesn't match the displayed height, proceed.
- Hold the down button (SmartPaddle) again until the LED display reads "Reset".
- Press the "M" or side button (SmartPaddle) until the numeric display flashes.
- Press Up or Down until the readout matches your measurement.
- Wait for the display to return to "Reset", then hold the down button (SmartPaddle) until the desktop lowers slightly and rises slightly, and the display changes back to the numeric height setting.
-
Handset Reset (First Use/Troubleshooting): If the display shows "Reset" or an error code, press the paddle down to the lowest height and release. Then press the paddle down again for 5 seconds until the display shows "Reset" and returns to a normal digital number.
-
Using the Memory Function:
- Setting Seated Height: Adjust desk below 35.5 inches. Press the side button once (displays ▼), then again to save (displays -2).
- Setting Standing Height: Adjust desk above 35.5 inches. Press the side button once (displays ▼), then again to save (displays -1).
-
Automatically Reach Standing Height: Press the handset paddle up twice quickly.
-
Automatically Reach Sitting Height: Press the handset paddle down twice quickly.
-
Setting Up Activity Reminders: Press and hold the side button for 5 seconds to enter settings. Press the side button again to enter activity reminder settings. Use the paddle to adjust the timer (30, 40, or 50 min). Press the side button to confirm. Enter this menu again to cancel the reminder.
Maintenance Features
Troubleshooting Guide: The manual includes a comprehensive troubleshooting section for various error codes:
-
E01-E06 (Column plugged into M1-M6 Port): Indicates column modification preventing movement, exceeding weight limit, control box telling column to travel beyond mechanical limits, or a mechanical failure.
- Solutions: Check for interference, perform base reset, check weight limit, exchange control box if column doesn't slow down before stopping, or replace column.
-
E07-E12 (Column plugged into M1-M6 Port): Indicates column not plugged in correctly, damaged cord/plug, or damaged control box port.
- Solutions: Verify all plugs are seated, perform base reset, unplug columns, turn control box around, plug columns back in (if new error code, replace column; if same error code, replace control box).
-
E13 (Control box error with master/slave connection): Indicates cord not plugged in correctly, damaged cord/plug, or control box problem.
- Solutions: Verify plugs are seated, perform base reset, inspect cord/plug for damage (replace if needed), or replace control box (custom install customer service may be required for master/slave systems).
-
H01 (Control box duty cycle): Indicates continuous movement over 4 minutes or high room temperature.
- Solutions: Desk must rest for 16 minutes, or ensure environment temperature is not too high.
-
LOC (Control box/handset lock): Indicates control box program has locked the handset or a handset circuit error.
- Solutions: Perform handset un-lock operation, or replace handset if un-lock doesn't solve the problem.
General Maintenance:
- Secure all cables with included cable ties during assembly.
- Ensure cables connect without being in tension.
- Regularly check for interference or obstructions that might prevent column movement.