700 RAM I.M.
700 RAM I.M. Rev. 1.1 Page 9 of 12
The user can then choose to either: 1) move to another menu item by executing a momentary hold, or 2)
return to Normal Operation via 15 second automatic timeout.
3.3 Set Serial ID
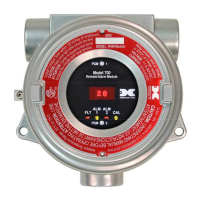
The RAM can be polled serially via the RS-485 Modbus™ interface. It repeats the Modbus™ output from
the 700 Gas Sensor it is connected to. The RAM Serial ID # should be set as a slave device to a master
polling device. The Serial ID # of the RAM is independent of the Serial ID # of the Model 700 Gas Sensor.
The Serial ID # of the Model 700 Gas Sensor connected to the RAM must be set to ID
= 01 for proper communication between the two devices.
Set Serial ID is used to set the Modbus™ serial ID address of the RAM. It is adjustable from 01 to 127 in
hexadecimal format (01-7F hex). The current serial ID can be viewed in View Sensor Status using the
instruction given in Section 3.1 View Sensor Status.
The menu item appears as: “Set Serial ID”
From the “Set Serial ID” text scroll, hold the programming magnet over PGM1 () or PGM2 () until the
arrow prompt appears and then hold continuously for an additional 3 seconds. The display will then switch
to “XX” (where XX is the current ID address). Swipe the magnet momentarily over PGM2 to increase or
PGM1 to decrease the hexadecimal number until the desired ID is displayed. Hold the magnet over PGM1
or PGM2 for 3 seconds to accept the new value. The display will scroll “New ID Saved”, and revert to “Set
Serial ID” text scroll.
The user can then choose to either: 1) move to another menu item by executing a momentary hold, or 2)
return to Normal Operation via 15 second automatic timeout.
3.4 Set-up for Relay Outputs
The user interface allows for the setting and configuration of the three relay contacts of the RAM. The three
relays can be optionally configured as follows:
Alarm 1: 1) gas level, 2) ascending/descending, 3) latching/non-latching and 4) energized/de-energized
Alarm 2: 1) gas level, 2) ascending/descending, 3) latching/non-latching and 4) energized/de-energized
Fault: 1) latching/non-latching and 2) energized/de-energized
The three menu items for relay output set-up are Alarm1 Settings, Alarm2 Settings, and Fault Settings.
They are used to set the gas alarm levels and relay status for ascending/descending, latching/non-latching,
and energized/de-energized. The gas concentration level for alarms can be set between 1-95% of the full-
scale range of the 700 Gas Sensor. The current relay configurational settings can be viewed in View Sensor
Status menu.
Ascending/Descending - In ascending mode, the alarm will trigger when the gas concentration
detected is greater than or equal to the alarm set point. In descending mode, the alarm will trigger
when the gas concentration detected is lesser than or equal to the alarm set point.
Latching/Non-Latching - In latching mode, the relay remains active when the alarm status has
cleared. In non-latching mode, the relay is deactivated when the alarm status is cleared.
Energized/De-Energized - In energized mode, the normally open contact is closed if the alarm level
has not been reached. In non-energized mode, the normally open contact is open if the alarm level
has not been reached. Energized mode provides for fail-safe operation since a loss of power or cable
failure will cause the contact to be open.