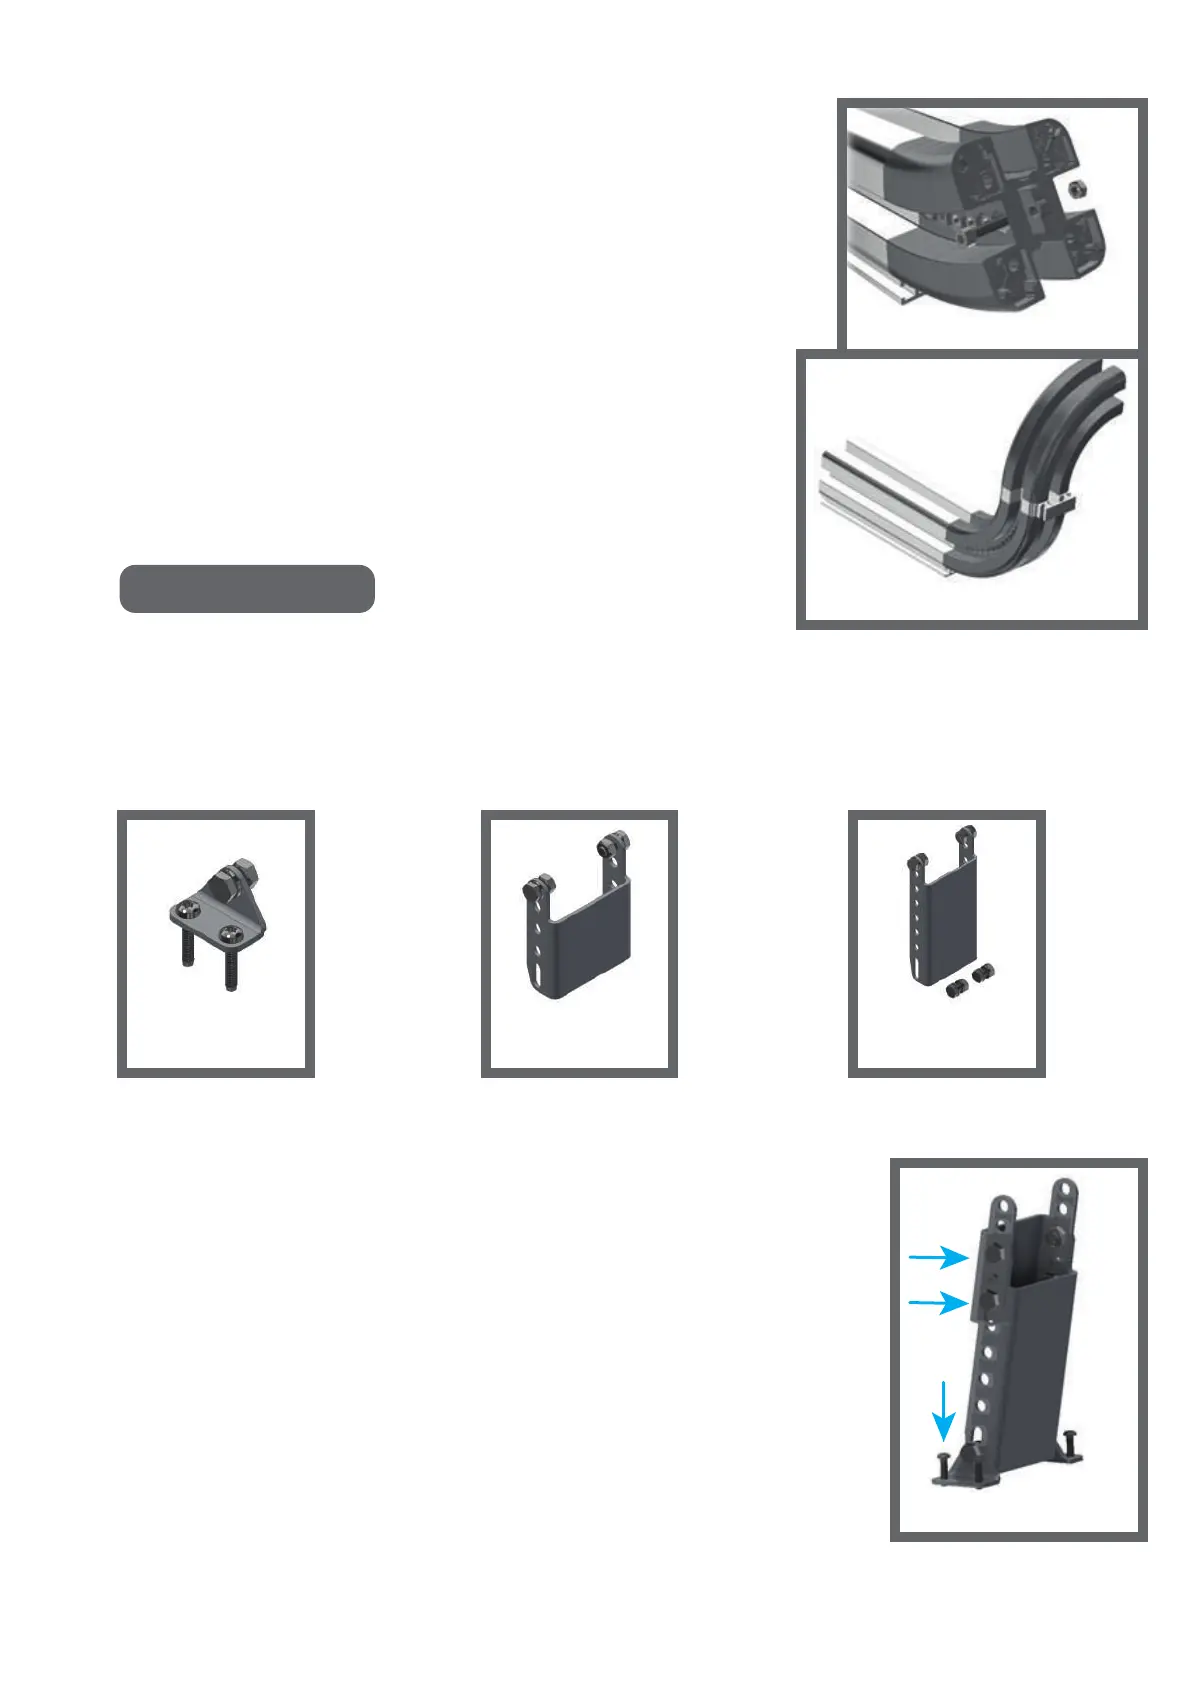
4. Complete the curve by adding segments (AB070000)
until the desired turn angle is reached. Every segment
is 5°. Remember that two segments of the turn are
already in place. At the red arrows a DIN 912 M6X30
screw should be placed with a DIN 934 M6 nut, with
the help of a fixing torque. See figure 5.
5. Eventually, the turn as displayed in figure 6 is
obtained. The turn can be made in every direction
by changing the orientation of the turn segments.
However, between two consecutive turns a straight
part of at least 25 mm should be present.
Rail mounting
Depending on the distance from the stairs, three different pieces can be
used for mounting the rail. Rail support short (fig. 7), Rail support medium
(fig. 8) and Rail support long (fig. 9). These pieces can be combined to get
the desired length for the mount.
AB040000 AB050000 AB060000
1. First determine the distance of the rails to the stairs or ground.
If possible, only use the rail support short otherwise combine
mounts to get the right length.
For the protection of the stairs, use little pieces of cardboard
under the rail supports until you mount them to the stairs.
2. When combining rail supports always have two of the rail
support short on the bottom of the combination. Fix them by
combining a bolt M8x16 DIN 934 and nut M8 ISO 4017
at the blue arrows (fig. 10). Combine the longer rail mounts
by laying them on top of each other and fixing them at the
red arrows (fig. 10). The desired length can be obtained
by changing the holes at which the mounts are connected
to each other.
11
(fig. 5)
(fig. 6)
(fig. 8) (fig. 9)
(fig. 10)
(fig. 7)
 Loading...