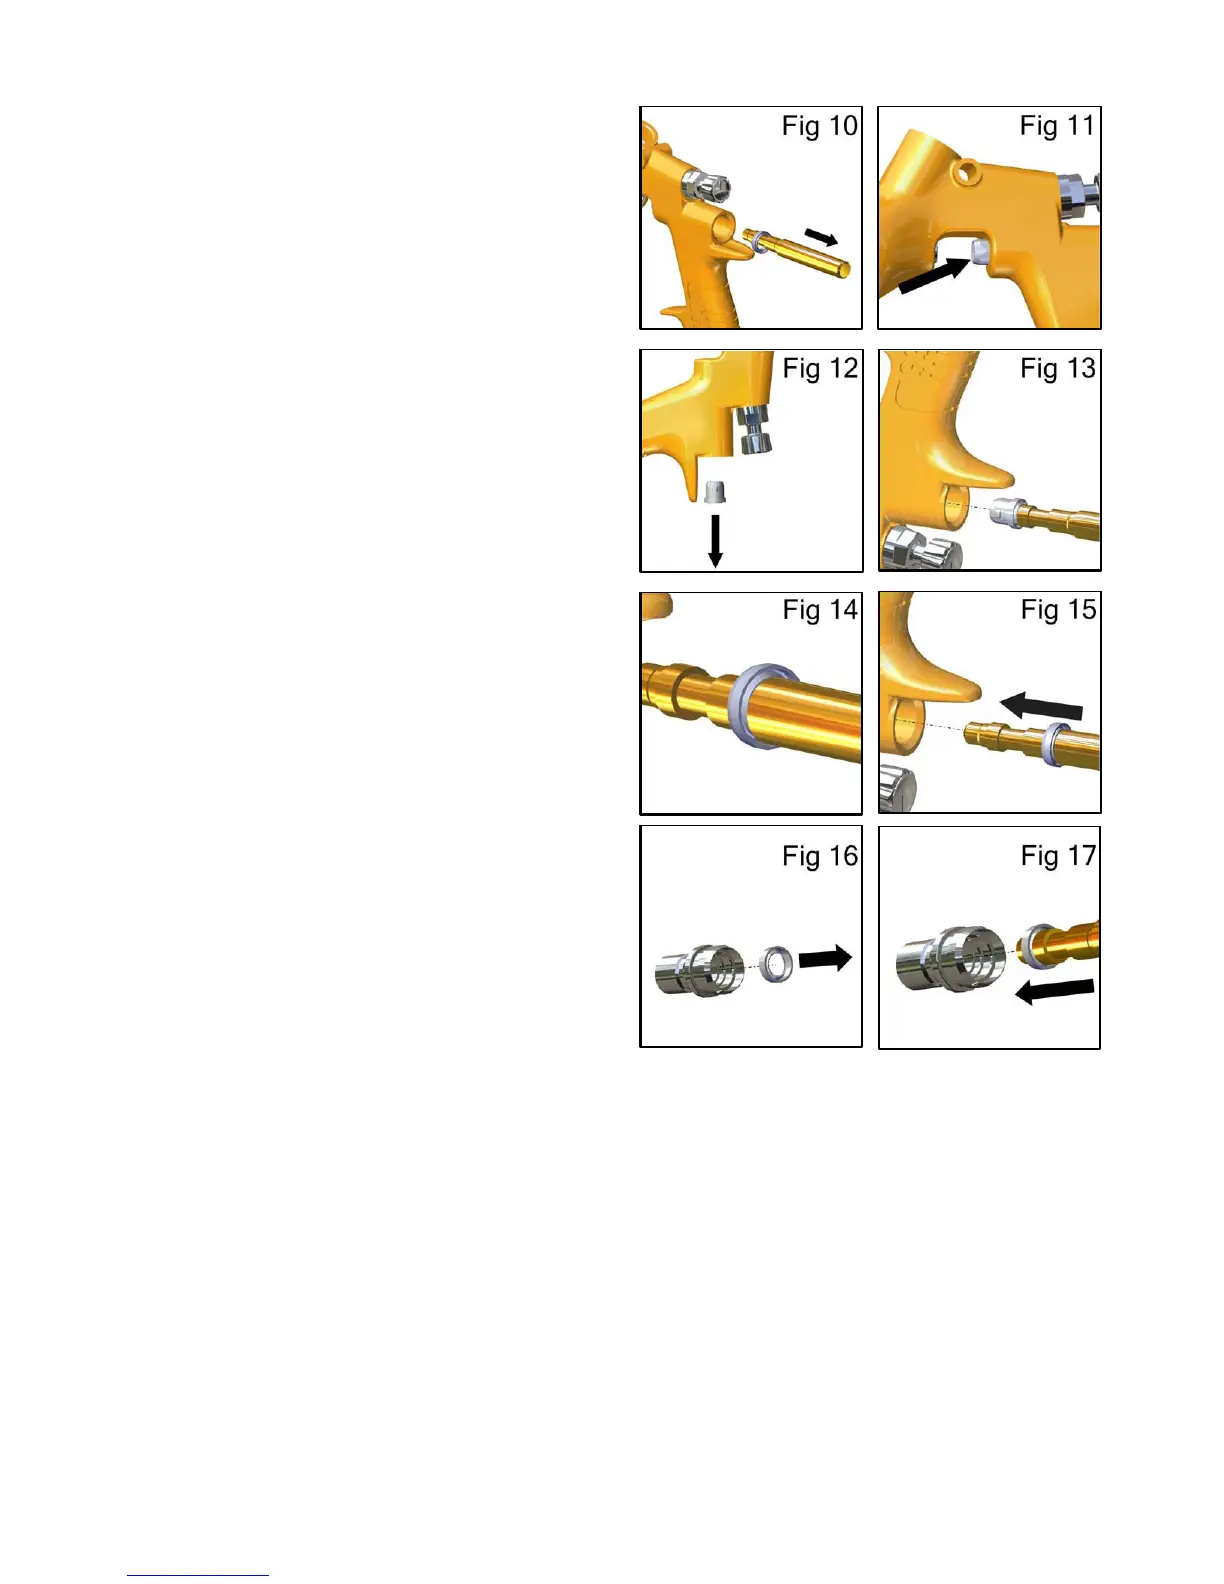
10
8. Withdraw the valve seat (19) from the gun body. (See
fig 10).
9. Push out the front airvalve seal (18) with a finger.
(See fig 11).
10. Turn the Gun upside down and let the seal fall out.
(See fig 12).
11. Fit New front seal (18) to service tool (53). Fit into
gunbody and press firmly to ensure Seal is engaged.
(See fig 13).
12. Fit a new valve seat (19) to service tool (53). Groove
must face outwards. (See fig 14).
13. Fit valve seat (19) to gunbody. (See fig 15).
14. Remove rear airvalve seal (22) from housing (27) with
a hooked instrument. (See fig 16).
15. Fit new seal (22) to service tool (53). Groove must
face outwards. Press seal (22) to housing (27). (See
fig 17).
16. Reassemble remaining parts in reverse order - valve
(20), spring (21), housing (27) and tighten with 6mm
hex key, needle (24) spring (29) and knob (28).
Replace trigger (39), fitting trigger stud (40), and
screw in the trigger screw (38) with Key (55) or Torx
Key T20.
17. Trigger gun fully and screw in fluid adjusting knob (28)
until it stops. Back it off 1/2 turn and gun will have full
needle travel.
18. Trigger gun several times to verify correct operation.