Do you have a question about the DeWalt DCH273 and is the answer not in the manual?
Provides sound and vibration emission levels for various operations, including safety guidance.
Essential safety rules for power tool use, including work area and electrical safety precautions.
Details crucial safety measures for using battery chargers to prevent shock, fire, and damage.
Focuses on safe handling and use of rotary hammers, including grip, workspace, and tool condition.
Details overload, mechanical, electronic clutches, and the anti-rotation system for enhanced safety.
Details how to select drilling, hammering, and screwdriving modes, and how to perform applications.
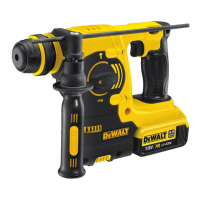
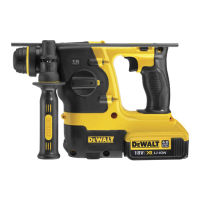
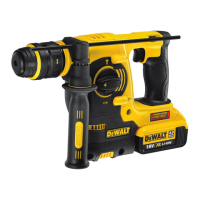
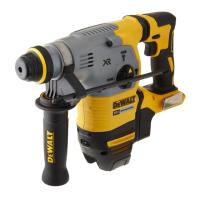
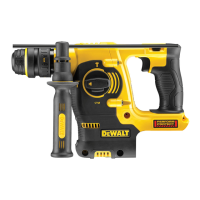
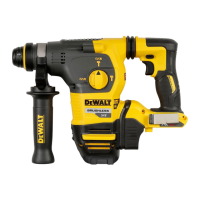
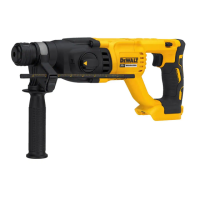
The DEWALT Heavy-Duty Cordless Rotary Hammerdrill, models DCH243, DCH253, DCH254, DCH273, DCH274, and DCH283, is a professional power tool designed for a variety of demanding applications. It is suitable for professional drilling and hammerdrilling, as well as screwdriving and chipping tasks. This tool is not intended for use in wet conditions or in the presence of flammable liquids or gases. Children should not be allowed to come into contact with the tool, and supervision is required when inexperienced operators use it. The appliance is not intended for use by young children or infirm persons without supervision, nor by persons with diminished physical, sensory, or mental abilities, or lack of experience, knowledge, or skills, unless supervised by a person responsible for their safety. Children should never be left alone with this product.
The rotary hammerdrill is equipped with a variable speed switch (1) that allows the user to control the operating speed. The farther the trigger switch is depressed, the faster the tool will operate. For maximum tool life, variable speed should only be used for starting holes or fasteners. A forward/reverse button (2) allows for changing the direction of rotation. To select forward rotation, press the button on the right side of the tool. To select reverse, press the button on the left side. The center position of the control button locks the tool in the off position.
A mode selector dial (3) allows the user to choose the appropriate operating mode:
To select an operating mode, depress the mode selector release button (4) and rotate the mode selector dial until the arrow points to the desired symbol. The mode selector must always be in one of the three operable positions (rotary drilling, rotary hammering, or hammering only). It may be necessary to briefly run the motor after changing from 'hammering only' to 'rotary' modes to align the gears.
The tool features an Overload Clutch system. In the event of a drill bit jamming, the drive to the drill spindle is interrupted. Due to the resulting forces, the user should always hold the tool with both hands and maintain a firm stance. After an overload, releasing and depressing the trigger will re-engage the drive.
For models DCH243, DCH253, DCH254, and DCH283, a Mechanical Clutch is fitted. When this clutch activates, an audible ratcheting sound will be heard along with increased vibration.
For models DCH273 and DCH274, an Electronic Clutch is implemented. When the electronic clutch activates, the motor will repeatedly switch on and off for a few seconds, mimicking the feedback of a mechanical clutch.
The DCH283 model also includes an Anti-Rotation System (Fig. E) for increased user comfort and safety. This on-board technology detects if the user loses control of the hammer. When a jam is detected, the torque and speed are instantly reduced, preventing self-rotation of the tool and reducing the occurrence of wrist injuries. The anti-rotation system indicator (15) will illuminate to indicate its status. If the tool is functioning normally, the indicator is OFF. If the Anti-Rotation System has been activated (SOLID), the user should release the trigger. The tool will function normally when the trigger is depressed again, and the indicator light will go out.
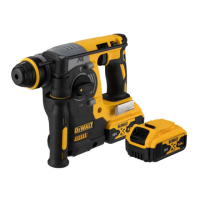
Some models (DCH253, DCH254, DCH273, DCH274, DCH283) are equipped with a worklight (13) designed to illuminate the immediate work surface when the trigger switch is depressed. The worklight will automatically turn off 20 seconds after the trigger switch is released.
The tool is designed for Active Vibration Control. To achieve the best vibration control, the tool should be held in the proper hand position, with one hand on the main handle (8) and the other on the side handle (5). The active vibration control neutralizes rebound vibration from the hammer mechanism, lowering hand and arm vibration, which allows for more comfortable use and extends the life of the unit. The hammer mechanism requires sufficient pressure to engage the active vibration control; applying too much pressure will not make the tool drill or chip faster and will prevent the active vibration control from engaging.
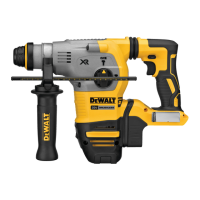
A Side Handle (5) is supplied with the tool and should always be used. It clamps to the front of the gear case and can be rotated 360° for right- or left-hand use. The side handle must be tightened sufficiently to resist the twisting action of the tool if the accessory binds or stalls. The user should grip the side handle at its far end to maintain control during a stall. To loosen the side handle, rotate it counterclockwise.
A Depth Rod (11) can be adjusted to control drilling depth (Fig. C). To adjust, push in and hold the depth rod release button (12) on the side handle. Move the depth rod so that the distance between its end and the end of the bit equals the desired drilling depth. Release the button to lock the rod in position. When drilling with the depth rod, stop when its end reaches the surface of the material.
A Utility Hook (14) is fitted below the main handle (8) on the left side of the tool for models DCH273, DCH274, and DCH283 (Fig. A, D). To extend it, pull it out from the side of the tool. To store it, push it back flush. If not desired, it can be removed completely by removing the hex head screw located on the underside of the main handle, pulling the hook free, and then re-inserting it into the slot below the main handle and tightening the screw. On DCH273 and DCH274 models, the hook can be installed on either side of the handle; the slot may be covered with a sticker that needs to be removed or pierced.
The tool uses an SDS Plus tool holder (9) for drill bits and other accessories (Fig. F). To insert a bit, push its shank about 19 mm into the SDS Plus tool holder and rotate until it locks in place. To release, pull the sleeve (10) back and remove the bit. Special adapters are needed for straight shank bits and hexagonal screwdriver bits.
For models DCH254 and DCH274, a Keyless Chuck (16) can be installed in place of the SDS Plus bit holder (Fig. F, G). To replace the SDS Plus bit holder with the keyless chuck, first select the hammering only mode to lock the spindle. Turn the locking collar (15) into the unlocked position and pull off the installed bit holder. Push the keyless chuck (16) onto the spindle (17) and turn the locking collar into the locking position. To insert a drill bit into the keyless chuck, grasp the sleeve (18) with one hand and the base of the chuck with the other. Rotate the sleeve counterclockwise until it accepts the accessory. Insert the accessory about 19 mm into the chuck and tighten securely by rotating the chuck sleeve clockwise until several ratchet clicks are heard. To release, repeat the insertion steps in reverse.
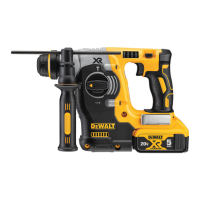
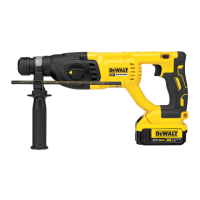
The tool operates on an 18-volt battery pack. Battery packs are not fully charged out of the carton and should be charged before first use. Some DEWALT battery packs include a fuel gauge (14) with three green LED lights that indicate the remaining charge level. To actuate, press and hold the fuel gauge button. The lights will illuminate, indicating the charge level. If the level is below the usable limit, the fuel gauge will not illuminate, and the battery will need to be recharged. The fuel gauge is only an indication of the charge and is subject to variation based on product components, temperature, and end-user application.
The tool is designed with an Electronic Protection System that protects the battery pack against overloading, overheating, or deep discharge. If the system engages, the tool will automatically turn off. In this case, the lithium-ion battery pack should be placed on the charger until fully charged.
DEWALT chargers require no adjustment and are designed for ease of operation. The electric motor is designed for one voltage only, and the battery pack voltage must correspond to the voltage on the rating plate. The charger voltage must also correspond to the mains voltage. DEWALT chargers are double insulated and do not require an earth wire. If the supply cord is damaged, it must be replaced by a specially prepared cord from a DEWALT service organization.
To charge a battery (Fig. B), plug the charger into an appropriate outlet, then insert the battery pack (6) into the charger, ensuring it is fully seated. The red (charging) light will blink repeatedly, indicating that charging has started. When the red light remains ON continuously, the battery pack is fully charged. To remove the battery pack, push the battery release button (7).
The charger has charge indicators for different statuses:
The charger will not charge a faulty battery pack and will indicate this by refusing to light. If the charger indicates a problem, both the charger and battery pack should be tested at an authorized service center.
The DEWALT power tool is designed for long-term operation with minimal maintenance. Proper tool care and regular cleaning are essential for continuous satisfactory operation.
Cleaning: Dirt and dust should be blown out of the main housing with dry air as often as visible in and around the air vents. Approved eye protection and a dust mask should be worn during this procedure. Solvents or other harsh chemicals should never be used for cleaning non-metallic parts of the tool, as they can weaken the materials. A cloth dampened with water and mild soap should be used. No liquid should enter the tool, and no part of the tool should be immersed in liquid.
Lubrication: The power tool does not require additional lubrication. Accessories and attachments used with the SDS Plus fitment should be regularly lubricated around the SDS Plus fitment.
Dust Extraction System (Fig. H): For some compatible hammerdrills, a dedicated integrated dust extraction system is available separately.
Rechargeable Battery Pack Disposal: This long-life battery pack should be recharged when it fails to produce sufficient power. At the end of its technical life, it should be discarded with care for the environment. Run the battery pack down completely, then remove it from the tool. Li-ion cells are recyclable and should be taken to a dealer or a local recycling station for proper recycling or disposal.
Storage Recommendations: For optimal battery performance and life, store battery packs at room temperature when not in use, in a cool, dry place away from direct sunlight and excessive heat or cold. Battery packs should not be stored completely depleted of charge and will need to be recharged before use.
Transportation: When transporting batteries, ensure that the battery terminals are protected and well insulated from conductive materials to prevent short circuits. Lithium-ion batteries should not be put in checked baggage. DEWALT batteries comply with all applicable shipping regulations, including UN Recommendations, IATA Dangerous Goods Regulations, IMDG Regulations, and the European Agreement Concerning the International Carriage of Dangerous Goods by Road (ADR). Lithium-ion cells and batteries are tested to section 38.3 of the UN Recommendations on the Transport of Dangerous Goods Manual of Tests and Criteria. Shipments containing lithium-ion batteries with an energy rating greater than 100 Watt Hours (Wh) may require classification as fully regulated Class 9 Hazardous Material. All lithium-ion batteries have the Watt Hour rating marked on the pack. DEWALT does not recommend air shipping lithium-ion battery packs alone regardless of Watt Hour rating. Shipments of tools with batteries (combo kits) can be air shipped as excepted if the Watt Hour rating of the battery pack is no greater than 100 Whr. The shipper is responsible for consulting the latest regulations for packaging, labeling/marking, and documentation requirements.
The DEWALT FLEXVOLT™ battery has two modes: Use and Transport.
| Voltage | 18V |
|---|---|
| Impact Energy | 2.1 J |
| No Load Speed | 0-1100 rpm |
| Vibration Control | Yes |
| Power Source | Cordless |
| Chuck Type | SDS Plus |
| Blows per Minute | 0-4600 bpm |
| Max. Concrete Drilling Capacity | 1 inch |
| Max. Steel Drilling Capacity | 1/2 inch |
| Optimal Concrete Drilling | 5/8 in |
| Max. Wood Drilling Capacity | 1-1/4 inches |