ENGLISH
9
Bit and Bit Holder
WARNING: Burn Hazard. ALWAYS wear gloves when
changing bits. Accessible metal parts on the tool and
bits may get extremely hot during operation. Small
bits of broken material may damage barehands.
The hammerdrill can be fitted with different bits depending
on the desired application. Use sharp drill bits only.
Bit Reccomendations
• For wood, use twist bits, spade bits, power auger bits or
hole saws.
• For metal, use high-speed steel twist drill bits or
holesaws. Use a cutting lubricant when drilling metals.
The exceptions are cast iron and brass which should be
drilleddry.
• For masonry, such as brick, cement, cinder block, etc.,
use carbide-tipped bits rated for percussiondrilling.
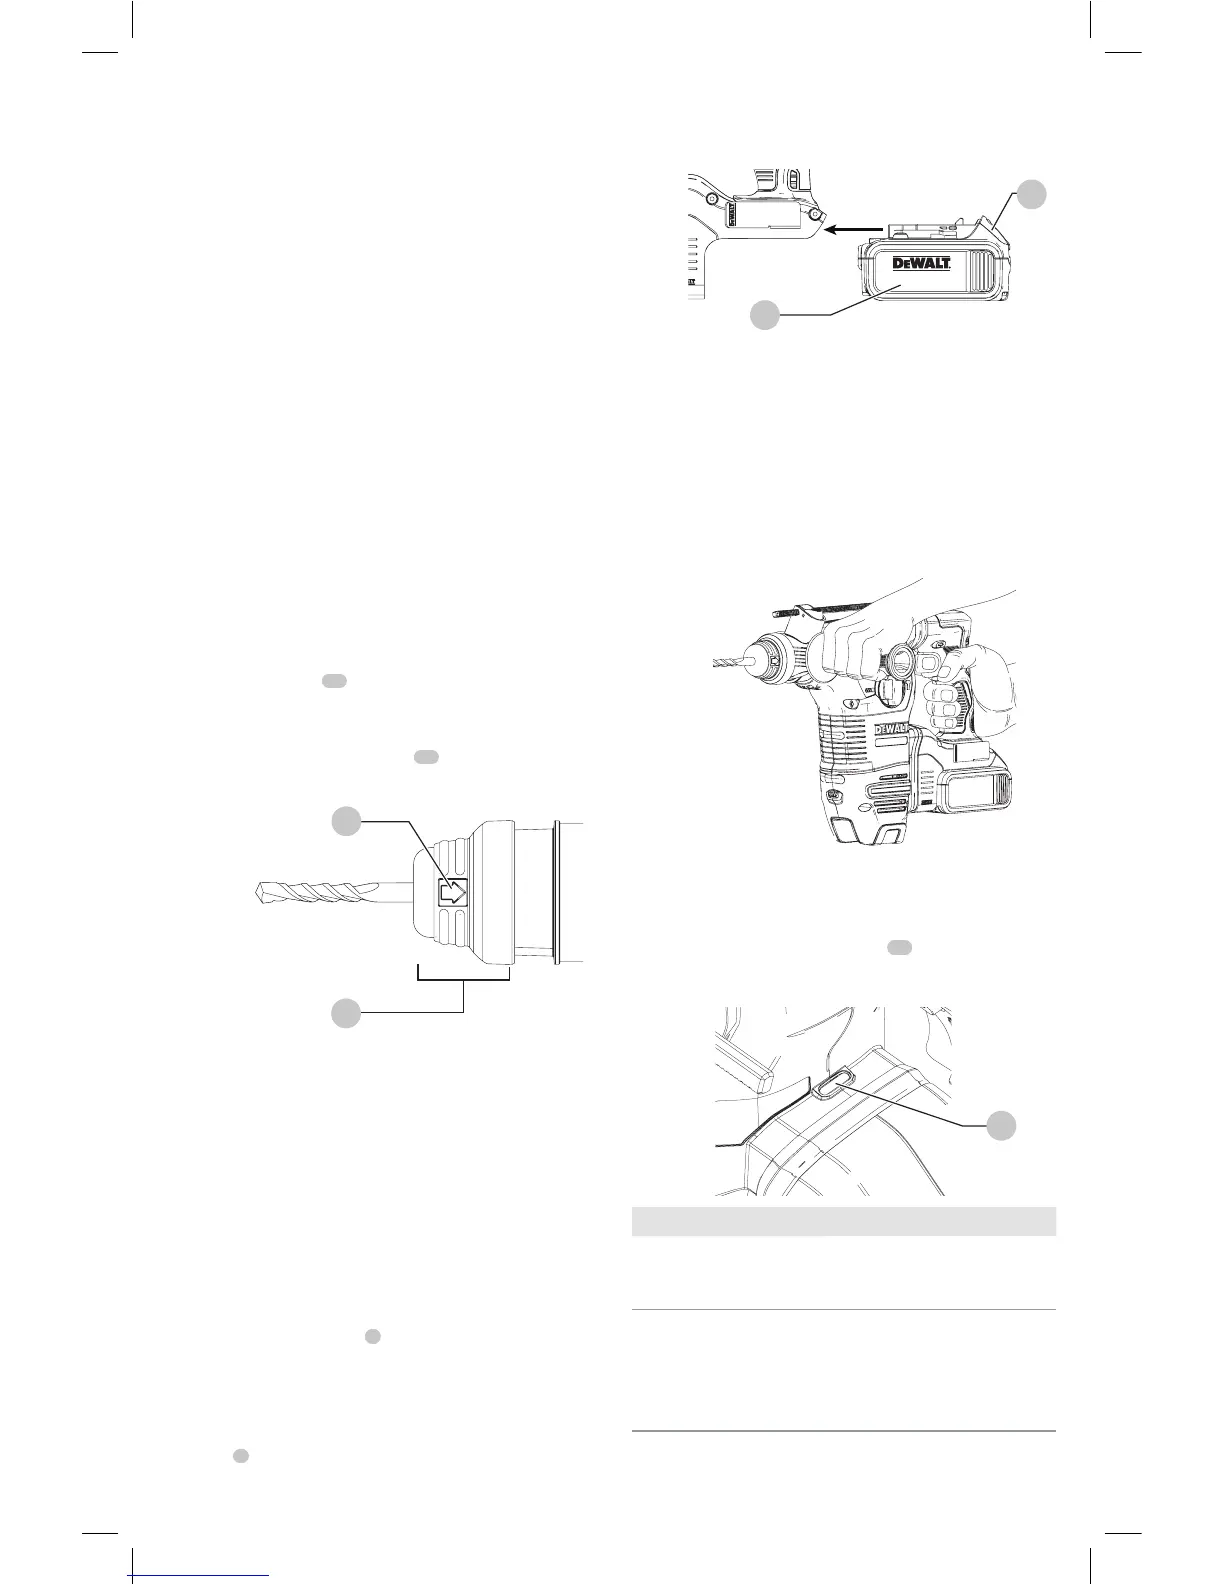
SDS Plus Bit Holder (Fig. F)
NOTE: Special adapters are needed to use the SDS Plus bit
holder with straight shank bits and hexagonal screwdriver
bits. Refer to Accessories.
To insert a drill bit or other accessory:
1. Insert the shank of the bit about 19mm (3/4") into SDS
Plus tool holder
11
.
2. Push and rotate bit until it locks in place. The bit will be
securelyheld.
3. To release bit, pull the sleeve
15
back and remove
thebit.
Fig. F
11
15
OPERATION
WARNING: To reduce the risk of serious personal
injury, turn unit off and remove the battery pack
before making any adjustments or removing/
installing attachments or accessories. An
accidental start-up can causeinjury.
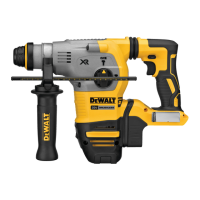
Installing and Removing the Battery Pack
(Fig. G)
NOTE: For best results, make sure your battery pack is
fullycharged.
To install the battery pack
1
into the tool handle, align the
battery pack with the rails inside the tool’s handle and slide
it into the handle until the battery pack is firmly seated in
the tool and ensure that it does notdisengage.
To remove the battery pack from the tool, press the release
button
2
and firmly pull the battery pack out of the tool
handle. Insert it into the charger as described in the charger
section of thismanual.
Fig.G
1
2
Proper Hand Position (Fig. H)
WARNING: To reduce the risk of serious personal injury,
ALWAYS use proper hand position as shown.
WARNING: To reduce the risk of serious personal
injury, ALWAYS hold securely in anticipation of a
suddenreaction.
Proper hand position requires one hand on the side handle,
with the other hand on the mainhandle. Hold tool firmly
with both hands to control the twisting action of the drill.
Fig. H
E-Clutch® System (Fig. I)
The
E-Clutch® system senses the motion of the
tool and reduces the motor torque to a manageable level
if necessary. The E-Clutch® indicator
14
will illuminate to
indicate status.
Fig. I
14
Indicator Diagnosis Solution
OFF Tool is
functioning
normally
Follow all warnings and instructions
when operating the tool.
SOLID E-Clutch
®
System has
been activated
(ENGAGED)
With the tool properly supported,
release trigger. The tool will
function normally when the trigger
is depressed again and the indicator
light will go out