Do you have a question about the DeWalt DCH333 and is the answer not in the manual?
Crucial safety and operating instructions for compatible battery chargers.
Essential safety and charging instructions for battery packs.
Congratulations on choosing a DEWALT tool. Years of experience, thorough product development, and innovation make DEWALT one of the most reliable partners for professional power tool users.
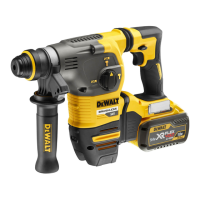
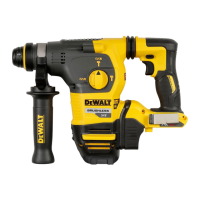
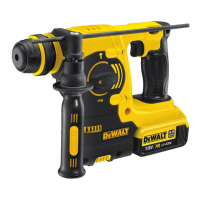
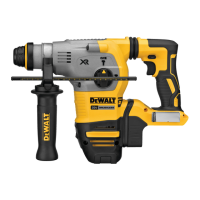
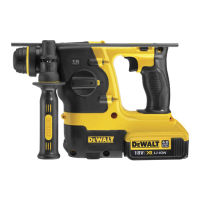
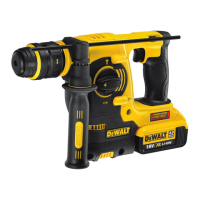
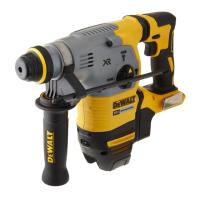
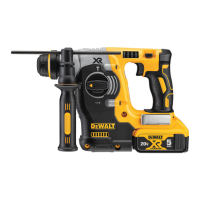
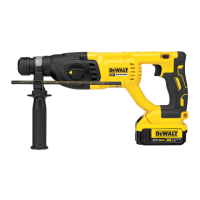
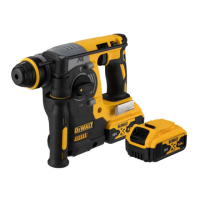
Your cordless rotary hammerdrill has been designed for professional drilling and hammerdrilling applications, as well as screwdriving and chipping applications. It operates on a 54-volt battery pack. The tool is equipped with a mode selector dial to select the mode appropriate to the desired operation.
The tool features a mechanical clutch that provides an audible ratcheting sound and increased vibration when activated. Additionally, an anti-rotation system offers increased user comfort and safety. This system detects when the user loses control of the hammer, instantly reducing torque and speed to prevent self-rotation and reduce wrist injuries. An indicator light illuminates when the anti-rotation system is activated.
For optimal vibration control, the tool incorporates an active vibration control system. This system neutralizes rebound vibration from the hammer mechanism, lowering hand and arm vibration for more comfortable use over longer periods and extending the unit's life. The hammer mechanism requires sufficient pressure to engage the active vibration control; applying too much pressure will not increase drilling or chipping speed.
The tool is equipped with a variable speed switch, a forward/reverse button, a mode selector button, and a main handle. A side handle and depth rod are also included. For illumination of the work surface, a worklight is integrated. A utility hook is provided for convenient storage.
Battery Installation and Removal: To install the battery pack, align it with the rails inside the tool's handle and slide it in until it firmly seats and locks into place. To remove, press the release button and firmly pull the battery pack out.
Fuel Gauge Battery Packs: Some DEWALT battery packs include a fuel gauge with three green LED lights indicating the remaining charge. Press and hold the fuel gauge button to activate it. The lights will illuminate to show the charge level. If the charge is below the usable limit, the fuel gauge will not illuminate, and the battery will need recharging. Note that the fuel gauge is an indication of charge and may vary based on product components, temperature, and application.
Side Handle Adjustment: The side handle clamps to the front of the gear case and can be rotated 360° for right- or left-hand use. It must be tightened sufficiently to resist twisting action during use. Grip the side handle at the far end for maximum control during a stall. To loosen, rotate counterclockwise.
Depth Rod Adjustment: Push and hold the depth rod release button on the side handle. Move the depth rod to set the desired drilling depth, measuring from the end of the rod to the end of the bit. Release the button to lock the rod. When drilling, stop when the end of the rod reaches the material surface.
Utility Hook: A utility hook is fitted below the main handle on the left side of the tool. To extend it, pull it out from the side. To store it, push it back flush. The hook can be removed completely by positioning it in the extended position, removing the hex head screw on the underside of the main handle, and pulling it free.
Bit and Bit Holder: The hammerdrill can be fitted with different bits. For wood, use twist bits, spade bits, power auger bits, or hole saws. For metal, use high-speed steel twist drill bits or hole saws with a cutting lubricant (except for cast iron and brass, which should be drilled dry). For masonry, use carbide-tipped bits rated for percussion drilling. Always use sharp drill bits.
SDS-Plus Bit Holder: To insert a bit, insert the shank about 19 mm into the SDS-Plus tool holder, then push and rotate until it locks. To release, pull the sleeve back and remove the bit. Special adapters are needed for straight shank bits and hexagonal screwdriver bits.
Keyless Chuck (DCH334): On some models, a keyless chuck can be installed in place of the SDS-Plus bit holder. Never use standard chucks in rotary hammering mode. To replace the SDS-Plus bit holder with the keyless chuck:
Operating Modes: The tool is equipped with a mode selector dial to choose between screwdriving, rotary drilling, rotary hammering, and hammering only. To select a mode, depress the mode selector release button and rotate the dial until the arrow points to the desired symbol. The mode selector must always be in one of these three modes; there are no operable positions in between. Briefly running the motor may be necessary after changing from 'hammering only' to 'rotary' modes to align gears.
Performing an Application:
Overload Clutch: In case of a drill bit jamming, the drive to the drill spindle is interrupted. Always hold the tool with both hands and maintain a firm stance. After an overload, release and depress the trigger to re-engage the drive.
Your DEWALT power tool has been designed for long-term operation with minimal maintenance. Proper tool care and regular cleaning ensure continuous satisfactory operation.
Lubrication: Your power tool requires no additional lubrication.
Cleaning: Blow dirt and dust out of the main housing with dry air as often as dirt is seen collecting in and around the air vents. Wear approved eye protection and a dust mask. Never use solvents or other harsh chemicals for cleaning non-metallic parts of the tool, as these can weaken the materials. Use a cloth dampened only with water and mild soap. Never let any liquid get inside the tool; never immerse any part of the tool into a liquid.
Chargers: DEWALT chargers require no adjustment and are designed for ease of use. They are double insulated and do not require an earth wire. If the supply cord is damaged, it must be replaced by a specially prepared cord available through the DEWALT service organization.
Battery Pack Care: Recharge the battery pack when it fails to produce sufficient power. At the end of its technical life, discard it responsibly. Run the battery pack down completely, then remove it from the tool. Li-Ion cells are recyclable; take them to your dealer or a local recycling station.
Storage Recommendations: Store battery packs in a cool, dry place away from direct sunlight, excess heat, or cold for optimum performance and life. For long storage, store a fully charged battery pack in a cool, dry place out of the charger. Battery packs should not be stored completely depleted of charge and will need recharging before use.
| Type | Rotary Hammer |
|---|---|
| Chuck Type | SDS-Plus |
| Power Source | Cordless |
| Impact Energy | 3.5 Joules |
| Battery Type | Lithium Ion |
| Tool Warranty | 3 Years |
| Max. Drilling Capacity in Wood | 1-1/2 inches |
| Max. Drilling Capacity in Steel | 13 mm |