11
ENGLISH
Attaching and Adjusting the Shoulder
Strap (Fig. K)
WARNING: The shoulder strap should only be slung
over one shoulder and not across the body. See Fig K.
A shoulder strap
24
is required for any tool with a total
weight exceeding 13lbs. (6 kg). (Total weight includes the
To Attach Nozzle to Spray Wand (Fig. J)
DANGER: Risk of fluid injection. Do not direct discharge
stream toward persons, unprotected skin, eyes or any
pets or animals. Serious injury willoccur.
WARNING: Flying objects could cause risk of serious
injury. DO NOT attempt to change nozzles while power
cleaner is running. Turn power cleaner off before
changingnozzles.
To connect the nozzle to the spray wand
11
, pull the quick
connect collar
12
toward the spray wand and insert the
appropriate nozzle. Release the quick connect collar to lock
the nozzle inplace.
To ensure nozzle is locked into place, give the nozzle a firm
tug after the quick connect collar has locked intoplace.
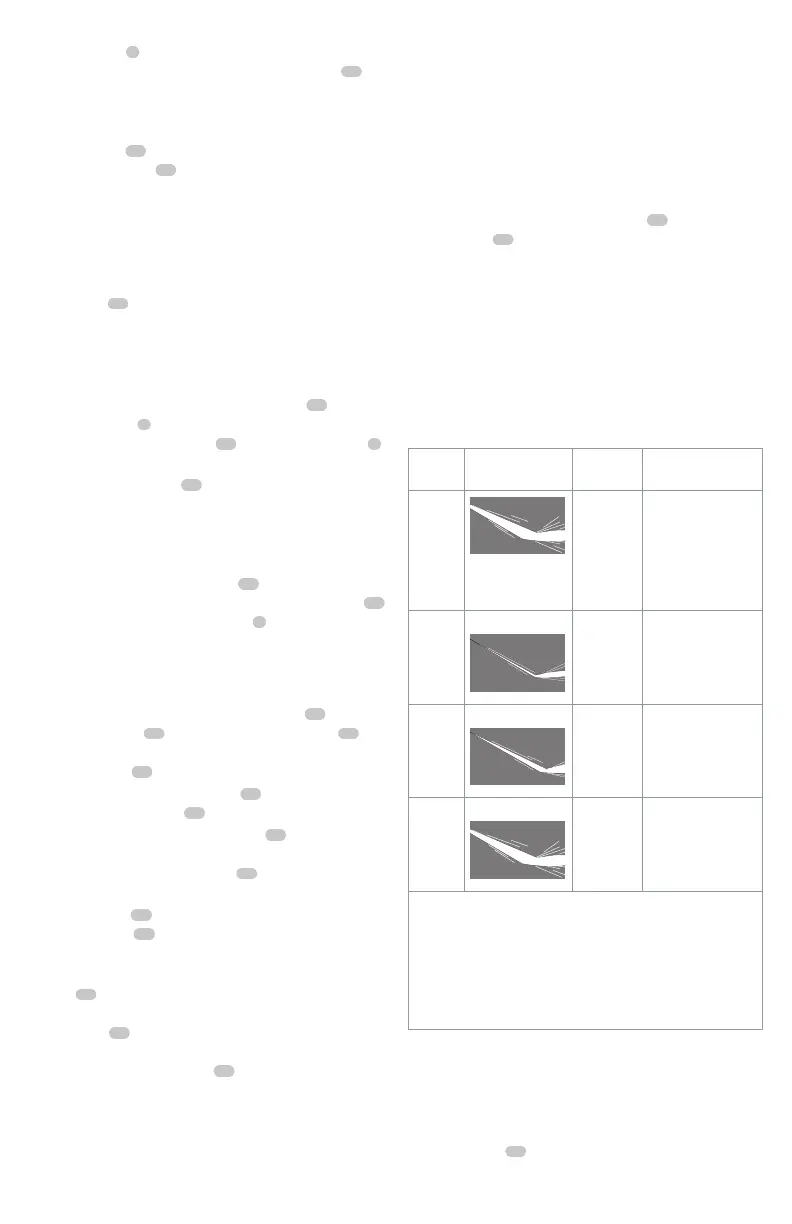
How To Use Spray Wand
Refer to the following chart to choose the correct nozzle for the
job to be performed.
CAUTION: Do not attempt to move the nozzle to
adjust pressure. The turbo nozzle is NOTadjustable.
Nozzle
Color
Spray Pattern Uses Surfaces*
Turbo
Spray
Nozzle
Delivers
the optimal
cleaning
effect for
the toughest
cleaning
tasks.
Cleaning brick,
concrete, and vinyl
surfaces. DO NOT use
on fabric.
Yellow
15˚
Intense
cleaning of
unpainted
hard
surfaces
Grills, driveways,
concrete or brick
walkways, unpainted
brick or stucco
Green
25˚
Intense
cleaning of
larger areas
Metal, concrete or
wood
White
40˚
Cleaning
of painted
or delicate
surfaces
Auto/RV, marine,
wood, painted brick
and stucco, vinyl,
painted siding
*NOTICE: The high pressure spray from your power
cleaner is capable of causing damage to surfaces
such as wood, glass, automobile paint, auto striping
and trim, and delicate objects such as flowers and
shrubs. Before spraying, check the item to be cleaned
to assure yourself that it is strong enough to resist
damage from the force of the spray.
Attaching High Pressure Foam Cannon
(Fig. I)
1. To connect the high pressure foamcannon
18
to
the spray wand
11
, pull the quick connect collar
12
toward the spray wand and insert the high pressure
foamcannon
18
.
2. Release the quick connect collar
12
to lock the high
pressure foamcannon
18
in place.
3. Give the high pressure foamcannon
18
a firm tug after
the quick connect collar has locked intoplace to ensure
the high pressure foamcannon
18
is locked intoplace.
4. To adjust the rate of foam, rotate the pressure
control knob
30
on the top of the high pressure
foamcannon
18
counterclockwise for less or clockwise
for morefoam.
NOTE: The bottle of the high pressure foam
cannon
18
should be positioned underneath the spray
wand. Do not position the bottle of the high pressure
foamcannon
18
above the spray wand as this will lead
to soap dripping on the spray wand. The spray tip on
the high pressure foamcannon
18
rotates for vertical or
horizontalapplication.
Attaching Quick Connect Hose Adapter and
Garden Hose (Fig. H)
A garden hose can only be attached when the quick connect
hose adapter
20
isinstalled.
NOTE: Before connecting the garden hose to the power
cleaner, run water through the garden hose for thirty
seconds to clear any debris from the mouth of thegarden
pressurehose.
1. To connect the quick connect hose adapter
20
to the
power cleaner
6
, place the quick connect end of the
quick connect hose adapter
20
onto the water intake
7
.
2. Thread a garden hose to the threaded end of the quick
connect hose adapter
20
and tighten byhand.
NOTE: Avoid cross threading when installing the garden
hose. Cross threading will causeleaks.
3. Always disconnect the garden hose afterusage. To
disconnect, unthread the garden hose from the end of
the quick connect hose adapter
20
and pull back the
quick connect end of the quick connect hose adapter
20
and remove from the water intake
7
.
water intake
7
.
NOTE: Before use, gently tug on the suction hose
19
to
ensure the connection issecured.
2. Place the end of suction hose with filter on it into
container of fresh water or a fresh water source. Adjust
the float ball
21
on the suction hose so the quick connect
suction hose filter
10
stays covered by thewater.
3. Select the correct nozzle to be used.
 Loading...