ENGLISH
12
Cleaning a Surface (Fig. M, O)
WARNING: Risk of injury from spray. Always engage
the trigger lock when gun is not in use. Failure to do so
could cause accidentalspraying.
1. To start the power cleaner, disengage the trigger
lock-off
3
and squeeze the trigger
4
.
NOTE: The best angle for spraying water against a
cleaning surface is 45°. Spraying head on tends to cause
dirt particles to embed in the surface. When working on
vertical surfaces, it is best to apply detergent starting at
the bottom and working upwards which will prevent the
detergent from sliding down and causingstreaks.
Preparing the Power Cleaner (Fig. O)
IMPORTANT: Disengage the trigger lock-off
3
,squeeze the
trigger
4
and hold the trigger for 30seconds to purge the
system of air. If air is still found in the water stream, continue
to run water through the sprayhandle.
1. Disengage the trigger lock-off
3
.
2. Squeeze the trigger
4
.
Preparing Power Cleaner Unit for Use
DANGER: Risk of flu
id injection and laceration. When using
the high‑pressure setting, DO NOT allow the high‑pressure
spray to come in contact with unprotected skin, eyes, or with
any pets or animals. Serious injury willoccur.
CAUTION: Before operation:
• Connect the water supply to the power cleaner.
For instructions on connecting the water supply to
the power cleaner, please refer to Attaching the
Suction Hose to the Water Inlet or Attaching
Quick Connect Hose Adapter and Garden Hose
in Assembly andAdjustments.
• Connect the attachment. For instructions on
connecting the pressure spray wand, please refer
to Assembling Spray Wand, To Attach Nozzle
to Spray Wand and Attaching High Pressure
FoamCannon in Assembly andAdjustments.
Pressure Washing
Preparing Surface for Cleaning
• Remove objects from the area which could create
ahazard.
• Ensure that all doors and windows are closed tight. Protect
all plants and trees in the adjacent area with a drop cloth
ensuring that they will not be harmed by anyoverspray.
• Pre-rinse cleaning area with freshwater.
• Use only detergents formulated for pressurewashers.
• Always test detergent in an inconspicuous area beforeuse.
For lower pressure, pull the speed selector
5
back toward
the main handle
1
into the "LO" position. This mode is best
for larger projects that require more time tocomplete.
To accelerate, push the speed selector forward toward the
spray wand
11
into the "HI" position. This mode is best for
applications that need higherPSI.
NOTE: When in "HI" mode, runtime will be decreased as
compared to when power cleaner is in "LO"mode.
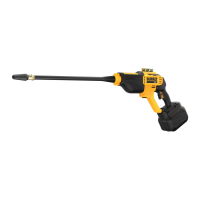
Speed Selector (Fig. A, N)
This power cleaner gives you the choice to operate at a lower
pressure for more delicate jobs, or accelerate the power
cleaner speed for high-performancecleaning.
Proper hand position requires one hand on the main handle
1
and the other hand on the handle grip
2
asshown.
Proper Hand Position (Fig. M)
WARNING: To reduce the risk of serious personal
injury, ALWAYS use proper hand position asshown.
WARNING: To reduce the risk of serious personal
injury, ALWAYS hold securely in anticipation of a
suddenreaction.
Installing and Removing the Battery Pack
(Fig. L)
NOTE: For best results, make sure your battery pack is
fullycharged.
To Install the Battery Packs
1. Press the battery port cover release button
9
and
then lift up the battery port cover
8
to expose the
batteryport
26
.
2. Align the battery pack
27
with the rails inside the
batteryport
26
and slide the battery pack in until the
battery pack is firmly seated in the batteryport
26
.
Ensure that the battery pack
27
does notdisengage.
3. Close the battery port cover
8
. Ensure the battery port
cover release button
9
is fully latched into position
before startingpower cleaner.
To Remove the Battery Pack
1. Press the battery port cover release button
9
and
then lift up the battery port cover
8
to expose the
batterypack
27
.
2. Press the battery release button
28
on the battery
pack
27
and firmly pull the battery pack out
ofpowercleaner.
3. Insert the battery into the charger as described in the
charger section of thismanual.
OPERATION
WARNING: To reduce the risk of serious personal
injury, turn unit off and remove the battery pack
before making any adjustments or removing/
installing attachments or accessories. An
accidental start‑up can causeinjury.
power cleaner unit, nozzle, and battery.) Attach the strap
to the tool as shown in Fig. K and adjust for proper balance
and support
1. Locate the strap moun
t
23
.
2. Snap the shoulder strap latch
29
onto the strap
mount
23
as shown in Fig.K. Adjust the stra
p
24
s
o
it fits over yourshoulder and provides proper balance
andsupport.