ENGLISH
11
Fig. H
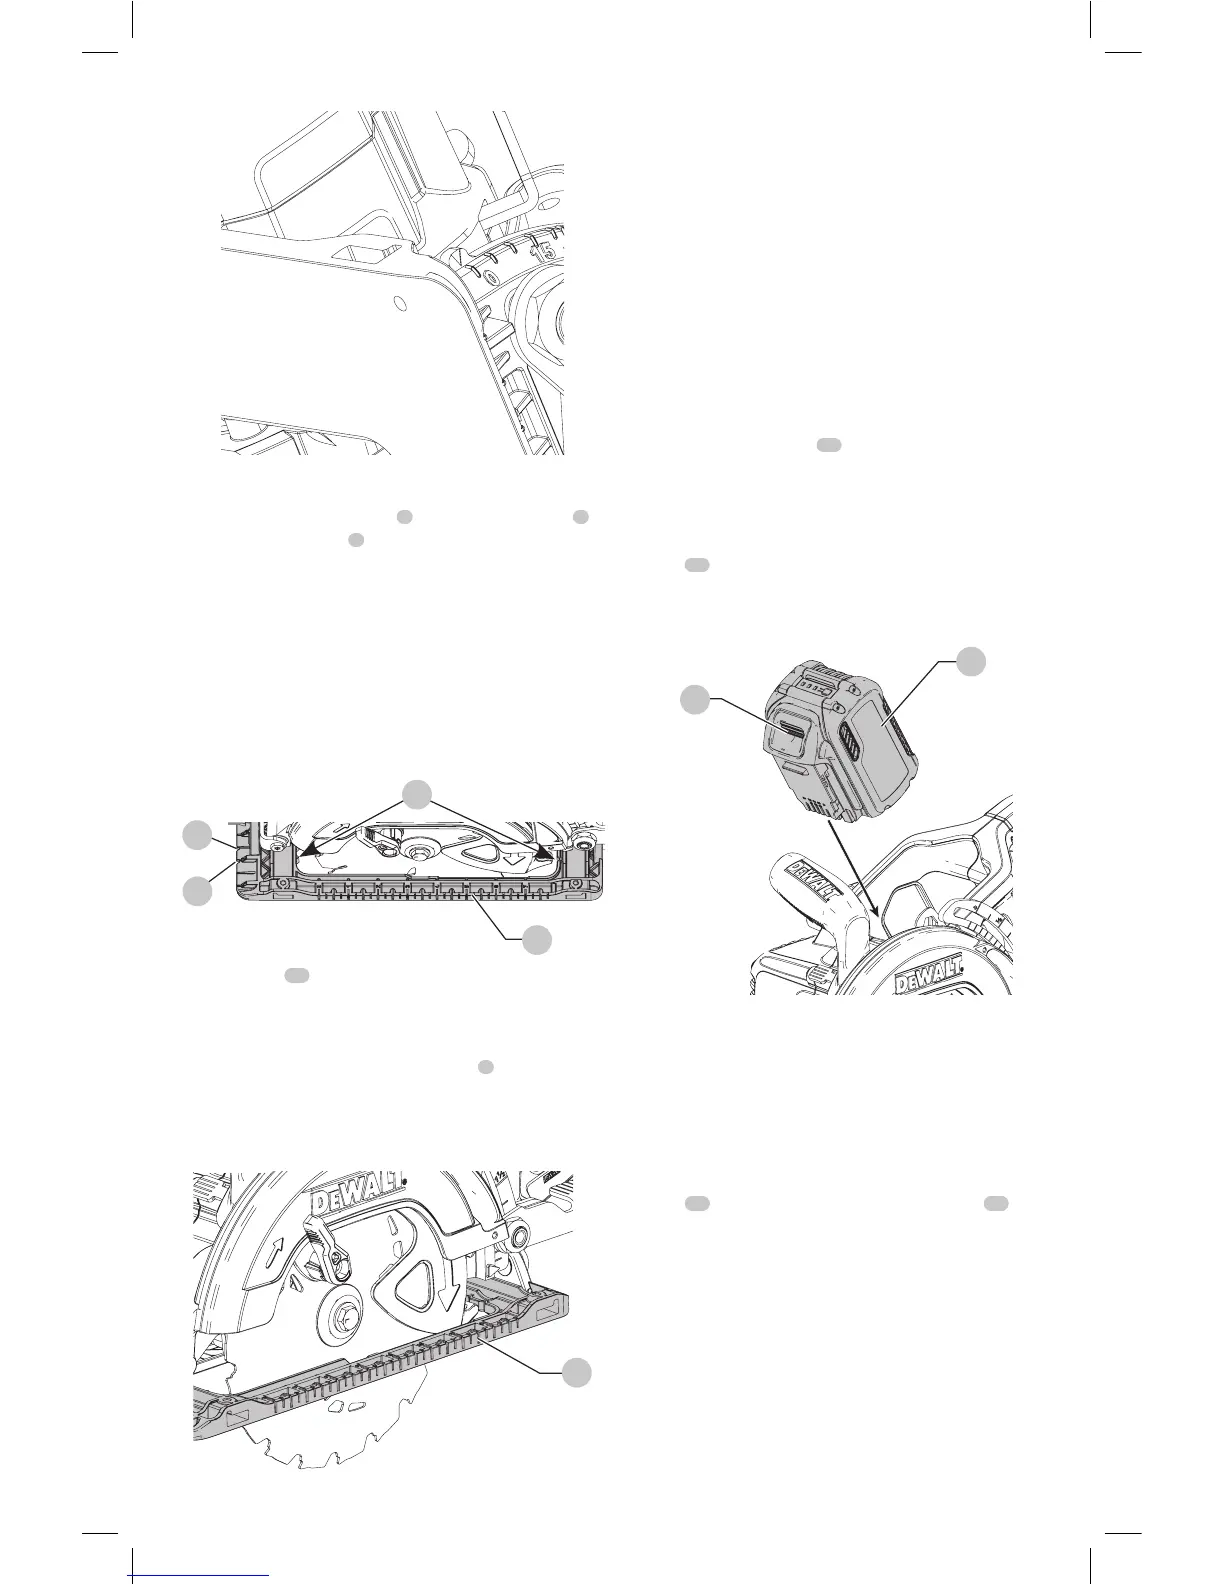
Kerf Indicator (Fig. I)
The front of the saw foot plate
5
has a 0˚ kerf indicator
7
and a 45˚ kerf indicator
8
for vertical and bevel cutting.
The kerf indicators enable you to guide the saw along the
cutting lines penciled on theworkpiece.
The indicator aligns with the left (outer) side of the saw
blade. The moving blade making the slot or “kerf” cut falls
to the right of the indicator. Position the saw along the
penciled cutting line so that the kerf falls into the waste
or surplus material. Marking indicators on the front of
the foot plate are at 1/2" (13 mm) intervals for additional
cuttingguides.
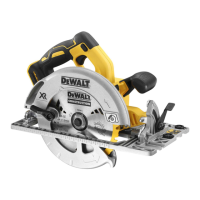
Fig. I
5
8
7
18
Kerf indicators
18
are also located on the inside of the foot
plate to keep the saw square whencutting.
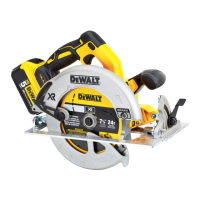
Cut Length Indicator (Fig. J)
The markings on the side of the foot plate
5
show the
length of the slot being cut into the material at the full
depth of the cut. The markings are in increments of 1/8"
(3.2mm).
Fig. J
5
OPERATION
WARNING: To reduce the risk of serious personal
injury, turn unit off and remove the battery pack
before making any adjustments or removing/
installing attachments or accessories. An
accidental start-up can causeinjury.
IMPORTANT: Always make sure the depth adjustment
locking lever is in the down position before operatingsaw.
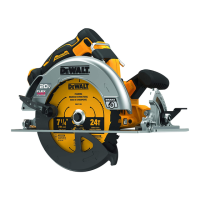
Installing and Removing the Battery Pack
(Fig. K)
NOTE: For best results, make sure your battery pack is
fullycharged.
To install the battery pack
15
into the tool handle, align the
battery pack with the rails inside the tool’s handle and slide
it into the handle until the battery pack is firmly seated in
the tool and ensure that it does notdisengage.
To remove the battery pack from the tool, press the release
button
14
and firmly pull the battery pack out of the tool
handle. Insert it into the charger as described in the charger
section of thismanual.
Fig. K
14
15
Proper Hand Position (Fig. L)
WARNING: To reduce the risk of serious personal injury,
ALWAYS use proper hand position as shown.
WARNING: To reduce the risk of serious personal injury,
ALWAYS hold securely in anticipation of a sudden
reaction.
Proper hand position requires one hand on the main
handle
12
and one hand on the auxilliary handle
13
. Note
that hands are kept away from cutting area.