20
ENGLISH
7. Switch the machine on and allow the blade to reach
fullspeed.
8. Slowly feed the workpiece underneath the guard, keeping
it firmly pressed against the rip fence. Allow the teeth to
cut, and do not force the workpiece through the blade. The
blade speed should be keptconstant.
9. Always use a push stick
22
when working close to the
blade(Fig.O).
10. After completing the cut, switch the machine off, allow the
blade to stop and remove theworkpiece.
WARNING:
• Never push or hold the "free" or cut-off-side of
theworkpiece.
• Do not cut excessively smallworkpieces.
• Always use a push stick when ripping
smallworkpieces.
Bevel Cuts (Fig. A)
WARNING: Avoid bevel ripping on the beveling (left) side
of the blade.
1. Set the required bevel angle, by rotating lever
7
by pushing
it up and to theright.
2. Set to desired angle, rotate lever by pushing down and to
the left to lock inplace.
3. Proceed as forripping.
Cross-Cutting and Bevel Crosscutting
1. Remove the rip fence and install the mitre gauge in theslot.
2. Lock the mitre gauge at 0°.
3. Proceed as forripping.
Mitre Cuts (Fig. A)
1. Set the mitre gauge
10
to the requiredangle.
NOTE: Always hold the workpiece tightly against the face of the
mitregauge.
2. Proceed as forripping.
Compound Mitre
This cut is a combination of a mitre and a bevel cut.Set the bevel
to the angle required and proceed as for a cross-cutmitre.
Support for Long Pieces
• Always support longpieces.
• Support long workpieces using any convenient means
such as saw-horses or similar devices to keep the ends
fromdropping.
Dust Extraction (Fig. A)
The machine is provided with a dust exhaust port
15
at
the rear of the machine suitable for use with dust extraction
equipment featuring 57/65 mm nozzles. Supplied with the
machine is a reducer port for use of dust extraction nozzles of
34–40mmdiameter.
The blade guard assembly also features a dust exhaust port for
35 mmnozzles and AirLocksystem.
• During all operations, connect a dust extraction device
designed in accordance with the relevant regulations
regarding dustemission.
• Ensure that the dust extraction hose in use is suitable for
the application and material being cut. Ensure proper
hosemanagement.
• Be aware that man-made materials such as chipboard
or MDF produce more dust particles during cutting than
naturaltimber.
Storage (Fig. P)
1. Attach push stick
22
tofence.
2. Remove blade guard assembly
11
. Refer to Installing/
Removing the Blade Guard Assembly and Riving Knife.
Place blade guard assembly into holder as shown, then turn
lock 1/4 turn to lock in place.
3. Slide closed end of blade wrenches
21
into catch then
secure in place with wing nut.
4. Insert guide bar of mitre guage
10
into pocket until it
bottoms out.
5. Non thru-sawing riving knife
23
slides in place on back side
of guard storage clip.
6. To store fence
18
, snap work support in stored position.
Remove fence from rails. Reattach fence upside down on
left side of saw. Pivot fence lock latches tosecure.
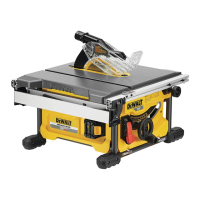
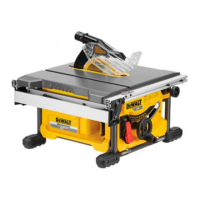
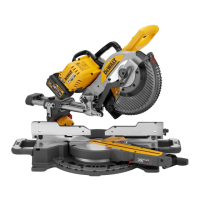
Transporting (Fig. A)
• Always carry the machine using the carry handles
14
.
WARNING: Always transport the machine with the upper
blade guardfitted.
MAINTENANCE
Your
power tool has been designed to operate
over a long period of time with a minimum of maintenance.
Continuous satisfactory operation depends upon proper tool
care and regularcleaning.
WARNING: To reduce the risk of serious personal
injury, turn tool off and disconnect battery pack
before making any adjustments or removing/
installing attachments or accessories. An accidental
start-up can causeinjury.
The charger and battery pack are notserviceable.
Lubrication (Fig. Q)
The motor and bearings require no additional lubrication. If
raising and lowering the blade becomes difficult, clean and
grease the height adjustment screws:
1. Unplug the saw from powersource.
2. Turn the saw on itsside.
3. Clean and lubricate the height adjustment screw
threads
46
on the underside of this saw as shown in
figureQ. Use general purposegrease.
Ташев-Галвинг ООД
www.tashev-galving.com