14
ENGLISH
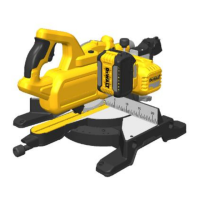
Compound Mitre (Fig.S, T)
This cut is a combination of a mitre and a bevel cut. This is the type of cut
used to make frames or boxes with slanting sides like the one shown in
figureS.
WARNING: If the cutting angle varies from cut to cut, check that
the bevel clamp handle and the mitre clamping knob are securely
tightened. These must be tightened after making any changes in bevel
ormitre.
WARNING: The saw must be fixed on a base support when
performing compound cuts to prevent tip over. Refer to Bench
Mounting.
• The chart shown below will assist you in selecting the proper bevel and
mitre settings for common compound mitrecuts.
• To use the chart, select the desired angle “A” (Fig.S) of your project
and locate that angle on the appropriate arc in the chart. From that
point follow the chart straight down to find the correct bevel angle and
straight across to find the correct mitreangle.
Set this miter angle on saw
Angle of side of box (angle ”A”)
Set this bevel angle on saw
1. Set your saw to the prescribed angles and make a few trialcuts.
2. Practice fitting the cut piecestogether.
Example: To make a four-sided box with 25° exterior angles (angle “A”)
(Fig.S), use the upper right arc. Find 25° on the arc scale. Follow the
horizontal intersecting line to either side to get the mitre angle setting
on the saw (23°). Likewise follow the vertical intersecting line to the top
or bottom to get the bevel angle setting on the saw (40°). Always try
cuts on a few scrap pieces of wood to verify the settings on thesaw.
WARNING: Never exceed the compound mitre limits of 45° bevel with
45° left or rightmitre.
Dust Extraction (Fig.A,G)
WARNING: Whenever possible, connect a dust extraction device
designed in accordance with the relevant regulations regarding
dustemission.
Connect a dust collection device designed in accordance with the relevant
regulations. The air velocity of externally connected systems shall be 20m/s
+/- 2 m/s. Velocity to be measured in the connection tube at the point of
connection, with the tool connected but notrunning.
NOTE: The DWV9000 twist-lock quick connector
48
is recommended as an
optional accessory to connect to the dust extractiondevice.
8 SIDED BOX
6 SIDED BOX
SQUARE BOX
Observe the relevant regulations in your country for the materials to
beworked.
The vacuum cleaner must be suitable for the material beingworked.
When vacuuming dry dust that is especially detrimental to health or
carcinogenic, use a special vacuumcleaner.
Transporting (Fig.A, B)
WARNING: In order to conveniently carry the mitre saw, the base is
provided with two hand indentations
31
. Never use guards to lift or
transport the mitresaw.
1. To transport the saw, set the bevel and mitre positions to 0°.
2. Push the saw head all the wayback.
3. Press the lower guard lock up release lever
2
(Fig.A).
4. Press the head down and press the lock down button
22
(Fig.B).
5. Bring the saw blade to rest position and press the traverse lock
18
.
MAINTENANCE
Your
power tool has been designed to operate over a long period
of time with a minimum of maintenance. Continuous satisfactory operation
depends upon proper tool care and regularcleaning.
WARNING: To reduce the risk of serious personal injury, turn
machine off and disconnect battery pack before making any
adjustments or removing/installing attachments or accessories.
An accidental start-up can causeinjury.
WARNING: If the saw blade is worn replace it with a new sharpblade.
Lubrication
Your power tool requires no additionallubrication.
Cleaning
Before use, carefully check the upper blade guard, movable lower blade
guard as well as the dust extraction tube to determine that it will operate
properly. Ensure that chips, dust or workpiece particle cannot lead to
blockage of one of thefunctions.
In case of workpiece fragments jammed between saw blade and guards
disconnect the machine from the power supply and follow the instructions
given in section Mounting the saw blade. Remove the jammed parts and
reassembling the sawblade.
WARNING: Blow dirt and dust out of the main housing with dry air
as often as dirt is seen collecting in and around the air vents. Wear
approved eye protection and approved dust mask when performing
thisprocedure.
WARNING: Never use solvents or other harsh chemicals for cleaning
the non-metallic parts of the tool. These chemicals may weaken the
materials used in these parts. Use a cloth dampened only with water
and mild soap. Never let any liquid get inside the tool; never immerse
any part of the tool into aliquid.
WARNING: To reduce the risk of injury, regularly clean the
tabletop.
WARNING: To reduce the risk of injury, regularly clean the dust
collectionsystem.
Optional Accessories
WARNING: Since accessories, other than those offered by