18
• All bearings are sealed. They are lubricated for life and need no further maintenance.
• Periodically clean all dust and wood chips from around AND UNDER the base and the
rotary table. Even though slots are provided to allow debris to pass through, some dust
will accumulate.
• The brushes are designed to give you several years of use. If they ever need replacement,
return the tool to the nearest service center for repair.
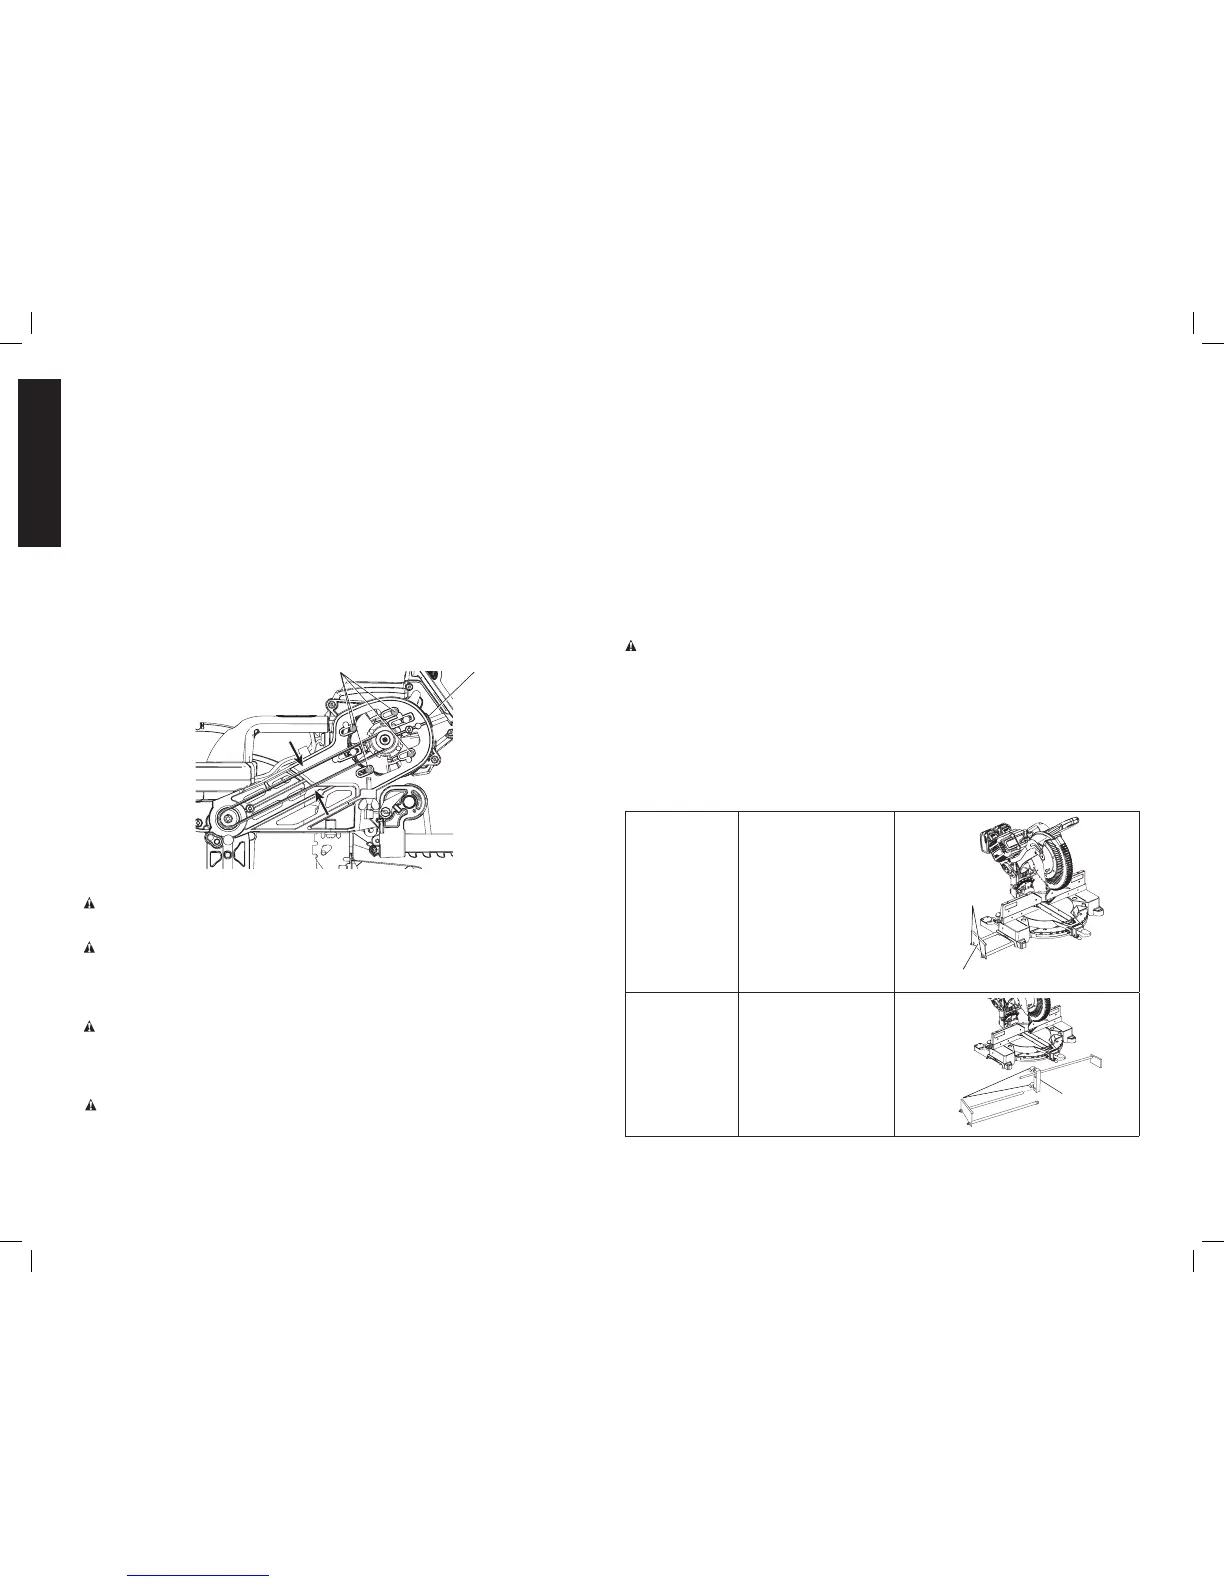
Removing and Replacing Belt (Fig. 34)
The belt is designed to last the life of the tool. However, abuse of the tool could cause the
belt to fail.
If the blade does not turn when the motor is running, the belt has failed. To inspect or replace
the belt, remove the belt cover screws. Remove the belt cover. Inspect the ribs of the belt for
wear or failure. Check belt tension by squeezing the belt as shown in Figure 34. The belt halves
should almost touch when squeezing firmly with the thumb and index finger.
To adjust the tension, loosen, but do not remove, the four cross head screws shown (AR).
Then rotate the set screw (AS) on the top of the motor plate casting until the proper tension
is achieved. Tighten the four screws securely and replace the belt cover.
NOTE: Over tightening the belt will cause premature motor failure.
AS
AR
FIG. 34
Cleaning
WARNING: Blow dirt and dust out of all air vents and guard mechanisms (if applicable) with
clean, dry air at least once a week. To minimize the risk of eye injury, always wear ANSI Z87.1
approved eye protection and respiratory protection when performing this.
WARNING: Never use solvents or other harsh chemicals for cleaning the non-metallic parts
of the tool. These chemicals may weaken the plastic materials used in these parts. Use a
cloth dampened only with water and mild soap. Never let any liquid get inside the tool; never
immerse any part of the tool into a liquid.
CLEANING THE DEWALT CORDED POWER SUPPLY
WARNING: Never use solvents or other harsh chemicals for cleaning the non-metallic parts
of the tool. These chemicals may weaken the plastic materials used in these parts. Use a
cloth dampened only with water and mild soap. Never let any liquid get inside the tool; never
immerse any part of the tool into a liquid.
CLEANING THE CORDED POWER SUPPLY RECEPTACLE
WARNING: Blow debris out of the corded power supply receptacle (AN, Fig. 16) with
clean, dry air. To minimize the risk of eye injury, always wear ANSI Z87.1 approved eye
protection and respiratory protection when performing this.
DUST DUCT CLEANING
Depending on your cutting environment, saw dust can clog the dust duct and may prevent
dust from flowing away from the cutting area properly. With the battery pack or corded power
supply removed and the saw head raised fully, low pressure air or a large diameter dowel rod
can be used to clear the dust out of the dust duct.
CUTLINE™ LED WORKLIGHT CLEANING
For the best worklight performance, perform the following maintenance regularly with the
battery or corded power supply removed.
• Carefully clean sawdust and debris from worklight lens with a cotton swab.
• DO NOT use solvents of any kind, they may damage the lens.
• Dust build-up can block the worklight and prevent it from accurately indicating the line of
cut.
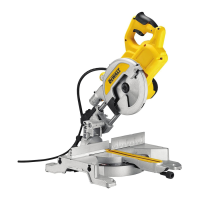
• Follow miter saw’s instruction manual to remove and install blade.
• With blade removed from saw, clean pitch and build-up from blade. Pitch and debris can
interfere with the worklight and prevent it from accurately indicating the line of cut.
Accessories
WARNING: Since accessories, other than those offered by D