9
ENGLISH
NOTE: For blades with a blade hole of 5/8" (15.88 mm), the 1" (25.4 mm) blade adapteris
notused.
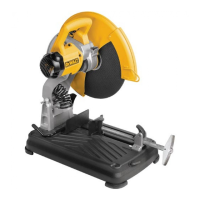
Installing a Blade (Fig. L–N)
1. Remove the battery packs or powersupply.
2. With the arm raised, the lower guard
4
held open and the guard bracket
42
raised, place
the blade on the spindle, onto the blade adapter (if using a blade with a 1" [25.4 mm]
diameter blade hole) and against the inner blade clamp with the teeth at the bottom of the
blade pointing toward the back of thesaw.
3. Assemble the outer clamp washer onto thespindle.
4. Install the blade screw
44
(with integral washer) and, engaging the spindle lock, tighten the
screw firmly with wrench
25
provided (turn counterclockwise, left-hand threads).
NOTE: When using blades with a 5/8" (15.88 mm) diameter blade hole, the blade adapter will
not be used and should be stored in a safe place for future use. The separate blade adapter is not
available on allmodels.
5. Return the guard bracket
42
to its original position and firmly tighten the guard bracket
screw
43
to hold bracket inplace.
WARNING: The guard bracket must be returned to its original position and the
guard bracket screw tightened before activating the saw. Failure to do so may
allow the guard to contact the spinning saw blade resulting in damage to the saw
and severe personalinjury.
25
4
43
44
42
Fig. L
45
Fig. M
Fig. N
46 47
48
44
Miter Scale Adjustment (Fig. G, O)
Unlock the miter lock lever
6
, press the miter release button
7
and swing the miter arm until
it locks at the 0° miter position. Do not lock the miter lock lever. Place a square against the saw’s
fence and blade, as shown in FigureO. (Do not touch the tips of the blade teeth with the square.
To do so will cause an inaccurate measure ment.) If the saw blade is not exactly perpendicular
to the fence, loosen the four screws
12
that hold the miter scale
11
and move the miter lock
lever
6
and the scale left or right until the blade is perpendicular to the fence, as measured with
the square. Retighten the four screws. Pay no attention to the reading of the miter pointer at
thistime.
Fig. O
Miter Pointer Adjustment (Fig. G)
Unlock the miter lock lever
6
to move the miter arm to the zero position. With the miter lock
lever unlocked, allow the miter arm to snap into place as you rotate the miter arm to zero.
Observe the miter pointer
10
and miter scale
11
. If the pointer does not indicate exactly zero,
loosen the miter pointer screw holding the pointer in place, reposition the pointer and tighten
thescrew.
Miter Lock Adjustment (Fig. G, P)
The miter lock rod
50
should be adjusted if the table of the saw can be moved when the miter
lock lever
6
is locked (down). To adjust the miter lock, put the miter lock handle in the unlocked
(up) position. Using a 1/2" open end wrench, loosen the lock nut
51
on the miter lock rod
50
.
Using a slotted screwdriver, tighten the miter lock rod by turning it clockwise. Turn the lock rod
until it is snug, then turn counterclockwise one turn. To ensure the miter lock is functioning
properly, re-lock the miter lock to a non-detented measurement on the miter scale – for example,
34º – and make sure the table will not rotate. Tighten locknut.
Fig. P
51
50
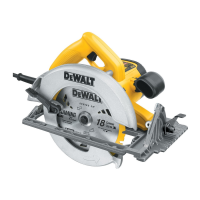
Bevel Square to Table Adjustment (Fig. A, I, Q)
To align the blade square to the table, lock the arm in the down position with the lock down
pin. Place a square against the blade, ensuring the square is not on top of a tooth. Loosen the
bevel lock knob
6
and ensure the arm is firmly against the 0° bevel stop. Rotate the 0°bevel
adjustment screw
36
Fig.I) with the 1/2" blade wrench as necessary so that the blade is at 0°
bevel to thetable.
Fig. Q