ENGLISH
5
Side Handle (Fig. A, C)
WARNING: To reduce the risk of personal injury,
ALWAYS operate the tool with the side handle
properly installed and tightened. Failure to do
so may result in the side handle slipping during tool
operation and subsequent loss of control. Hold tool
with both hands to maximizecontrol.
A side handle
4
may be supplied with this hammerdrill. It
clamps to the front of the gear case as shown in FigureC
and can be rotated 360˚ for right- or left- hand use. Rotate
clockwise until securelytightened.
4
6
Fig. C
Hammer/Drill Selector (Fig. A)
To switch the tool from the drilling mode to the hammering
mode (or vice-versa) rotate the selector dial
5
on the
applicable symbol shown in FigureA. For straight drilling,
align the drill bit symbol toward the chuck. For hammering,
align the hammer symbol with the lever, asshown.
NOTE: The selector must be in either drill or hammer/drill
mode at all times. There are no operable positions between
the twomodes.
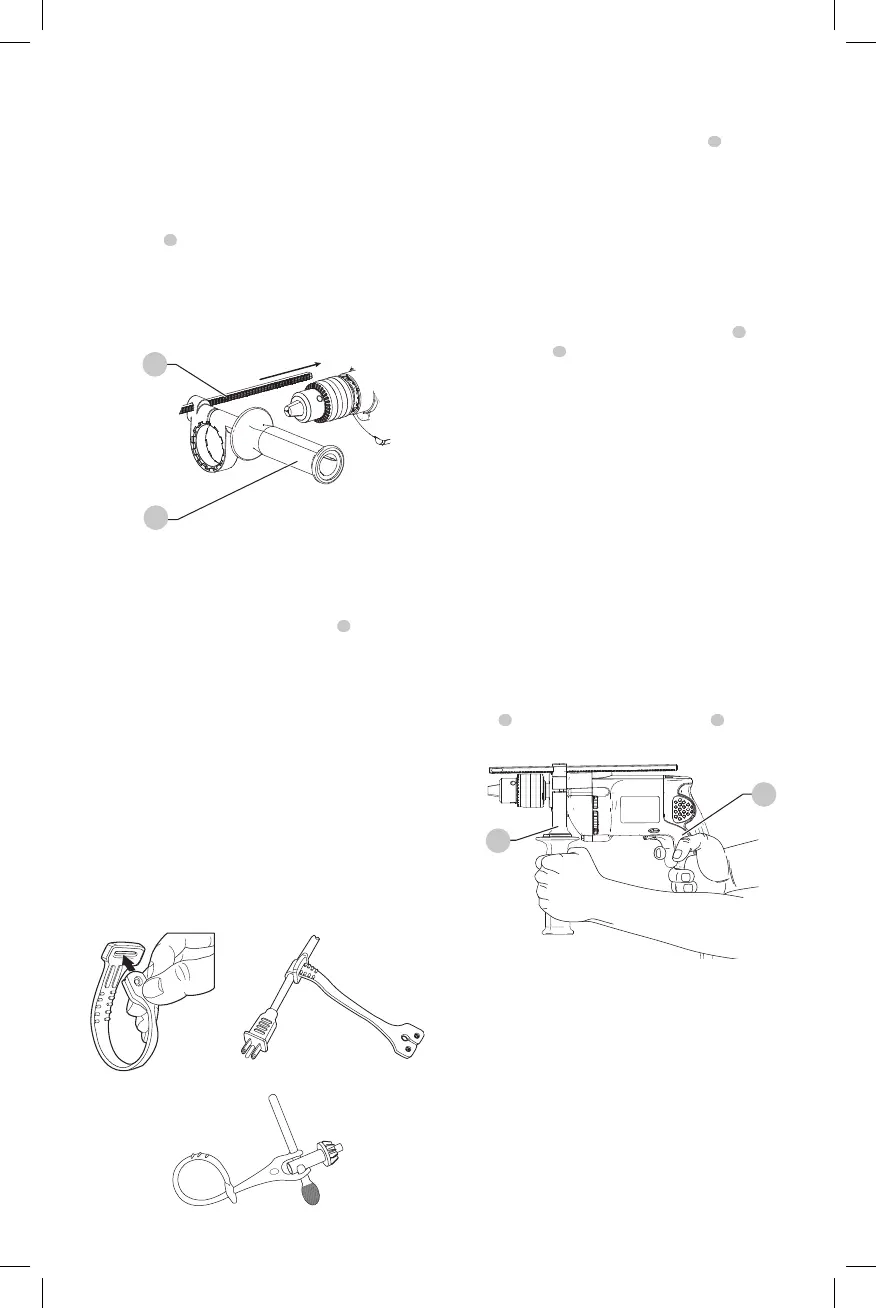
Chuck Key Holder (Fig. D, E, F)
1. Push double-hole end of holder through the slot in
other end of holder (Fig. D).
2. Slip loop over electric plug and draw loop tight around
cord (Fig. E).
3. Push ends of chuck key handle (long end first) through
two holes in end of holder (Fig. F).
Fig. E
Fig. D
Fig. F
Keyed Chuck (Fig. A)
Open chuck jaws by turning collar with fingers and insert
shank of bit about 3/4" (19mm) into chuck
7
. Tighten
chuck collar by hand. Place chuck key in each of the three
holes, and tighten in clockwise direction. It’s important to
tighten chuck with all three holes to prevent slippage. To
release bit, turn chuck key counterclockwise in just one hole,
then loosen the chuck by hand. Any authorized
service center can install a keyless chuck in place of a
keyedchuck.
Depth Rod (Fig. A, C)
To adjust the depth rod, loosen the side handle
4
and
move depth rod
6
so that the distance between the end
of the rod and the end of the bit equals the desired drilling
depth. When drilling with depth rod, stop when end of rod
reaches surface ofmaterial.
OPERATION
WARNING: To reduce the risk of serious personal
injury, turn unit off and disconnect it from
power source before making any adjustments or
removing/installing attachments or accessories.
An accidental start-up can causeinjury.
Proper Hand Position (Fig. G)
WARNING: To reduce the risk of serious personal injury,
ALWAYS use proper hand position as shown.
WARNING: To reduce the risk of serious personal
injury, ALWAYS hold securely in anticipation of a
suddenreaction.
Proper hand position requires one hand on the main
handle
8
and one hand on the side handle
4
.
Fig. G
8
4
WARNING: To reduce the risk of personal injury,
ALWAYS ensure workpiece is anchored or
clamped firmly. If drilling thin material, use a wood
“back-up” block to prevent damage to thematerial.
WARNING: To reduce the risk of personal injury,
ALWAYS operate the tool with the side handle
properly installed. Failure to do so may result in
the side handle slipping during tool operation and
subsequent loss of control. Hold tool with both hands
to maximizecontrol.