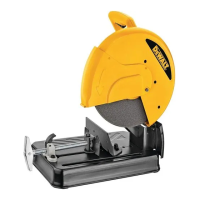
with the wrench provided at rear of base. Bolt has right hand
thread.
3. Remove the bolt, washer, outside flange, adapter, and old
wheel (Fig. 2).
4. Install the new abrasive wheel by reversing the above steps.
Make sure adapter is on gear shaft and centered in wheel.
5. Do not overtighten bolt.
WARNING: Check the work surface that the chop saw rests
on when replacing with a new abrasive wheel. It is possible
that the wheel may contact the work surface (through the
base) when the arm is fully lowered.
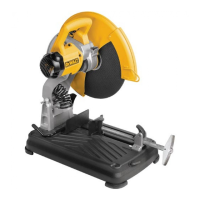
and open the jaws. When clamping an object, you need only to
push in the crank handle to the desired position. The moveable jaw
will slide freely until contact is made with the workpiece. Turn the
crank clockwise to clamp the workpiece in place.
To Adjust Vise Stop
CUTTING ANGLE
Use the wrench to loosen the two hex bolts (Fig. 3). (Do not
remove the bolts). The fence can be rotated in either direction.
Securely tighten both the bolts before use.
OPENING ADJUSTMENT
Remove both fence bolts. Move fence forward or backward to
desired location. Install both bolts. Tighten both bolts.
5
FIG. 2
GEAR
SHAFT
FLANGE,
INSIDE
ABRASIVE WHEEL
ADAPTER
FLANGE, OUTSIDE
WASHER
HEX HEAD BOLT
DO NOT MAKE ANY ADJUSTMENTS WHILE WHEEL IS IN
MOTION. DO NOT MAKE ANY ADJUSTMENTS WHILE CHOP
SAW IS PLUGGED INTO POWER SUPPLY.
Quick Release Vise
Your saw features a quick release vise for greater convenience. To
release the vise, turn the crank handle a turn or two
counterclockwise to release the pressure on the vise jaw. With the
crank loose, lift the release lever on top of the moveable jaw, as
shown in Figure 3. Hold the lever up as you pull back on the crank