Removing and Mounting the Bracket
Always ensure there are no hidden cables/pipes before drilling mounting holes.
●
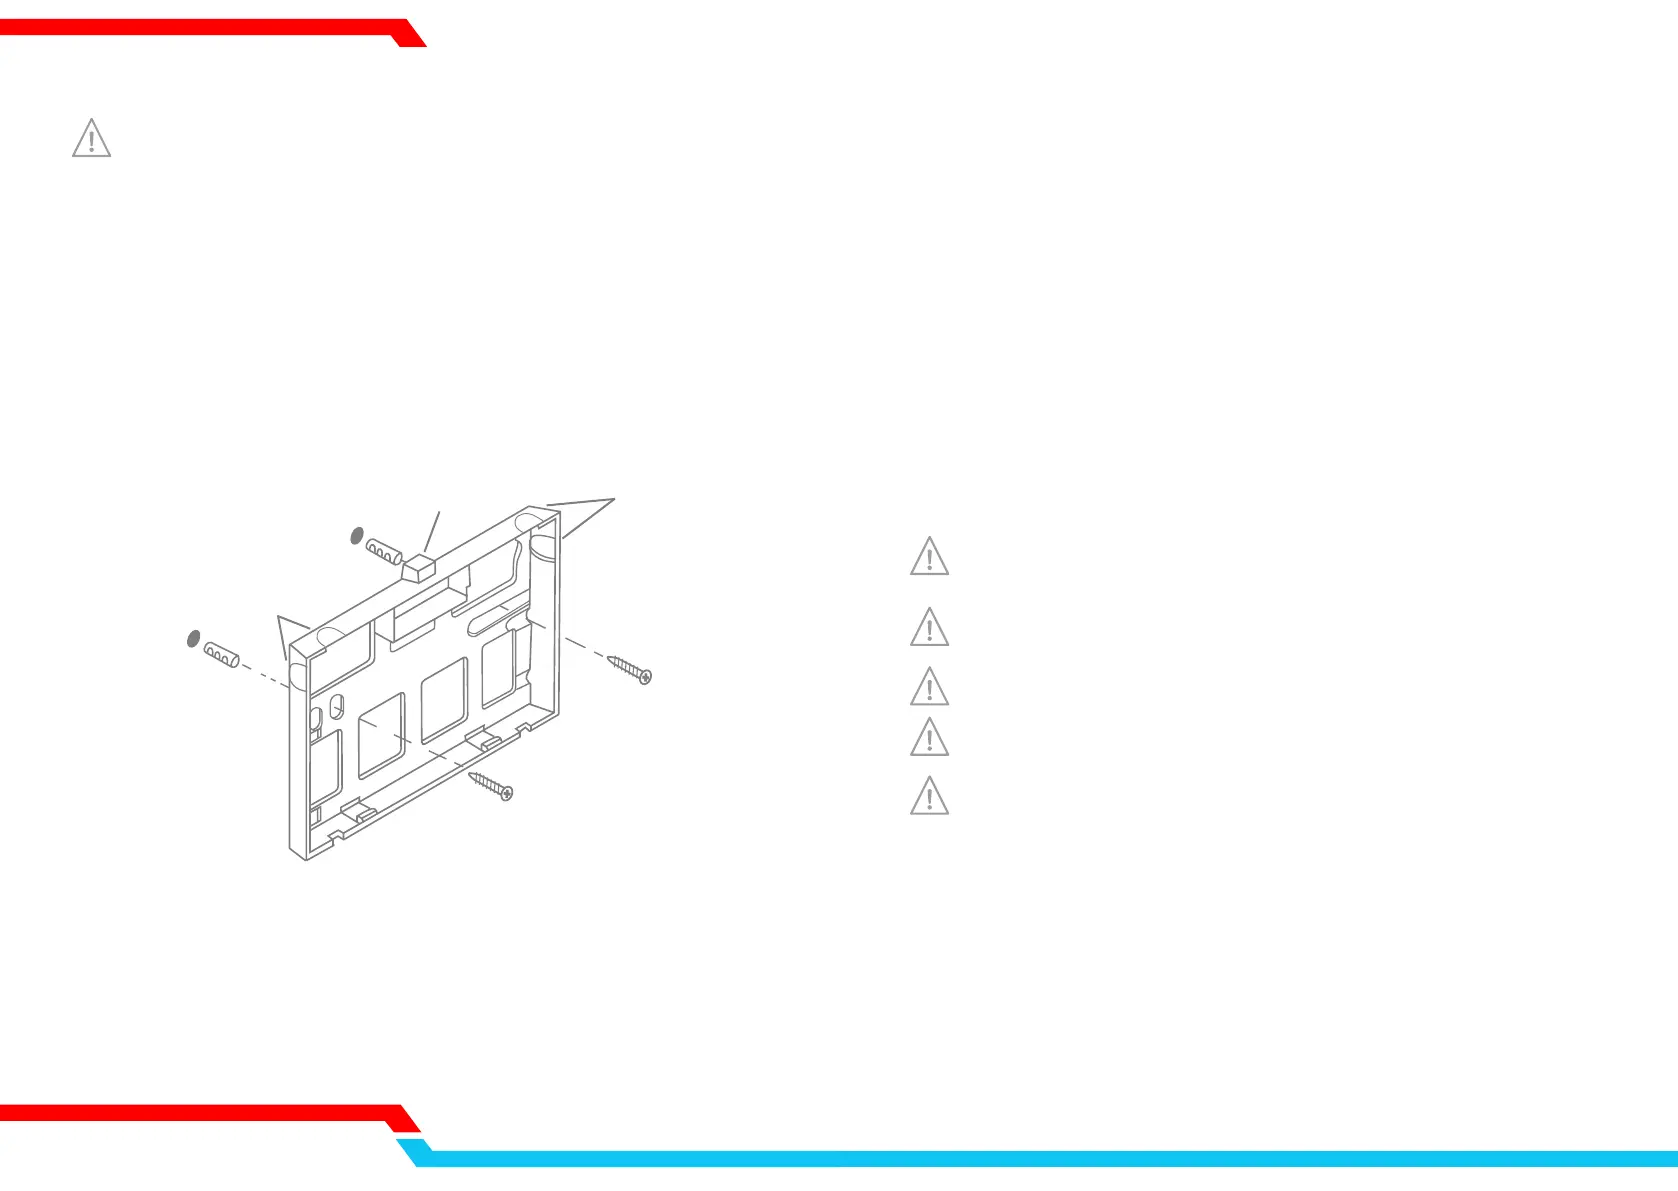
Place a flat headed screwdriver into the lug on the bracket (between the inlet/outlet
connections, see diagram) and then gently lever the bracket away from the heater.
●
Pull down at the bottom of the bracketo remove the bracket from the unit.
●
Refitting the unit to the bracket is the reverse of this process.
●
Before attaching the bracket to the wall, consider the wiring route. The bracket has knock
out sections to allow the wire to exit from either the left, right or top of the bracket.
●
The unit can be installed with the inlet/outlet at the top or at the bottom. Ensure
the unit & bracket orientation is the same. The electronic temperature display will rotate
automatically depending on orientation.
●
Drill two holes using the bracket as a template. Wall plugs and screws are included for
attaching the bracket to the wall (see diagram below).
●
Refit the unit to the bracket.
Cable exits from the right hand side when viewed from the front and installed with the
inlet/outlet at the top of the unit. Supplied pre knocked out but can be changed if desired.
Lug
Knockout
Knockout
Connection to the water supply
The device must be installed as shown in the installation drawing on the first page of this
manual.
●
Left outlet of the device is the water inlet (cold/ blue), right outlet is the water outlet
(hot/red).
●
Prepare the water connections to the tap. Make sure main water supply is switched off.
●
Install the device by using the plastic installation bracket which is supplied with the
device. Make sure main power is switched off.
●
Connect the water supply to the device and to the main water supply.
●
Open the main water supply and check for leakage and release air from the system by
opening the hot water tap.
●
When air has left the system, connect the device to the electric system.
●
Heater should now function!
Ensure the system must be full of water and tested for leaks before powering on
the unit
Electrical installation must be carried out by a qualified electrician in accordance
with the latest edition of the IEE wiring regulations.
Ensure the heater is earthed.
Isolate electric and water supply before electrical installation.
Ensure all wiring provisions meet the specifications of the heater as stated on the
rating label and ‘Specification’ section of this manual.
Electrical Connection
●
Make connection to the electrical supply from the heater via a 30A rated fused spur
using the cable supplied.
●
Connection should be made as follows:
Green/Yellow earth wire to the terminal marked “ E” or
Brown/Red live wire to the terminal marked “L”
Blue/Black neutral wire to the terminal marked “N”
DXI55 INSTANT WATER HEATER
 Loading...