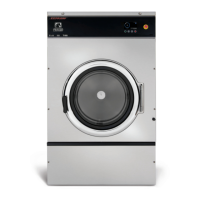
Do you have a question about the Dexter Laundry WCN Series and is the answer not in the manual?
Indicates an imminently hazardous situation. Death or serious injury if not avoided.
Indicates a potentially hazardous situation. Death or serious injury if not avoided.
Indicates a potentially hazardous situation. Minor or moderate injury if not avoided. Alerts unsafe practices.
Information or company policy related to personnel safety or property protection.
Indicates damage/injury risk if procedures are not followed. Refer to documents.
Indicates DANGEROUS HIGH VOLTAGES inside. Refer servicing to qualified personnel only.
Caution about sharp edges on internal sheet metal parts. Use safety consciousness.
Caution to reduce risk of damage to Water Inlet Valve. Do not supply water over 70°C.
Caution to reduce risk of fire/explosion. Do not operate in hazardous classified (ATEX) environments.
Warning not to operate equipment if door glass is damaged.
Warning to keep clear of rotating parts.
Prohibited to enter this equipment or space.
Prohibited to step or stand on this equipment.
Prohibited to operate without all guards and covers in place.
Prohibited to wash clothing impregnated with flammable liquids.
Prohibited to allow children to play in or around equipment.
All washers must be installed according to applicable electrical, plumbing, and local codes.
Installation and operation instructions are for qualified personnel only. Refer to instructions for servicing.
Do not install washers in an explosive atmosphere.
Stress foundation work for stable installation, eliminating vibration. Ensure level foundation within 13 mm.
Keep all panels in place to protect against shock/injury and add rigidity.
Appliance not intended for unsupervised use by persons with reduced capabilities or lack of knowledge.
Washer should not operate with high water level, improper grounding, door not locked, or vibration.
Prohibited to attempt to open, touch, or proceed without referring to manual or unless qualified.
Mandatory to read all supporting documentation before operating or maintaining equipment.
Mandatory to disconnect electrical power before servicing equipment.
Mandatory to lock out and tag out before servicing this equipment.
Mandatory to disconnect water supply before servicing equipment.
Mandatory for children to be supervised to ensure they do not operate equipment.
Precautions for safe operation. Avoid injury/shock. Do not perform service unless qualified.
Rules for servicing: shut off power/water, discharge capacitors, do not overload, etc.
Washer should not operate with high water level, improper grounding, door not locked, or vibration.
Instructions to activate warranty by returning the red warranty form to the factory.
Specifications for various Dexter washer models including cycle times, water usage, and temperatures.
Diagrams showing T-400 washer mounting dimensions.
Diagrams showing T-600 washer mounting dimensions.
Details on concrete pedestal mounting with anchor specifications.
Detailed illustration of machine mounting hardware and placement.
Diagrams for T-600 mounting pad dimensions.
Details on concrete pedestal mounting with anchor specifications.
Detailed illustration of machine mounting hardware and placement.
Washer must be securely bolted to a substantial concrete floor or suitable base.
Advice on concrete pads, steel bases, and clearance for service.
Instructions for grout installation between base/floor and machine frame.
Recommendations for using mounting holes and checking bolt tightness.
Details on water supply hoses, shut-off valves, pressure, and temperature.
Specifications for drain outlet tubes and gravity drain requirements.
Instructions to peel off protective film from panels before service.
Requirements for permanent installation, branch circuits, liquid-tight conduit, and qualified technician.
Steps for final checks before operation, including disconnecting power and checking terminals.
Instructions for setting coin count and time remaining using accumulator switches.
How to select program length by moving a jumper wire on the terminal block.
Details on connecting chemical injector systems and converting rinses to warm.
How to operate the washer, including setting the accumulator and starting the machine.
Recommended detergent amounts for T-400 and T-600 washer models.
How to use timer sequence charts with wiring diagrams to trace circuitry.
Detailed explanation of the start circuit, including transformers, breakers, and relays.
Explanation of the fill circuit, including door lock, timer, and water valves.
Explanation of the wash circuit, including reversing timer and drive motor operation.
Description of drain and rinse circuits, including valve and light operation.
Explanation of the extract circuit, including spin motor and contactor operation.
Description of circuits for unlocking thermoactuator and shake out tumble.
Explanation of the end of cycle circuit, including beeper signal and accumulator reset.
Step-by-step instructions for removing the top panel.
Step-by-step instructions for removing the front panel.
Step-by-step instructions for removing the back panel.
How to access the drain valve by removing the lower service panel.
Step-by-step instructions for cleaning the drain valve and its components.
How to access the detergent dispenser by removing the top panel.
Explanation of the vacuum breaker's function and location.
Description of water valves, their mounting, and removal process.
Steps for removing the masking ring for the door lock cover.
How the door latching switch and sensing switches operate.
How to access the door lock assembly after removing panels.
How to adjust the latching and piggyback sensing switches.
Adjusting the door switch using flat blade screws for proper actuation.
Checking and adjusting the door lock rod for proper engagement.
Explanation of the door locking solenoid's function and location.
Explanation of thermoactuators as safety devices for the door lock.
Steps to remove the loading door and its components.
Steps to disassemble the loading door, including glass removal.
Steps for reassembling the loading door and its components.
How to adjust the loading door for proper fit and pressure.
Steps for removing the loading door hinge and shims.
Steps to remove the tub back, bearing, and cylinder assembly.
Reverse procedures for reassembling the tub back assembly.
Steps to remove the basket pulley, bearing housing, water seals, and tub back.
Steps for reassembling the basket pulley and bearing housing.
Common causes and remedies for when the machine does not start.
Common causes and remedies for issues with coin acceptance and counting.
Common causes and remedies for when the door does not lock.
Common causes and remedies for when the door will not open.
Causes and remedies for timer not advancing after machine starts.
Causes and remedies for lack of hot water in the detergent dispenser.
Causes and remedies for hot water not entering the tub.
Causes and remedies for no cold water entering the tub.
Causes and remedies for excessive water level in the tub.
Causes and remedies for slow water drainage.
Causes and remedies for water not flushing the softener compartment.
Causes and remedies for the machine not turning.
Causes and remedies for the machine tumbling in only one direction.
Causes and remedies for excessive vibration during operation.
Causes and remedies for the machine not spinning.
Causes and remedies for machine starting but not operating.
Causes and remedies for the machine not stopping.
Causes and remedies for water leakage around the loading door.
List of available accessories for N-Series washers with part numbers.
Table listing wiring harness part numbers for different N-Series models.
Part numbers for cabinet and front panel components for WCN25AA/WCN25AB models.
Part numbers for cabinet and front panel components for WCN40AA/WCN40AB models.
Part numbers for components accessed from the rear view of WCN25 models.
Part numbers for components accessed from the rear view of WCN40 models.
Part numbers for cylinder, seals, and bearings for WCN25 models.
Part numbers for cylinder, seals, and bearings for WCN40 models.
Part numbers for chassis and drain components for WCN25 models.
Part numbers for chassis and drain components for WCN40 models.
Part numbers for water inlet and rear channel components for WCN25 models.
Part numbers for water inlet and rear channel components for WCN40 models.
Part numbers for top compartment electrical components for WCN25AA single phase.
Part numbers for top compartment electrical components for WCN25AB three phase.
Part numbers for top compartment electrical components for WCN40AA single phase.
Part numbers for top compartment electrical components for WCN40AB three phase.
Daily and quarterly maintenance tasks for the washer.
| G-Force | 200 G-Force |
|---|---|
| Construction | Stainless steel |
| Water Levels | Multiple |
| Door Type | Hinged |
| Control System | Microprocessor control |