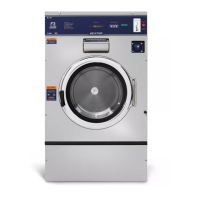
EasyManua.ls Logo

Dexter Laundry T1200 - User Manual

Dexter Laundry T1200
17 pages
Print Icon
To Next Page IconTo Next Page
Loading...
P/N 8514-159-001C
MODEL T1200
80LB CAPACITY
COMPUTER CONTROL
COIN WASHER
DEXTER
LAUNDRY,
INC.
OWNER'S BOOKLET
INSTALLATION & OPERATION
INSTRUCTIONS
Please read this information and retain for reference.
WARNING - THIS WASHER IS EQUIPPED WITH DEVICES AND FEATURES RELATING TO ITS SAFE
OPERATION. TO AVOID INJURY OR ELECTRICAL SHOCK, DO NOT PERFORM ANY SERVICING
UNLESS QUALIFIED TO DO SO.
IT IS THE RESPONSIBILITY OF THE OWNER TO CHECK THIS EQUIPMENT ON A FREQUENT
BASIS TO ASSURE ITS SAFE OPERATION.
A machine should not be allowed to operate if any of the following occur:
- Excessively high water level.
- If machine is not connected to a properly grounded circuit.
- If the door does not remain securely locked during the entire cycle.
- Vibration or shaking from an inadequate mounting or foundation.
WARNING - FOR SAFETY
1. Always shut off power and water supply before servicing.
2. Do not overload the washer.
3. Do not open door when cylinder is in motion or it contains water.
4. Do not bypass any safety devices of this washer.
5. Do not use volatile or flammable substances in or near this washer.
6. Keep all panels in place. They protect against shock and injury and add rigidity to the washer.
PREVENTIVE MAINTENANCE REQUIREMENTS
DAILY
- Check that the loading door remains securely locked and cannot be opened during the entire cycle.
- Check the water connections for leaks.
- Clean the top and sides of the cabinet to remove residue.
- Clean the soap dispenser and lid.
- Check the drain valve for leaking and that it opens properly.
- Check the loading door for leaks. Clean the door seal of all foreign matter.
- Leave the loading door open to aerate the washer when not in use.
QUARTERLY
- Make sure the washer is inoperative by switching off the main power supply.
- Check the V-belts for wear and proper tension.
- Clean lint and other foreign matter from around motor.
- Check all water connections for leaks.
- Wipe and clean the inside of the washer and check that all electrical components are free of moisture and dust.
- Remove and clean water inlet hose filters. Replace if necessary.
- Check anchor bolts - retighten if necessary
IMPORTANT: Replace any and all panels that were removed to perform daily and/or quarterly maintenance.

Other manuals for Dexter Laundry T1200

Questions and Answers

Summary

Safety and Maintenance

General Safety Warnings

Essential safety precautions to avoid injury or electrical shock during operation and servicing.

Preventive Maintenance Requirements

Guidelines for routine and periodic checks to ensure optimal washer performance and longevity.

Installation Instructions

Foundation Requirements

Guidelines for ensuring a stable installation on a concrete floor to prevent excessive vibration.

Mounting Procedures

Recommendations for elevating the machine and ensuring proper clearance for maintenance.

Plumbing and Electrical

Plumbing Specifications

Details on water supply hoses, connections, pressure, and recommended hot water temperature.

Electrical Connections

Instructions for connecting the single/three-phase power supply and recommended wire size.

Fusing Requirements

Specifications for fuse or circuit breaker rating for single and three-phase models.

Operation and Controls

Controls Transformer

Information about the controls transformer stepping down voltage for machine operation.

Starting the Washer

Step-by-step guide on loading, adding detergent, and initiating a wash cycle.

Safety Features and Specifications

Emergency Stop and Door Lock

Explanation of the safety door lock mechanism and emergency stop button functionality.

Technical Specifications

Key performance data including capacity, cylinder size, electrical, drive system, and water inlet.

Programming Instructions

Coin Price Programming

Guide to setting prices for wash cycles and coin values through the controller interface.

Water Temperature Pricing

Details on setting prices for different water temperatures (Cold, Warm, Hot) and Plus Cycle options.

Wash Cycle Programming

Instructions for modifying wash cycle parameters like baths, temperature, fill, and spin times.

Coin Washer Cycle Parameters

Cycle Parameter Ranges

Defines the acceptable ranges for cycle time, water temperature, water level, delay fill, and spin time.

Default Cycle Settings

Details of the standard wash cycle configuration including bath times, temperatures, and fill settings.

Advanced Operation Modes

Rapid Advance Mode

Procedure to quickly advance through wash cycle segments, with notes on time accuracy and door lock.

Easy Card Models

Information on using the Easy Card debit card system for payment and its independent programming.

Coin Acceptor Settings

Electronic Coin Acceptor Switches

Instructions for setting electronic coin acceptor switches based on country and currency for proper operation.

Washer Error Codes

Troubleshooting Error Codes

List of fault codes, their descriptions, and recommended customer actions for diagnosing and resolving issues.

Accessories

Furnished Installation Accessories

List of included accessories for installation, such as water supply hoses and shut-off valves.

Overview

The Dexter T1200 is an 80lb capacity commercial coin washer with a computer control system, designed for permanent installation on a bare concrete floor. It is crucial to install this machine according to all local, state, and national building, electrical, and plumbing codes. Servicing should only be performed by qualified personnel to avoid injury or electrical shock. The owner is responsible for frequently checking the equipment to ensure safe operation. The machine should not operate if there is an excessively high water level, if it's not properly grounded, if the door doesn't remain securely locked, or if there's excessive vibration.

Important Technical Specifications:

  • Model: T1200 80LB WASHER
  • Capacity: 80 lbs / 11.5 cubic feet (36.3 kg / 325 l)
  • Cylinder Size: 30” DIA x 28” DEEP (76cm x 71cm)
  • Electrical: 208-240 VAC, 60 HZ, 1 OR 3 PHASE
  • Drive System: Soft Start Reversing Inverter Drive
  • Wash Speed: 43 RPM
  • Intermediate Extract: 375 RPM (60 G'S)
  • Final Extract: 485 RPM (100 G'S)
  • Machine Control: Programmable Computer
  • Water Inlet: 4 Solenoid Operated Valves
    • Flow Rate: 2 Dual Valves (9 GAL/MIN) each, 30-120 PSI
    • 2 Single Valves (12 GAL/MIN) each, 30-120 PSI
  • Drain Valve: 3" Diameter

Installation Requirements:

The washer must be securely bolted and grouted to a substantial concrete floor, or a suitable base that is also securely bolted and grouted. All installations must be on sound concrete floors, 8 inches (203 mm) or thicker. Anchor bolts or expansion anchors should be a minimum of 3/4-inch (19 mm) diameter, quality grade. Six bolts are required to mount the washer. A concrete pedestal or steel-mounting base that elevates the machine approximately 4 inches (102 mm) above the floor is recommended for easy access to the loading door. A minimum of 24 inches (610mm) of clearance behind the machine is needed for motor removal. If an elevated concrete pedestal is used, it should be embedded into the existing floor with 3/4" x 8" (19 mm x 200 mm), grade 8 or better, headed anchor bolts with a 4 inch (10 cm) square fish plate, protruding 2 1/2” (64 mm) above the finished surface. Expansion anchors are not recommended for concrete pedestals due to proximity to the edge.

Plumbing:

Water supply hoses (3/4-11 1/2 NHT threaded connections) are furnished. Small 3/8 ID supply hoses and brass shut-off valves connect to the lower hot and cold valves for the soap box flush. Larger 5/8 ID supply hoses connect to the upper hot and cold valves. Separate hot and cold water lines are required, maintaining 30-120 psi (207-827 kPa) flow pressure. A 140F (60C) hot water supply is recommended. The drain outlet tube is 3 inches (76 mm) in diameter, and any drain hose must be lower than the drain valve for proper draining.

Electrical:

The Dexter T1200 is a permanently installed appliance. It requires a 208-240VAC 60 Hz single or three-phase individual branch circuit, not shared with other equipment. No power cord is provided. Connections should be made with liquid-tight flexible conduit or equivalent, using properly sized and insulated conductors (minimum 12 ga. suggested). For 208-240-3PH-60Hz, connect L1, L2, L3, and ground (high leg to L3). For 208-240-1PH-60Hz, connect L1, L2, and Ground. The grounding screw next to the power terminal block TB-1 must be connected to a good external ground. Fusing requirements are 20 AMP TIME-DELAY (DUAL ELEMENT) FUSE or equivalent circuit breaker for both single and three-phase models. The controls transformer steps down 208-240 volts to 115 volts. Use the "208V" terminal for 208-215 volts and "230V" for 216-240 volts.

Usage Features:

  • Starting the Washer: Load clothes (max 80 lbs dry weight), latch the door securely, select cycle temperatures, add low-sudsing powdered detergent to the "detergent" compartment (or liquid wash products at the beginning of the cycle), and fabric softener if desired. For pre-wash, products can be added to the round dispenser opening or with clothes. Insert coins, tokens, or debit card to meet the vend price. The display will show "PUSH" and the start button LED will blink. If the door is not latched, it will show "DOOR". Pressing the start button begins the cycle, activates the ON light, and locks the door until the cycle ends.
  • End of Cycle: When complete, the display shows "0" and a 5-second tone sounds. The door unlocks. Leave the door open when not in use to aerate.
  • Emergency Stop / Safety Door Lock: The machine has a Safety Door Lock that keeps the door locked from start to end of cycle, and for up to 3 minutes if power is interrupted. The Emergency Stop button pauses the washer and allows the door to be opened after the Safety Door Lock releases. Pressing it for less than 3 seconds pauses the alarm and resumes the cycle. Holding it for 3 seconds counts down to "0", stops movement and water flow, and drains water. The door may take up to 3 minutes to unlock. The washer can be restarted by closing the door and pressing Start. If stopped multiple times before final extract, the cycle is cancelled. If stopped during final extract, the cycle ends. If stopped for over 1 hour, the cycle terminates.
  • Rapid Advance Mode: To enter, hold the Cold water temperature button and push the programming button. This mode can be entered from Idle or during a cycle. To advance to the next bath segment, push Start and Warm temperature buttons simultaneously. The display shows "Ad". Water drains before advancing. This mode continues until the final bath segment, which cannot be skipped. Note: Cycle time will be incorrect, and the door may not open immediately at the end of the cycle.
  • Easy Card Models: Some washers are equipped with a card reader for Dexter's Easy Card debit system. The card reader signals the washer control when money is debited. Washer pricing and Easy Card system pricing are independent and must be programmed separately.

Maintenance Features:

  • Daily:
    • Check that the loading door remains securely locked throughout the cycle.
    • Check water connections for leaks.
    • Clean the top and sides of the cabinet to remove residue.
    • Clean the soap dispenser and lid.
    • Check the drain valve for proper opening and no leaks.
    • Check the loading door for leaks and clean the door seal of foreign matter.
    • Leave the loading door open to aerate the washer when not in use.
  • Quarterly:
    • Ensure the washer is inoperative by switching off the main power supply.
    • Check V-belts for wear and proper tension.
    • Clean lint and other foreign matter from around the motor.
    • Check all water connections for leaks.
    • Wipe and clean the inside of the washer, and check electrical components for moisture and dust.
    • Remove and clean water inlet hose filters; replace if necessary.
    • Check anchor bolts and retighten if necessary.
  • Important: Replace any and all panels removed for maintenance.

Programming Instructions:

Programming can be done manually or via a PDA. For manual programming, the top of the washer must be unlocked and slid back a few inches.

  • Coin Price Programming: In Idle mode, push the Programming pushbutton (small button on upper center of controller behind display). Repeatedly push START to step through stages. Hold Cold temperature button for 5 seconds to exit.
    • Stage 1: Right Coin: Blinks "r" then value ($1.00 default). Use Hot to decrease, Warm to increase (1¢ steps, $00.00-$99.99). Push Start once to store, second time to move to next step.
    • Stage 2: Left Coin: Blinks "L" then value ($0.25 default). Same adjustment as Right Coin.
    • Stage 3: Wash Price: Blinks "P" then price. Same adjustment as Right Coin. If set to $00.00, display shows "FREE".
  • Water Temperature Pricing:
    • Stage 4: Warm Water Price: Sets additional price for Warm water usage (added to cold wash price). Blinks "CH P" then "00.00". Use Hot to decrease, Warm to increase (1¢ steps, $00.00-$99.99). Set to "00.00" to disable. Push Start once to store, second time to next step.
    • Stage 5: Hot Water Price: Sets additional price for Hot water usage. Blinks "HP" then "00.00". Same adjustment as Warm Water Price. Set to "00.00" to disable.
    • Stage 6: Plus Cycle Price: Sets price for Plus Cycle feature (adds 3 minutes of wash time). Blinks "PC P" then price. Same adjustment as Warm Water Price. Set to zero to turn off.
    • Stage 7: Decimal Point: Blinks "dP" then "on" (default) or "off". Use Hot or Warm to select. Push Start to store, second time to next step.
  • Wash Cycle Programming: Hold Hot temperature button then push Programming pushbutton in Idle mode. Bleach LED blinks. Display shows "C 0" (default cycle). To return to factory defaults, hold Start and press Warm (display shows "C 0"). To modify, use Hot or Warm to change display to "C 1". Push Enter. Display shows "b" and PreWash light blinks. Use Up/Down buttons to move between bath modes (Prewash, Wash, Rinse1, Rinse2, Final Rinse). Push Enter when desired bath mode is lit.
    • Cycle Time ("ct"): Selected bath LED blinks. Display shows "ct" then time. Use Up/Down to change (0-15 min for Prewash, Rinse1, Rinse2; 3-15 min for Wash, Final Rinse). Zero time skips bath. Push Enter.
    • Water Temperature ("t"): Display shows "t" then "CC". Defaulted to CC for coin washer. Push Enter.
    • Water Level ("L"): Display shows "L" then "LO". Defaulted to LO for coin washer. Push Enter.
    • Bath Delay Fill ("dF"): Display shows "dF" then "t". Select "t" (countdown during fill) or "d" (delay until water level reached). Push Enter.
    • Spin Time ("S"): Display shows "S" then time. Use Up/Down to change (0-10 min for Prewash, Wash, Rinse1, Rinse2; 1-10 min for Final Spin). Push Enter.
    • Injection Selection ("IS"): Display shows "IS" then "0". Defaulted to "0" for coin washer. Push Enter twice.
    • To exit programming, hold Exit for 5 seconds. Cycle is stored.
  • Coin Washer Default Cycle Parameters:
    • Prewash: Time 0, Temp CC, Level LO, Delay Fill t, Spin Time 0, IS 0
    • Wash: Time 9, Temp CH, Level LO, Delay Fill t, Spin Time 0, IS 0
    • Rinse 1: Time 4, Temp CC, Level LO, Delay Fill t, Spin Time 1, IS 0
    • Rinse 2: Time 0, Temp CC, Level LO, Delay Fill t, Spin Time 0, IS 0
    • Final Rinse: Time 5, Temp CC, Level LO, Delay Fill t, Spin Time 4, IS 0
    • Note: Water Level and IS are preset and cannot be changed.

Coin Acceptor Switches:

Some models have an electronic coin acceptor. Turn power OFF before changing switches. Refer to the provided table for country-specific settings for Left Coin (1 pulse to left input) and Right Coin ($1, 500¥, 50NT, $10 coins give 1 pulse to right input; $2 coins give 2 pulses to right input). Multiple coins/tokens per country are allowed; only the down/off setting is required for acceptance. Turn power ON and test.

Washer Error Codes:

The manual lists various fault codes (F#) with descriptions and customer actions, including issues with door lock, water fill, memory, communication, pressure switch, drive size, drive installation, drain, spin frequency, and spin stop time. Actions generally involve turning off power, checking connections, components, and replacing parts if necessary. For persistent issues, contact a Dexter representative. Note: Power must remain off for one minute when troubleshooting.

Dexter Laundry T1200 Specifications

General IconGeneral
BrandDexter Laundry
ModelT1200
CategoryWasher
LanguageEnglish

Related product manuals