Page 38
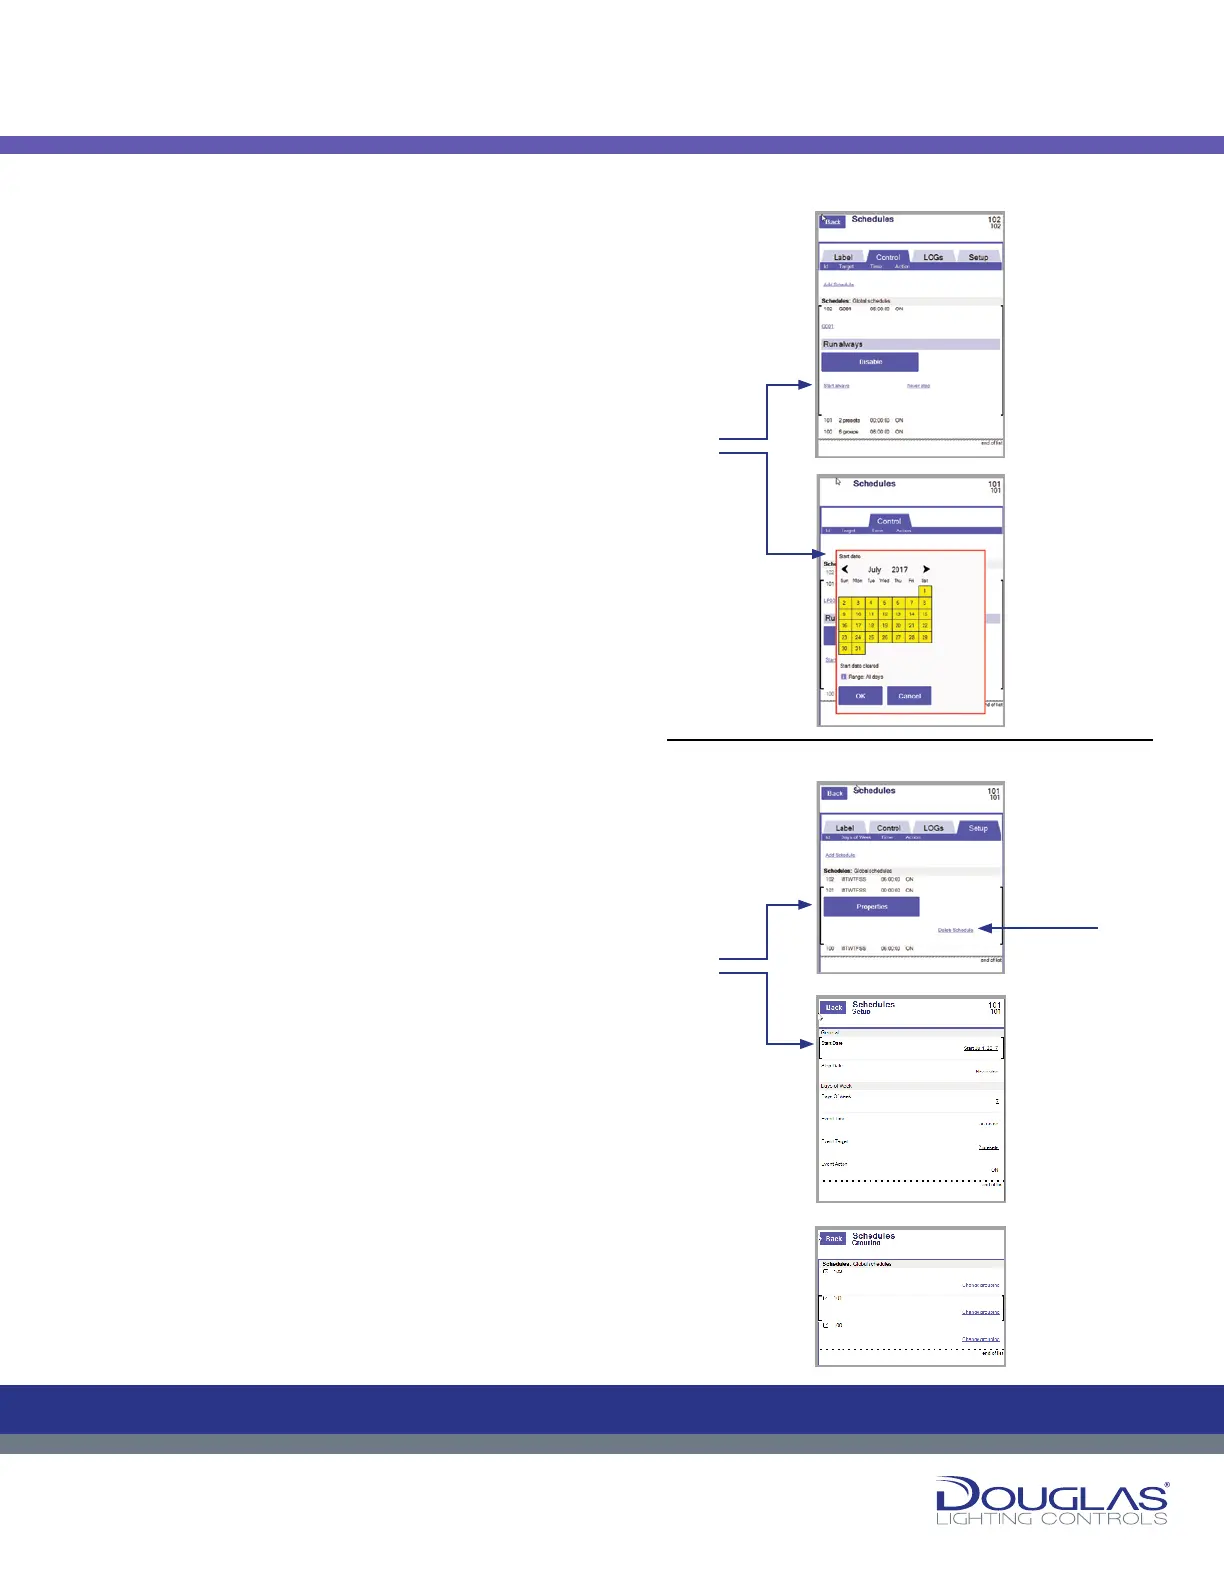
2. Control (continued)
c) Select the Start Always link to specify a date for the schedule
to start. Use the arrow keys to select the month, year, and
date. Next, and select the OK button. To specify a date for
the schedule to end, select the Never Stop link and specify
the date in the same way.
3. Logs
You can view the historical activity for a selected schedule by
selecting the LOGs tab.
4. Setup
To congure a schedule:
a) To delete a schedule, select the Delete Schedule link.
b) To modify the parameters for a schedule, select the
Properties button. You can modify the settings by selecting
the corresponding link, as follows: Start Date - date the
schedule starts. Use the arrow keys to specify the date and
select the OK button.
Stop Date - date the schedule ends Use the arrow keys to
specify the date and select the OK button.
Days of Week - the days of the week the schedule occurs.
Select the check box beside the day of the week and select
the OK button.
Event Time - the time the schedule occurs. Select the
appropriate time and select the OK button.
Event Target - the groups or presets scheduled to turn ON or
OFF. Select the target time option and select the OK button.
Event Action - displays if the targets turn ON or OFF in
the schedule. Select the ON/OFF option and select the OK
button.
The All Holidays screen lists....
The Grouping screen lists the schedules in order of their grouping.
Grouping is the relation to the same area or function, with the default
being Global (served by the entire LCU). When a new schedule is
created, it is assigned to the Global default setting. You can create
a new grouping in this screen and assign schedules to the different
groupings.
Schedules
Control:
To congure a schedule:
37
Dialog® Lighting Control System
2. Control (continued)
c) Select the Start Always link to specify a date for the schedule to start. Use
the arrow keys to select the month, year, and date. Next, and
select the OK button. To specify a date for the schedule to end, select the
Never Stop link and specify the date in the same way.
3. Logs
You can view the historical activity for a selected schedule by selecting the
LOGs tab.
4. Setup
a) To delete a schedule, select the Delete Schedule link.
b) To modify the parameters for a schedule, select the Properties button. You
can modify the settings by selecting the corresponding link, as follows:
Start Date - date the schedule starts. Use the arrow keys to specify the
date and select the OK button.
Stop Date - date the schedule ends Use the arrow keys to specify the
date and select the OK button.
Days of Week - the days of the week the schedule occurs. Select the
check box beside the day of the week and select the OK button.
Event Time - the time the schedule occurs. Select the appropriate time
and select the OK button.
Event Target - the groups or presets scheduled to turn ON or OFF. Select
the target time option and select the OK button.
Event Action - displays if the targets turn ON or OFF in the schedule.
Select the ON/OFF option and select the OK button.
The All Holidays screen lists....
The Grouping screen lists the schedules in order of their grouping. Grouping is
the relation to the same area or function, with the default being Global (served
by the entire LCU). When a new schedule is created, it is assigned to the
Global default setting. You can create a new grouping in this screen and assign
schedules to the dierent groupings.
Schedules
C
M
Y
CM
MY
CY
CMY
K
c)
b)
a)
 Loading...