Page 37
Schedule Menu
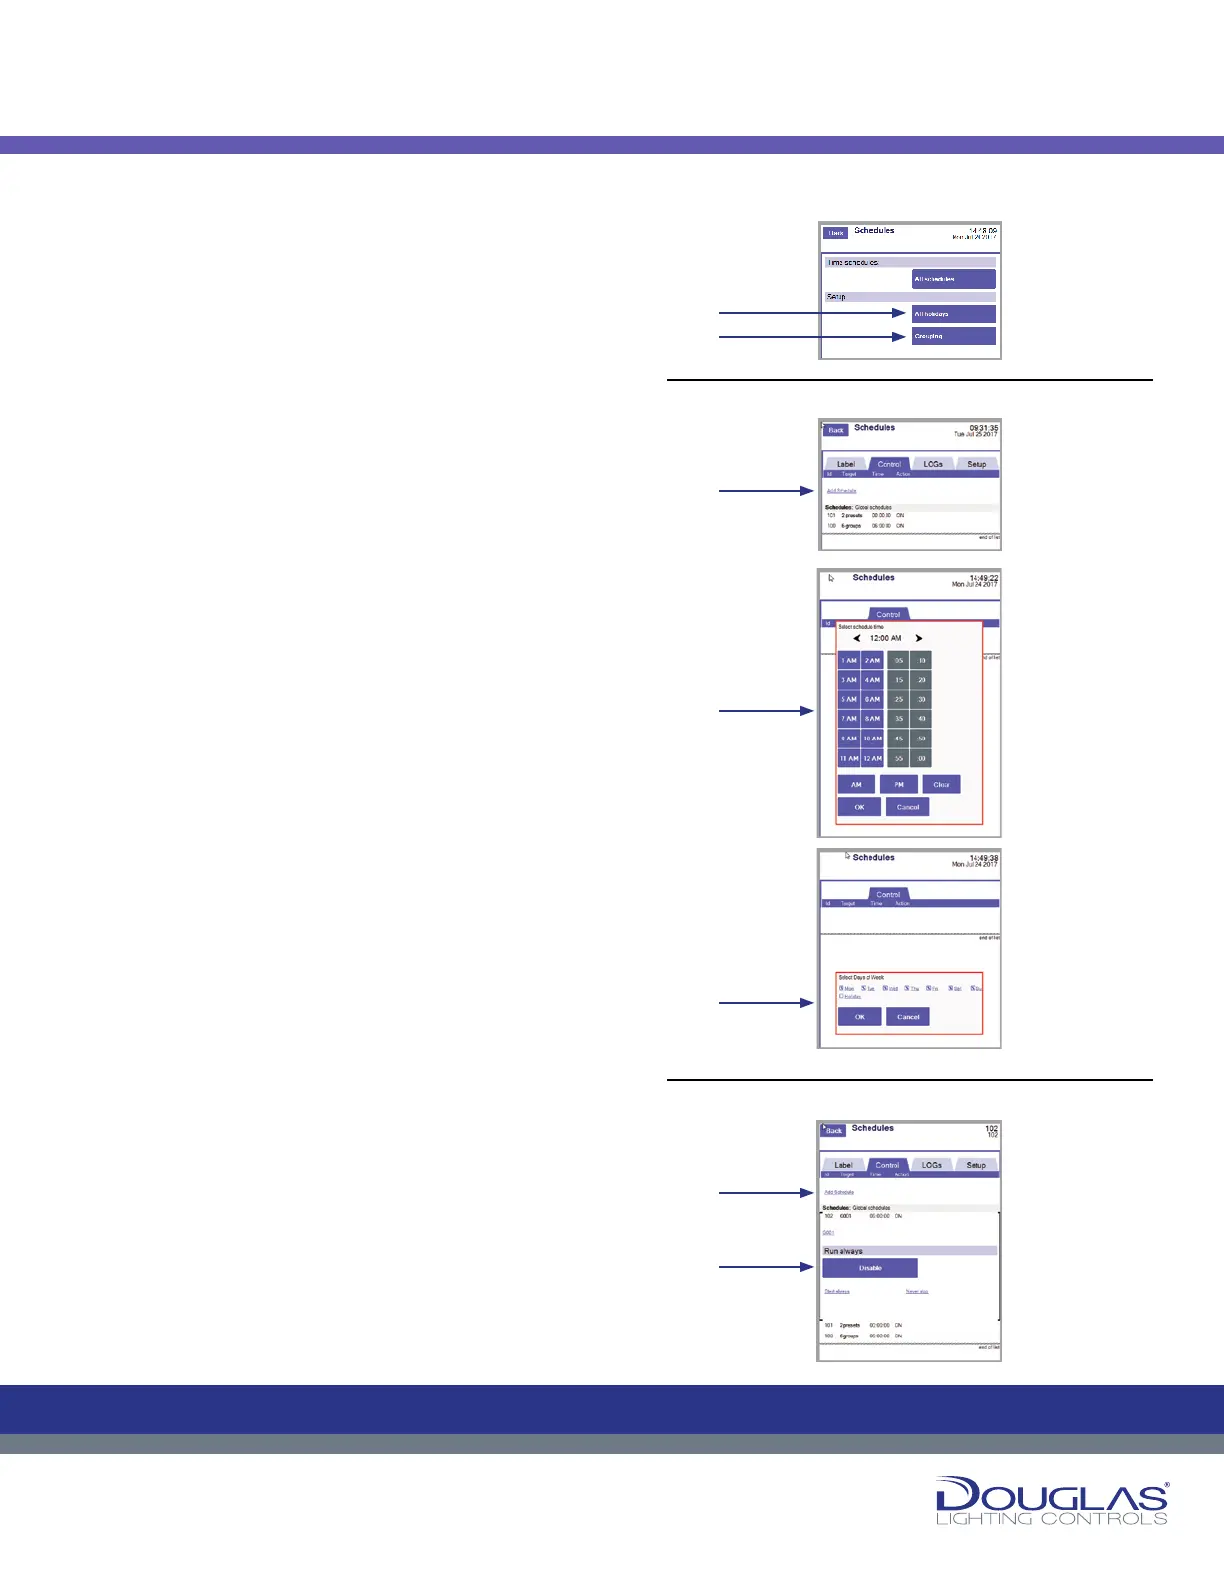
The Schedules menu has two menus—Time Schedules and Setup.
The Setup menu has two submenus. You access the conguration
for each of these submenus by selecting the corresponding button:
1. Time Schedules > All Schedules
2. Setup > All Holidays and Setup > Grouping.
1. All Schedules
The All Schedules screen displays the schedules for the Lighting
Control Unit.
To create a new Schedule:
a) Select the Add Schedule link.
b) Select the time target group or preset and select the OK
button.
c) Select the days of the week the schedule will be active and
select the OK button.
d) Select the target type—group or preset—and select the OK
button.
e) Specify if the target is turned on by selecting the ON or OFF
option and select the OK button.
f) Select the groups or presets and select the Back button.
The new schedule is added to the list.
The All Schedules screen has three tabs:
1. Label
To modify a mode name:
a) Select a schedule and select its label.
b) Enter the new schedule name and select the OK button.
2. Control
To modify targets, disable, or set start and end dates for a
schedule:
a) Select a schedule.
b) Disable or enable a schedule by selecting the DISABLE or
ENABLE button.
3. LOGs
You can view the historical activity for a selected mode by
selecting the LOGs tab.
Schedules
36
Dialog® Lighting Control System
Schedules
Schedule Menu
1. All Schedules
The All Schedules screen displays the schedules for the Lighting Control
Unit.
To create a new Schedule:
a) Select the Add Schedule link.
b) Select the time target group or preset and select the OK button.
c) Select the days of the week the schedule will be active and select the
OK button.
d) Select the target type—group or preset—and select the OK button.
e) Specify if the target is turned on by selecting the ON or OFF option and
select the OK button.
f) Select the groups or presets and select the Back button.
The new schedule is added to the list.
The All Schedules screen has three tabs:
1. Label
To modify a mode name:
a) Select a schedule and select its label.
b) Enter the new schedule name and select the OK button.
2. Control
To modify targets, disable, or set start and end dates for a schedule:
a) Select a schedule.
b) Disable or enable a schedule by selecting the DISABLE or
ENABLE button.
3. LOGs
Y
ou can view the historical activity for a selected mode by selecting the
LOGs tab.
The Schedules menu has two menus— Time Schedules and Setup. The
Setup menu has two submenus. Y
submenus by selecting the corresponding button:
1.
Time Schedules > All Schedules
2. Setup > All Holidays and Setup > Grouping.
C
M
Y
CM
MY
CY
CMY
K
C
M
Y
CM
MY
CY
CMY
K
Schedule Menu:
1.
a)
b)
c)
a)
b)
2.
To create a new Schedule:
Control:
 Loading...