Touchscreen Data Logger Quick Start Guide (DicksonOne) Page 3
1. ‘Information’ provides details about the logger, including Model, Serial Number, Firmware
Version, Mac Address, Attached Sensors and Channels.
2. ‘General Settings’ allows you to configure the device’s name, time settings (format, time zone,
date), sample interval for logging, units of measurement, screen saving, and brightness
adjustment.
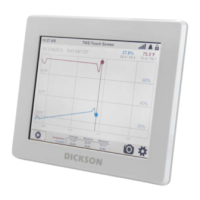
3. ‘Graph’ area allows you to choose between a graph display or text view of readings, statistics,
scaling, determine what channels to display on the main screen (two max), and set min/max
on/off.
4. ‘Network Settings’ is used if your device will be registered to your DicksonOne account. After
connecting your device to the internet (WiFi or Ethernet), the device will display a 6-digit
registration code that is used to register the device to your account. This screen will not be
used for standalone TSB loggers.
5. ‘Alarms’ allows you to enable the alarm (up to two per channel or one high and one low per
channel).
6. ‘Calibration’ provides details of when the sensors were calibrated and allows you to create
calibration alarms as well.
7. ‘Stored Data’ allows you to download the data from the device using USB and/or also delete
the tablet data.
8. ‘Admin Settings’ allows you to set a passcode to secure the device.
Using your Touchscreen Locally (Without Cloud Software)
All touchscreen devices including TWEs and TWPs, can be used as a standalone device without a
DicksonOne subscription.
NOTE: TSBs do not have the option to be used with DicksonOne and therefore can only be used locally.
To set the TWE or TWP as a standalone device:
1. Tap the ‘Settings’ icon.
2. Tap on the WiFi icon in the Settings Menu to open the ‘Network Settings’ screen.
3. Set ‘DicksonOne Enabled’ to OFF.
Using your Touchscreen With Cloud Software
Connecting a Logger to the Internet (TWE/TWP Only)
Connect via Ethernet
1. While connected to power, plug an ethernet cable into the device and an active ethernet jack.
2. Navigate to the ‘Network Settings’ screen.
3. Switch the ‘Network Adapter’ setting to Ethernet.