103
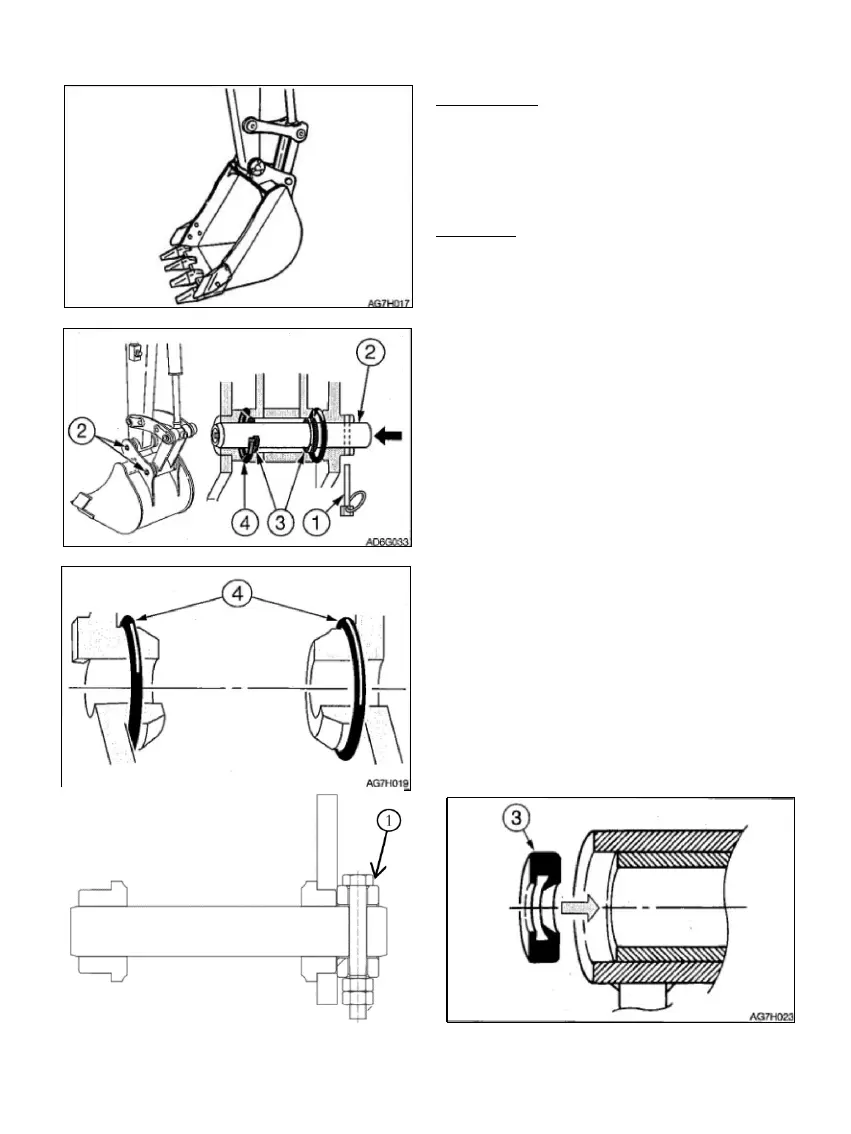
Disassembling
Disassemble the bucket. Check the pin seal ring
(3). Upon detection of deformation or damage,
replace.
Installation
Lower the bucket steadily onto the ground as
shown in above diagram.
Note: While disassembling the tooth pin, adjust
the bucket position in such manner that the
bucket barely comes into contact with the
ground. If the bucket is steadily on the ground,
the resistance will be really high making it
difficult to disassemble the tooth pin.
Place the safety lock handle to locking position
and stop the engine.
Place O-ring (4) onto the bucket, as shown in
above diagram.
Unlock the ring of lock pin (1) and take out the
lock pin (1). Knock the tooth pin (2) from the
bucket by align the pinholes (A) on the bucket
with pinholes on bucket arm (5) and install the
tooth pins (2).
Operate the cylinders to align the pinholes (B)
on the bucket with pinholes on connecting rod
(6) and install the tooth pins (2).