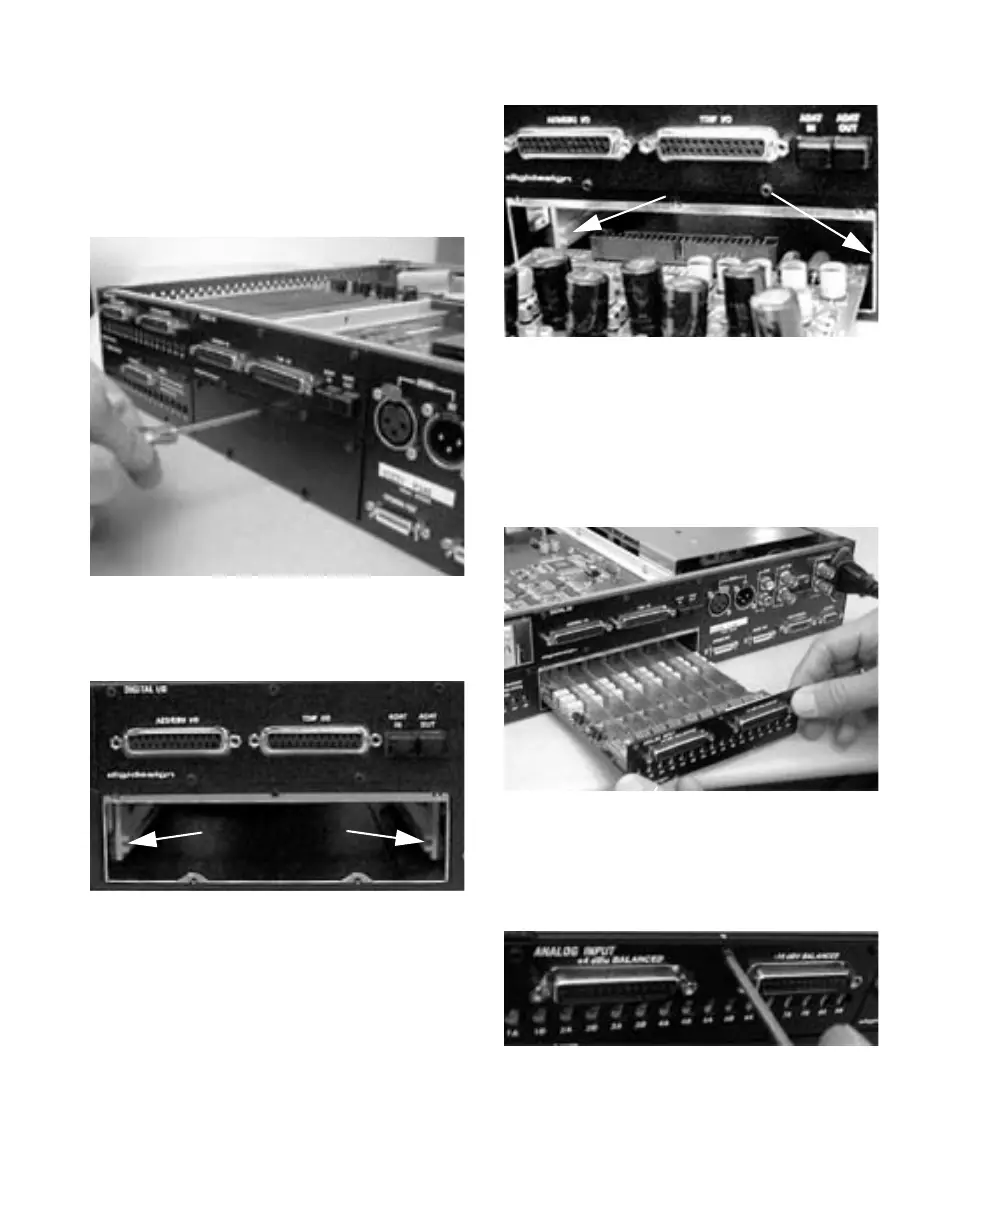
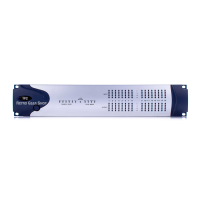
192 I/O Guide14
4 Lift off the top of the 192 I/O and set it aside.
5 Remove the five screws on the cover over the
empty bay. Do not misplace these screws; note
that they are a different size and shape from the
top cover screws.
6 Look into the empty bay to locate the guide
rails for the card to slide in on.
7 Slide the edges of the card into the guide rails
on each side of the bay.
8 Gently push the card back into the bay, lifting
slightly to keep components underneath the
card from touching the back panel.
9 Attach the card’s faceplate onto the back
panel surface of the 192 I/O with the same
screws you removed from the empty bay cover.
Removing the cover on the empty bay
Locating guide rails along sides of empty bay
Placing the edge of the card into the guide rails
Lifting slightly while pushing the card back into the bay
Attaching the card faceplate into the back panel
surface of the 192 I/O