Do you have a question about the DigiTech JAMMAN - MANUAL 2 and is the answer not in the manual?
Key safety warnings and instructions for product use, including electrical safety and handling.
Details on earthing, wire coloring, and precautions against electric shock.
Instructions for making audio connections and connecting the power supply.
Steps to select an unused memory location for recording a new loop.
Guide to choosing the correct input mode (Inst/Mic) for recording.
Setting the Loop Level, Rhythm Level, and Inst Level knobs for optimal recording.
How to initiate recording using the REC/PLAY/OVERDUB footswitch.
Procedure to set the loop point and begin playback of the recorded loop.
How to stop playback and store the recorded loop.
Choose an unused memory slot for recording.
Set a tempo for the rhythm guide track.
Configure the time signature for the loop.
Begin recording the loop phrase.
Define the end of the loop and start repeating playback.
Choose an empty memory location to enable Auto Record.
Press the AUTO REC button to activate the feature.
Press the REC/PLAY/OVERDUB footswitch to arm recording.
Start playing to trigger automatic recording.
Define the loop end and start playback.
End the playback of the recorded loop.
Choose a recorded loop or phrase to add overdubs.
Initiate overdub recording with the REC/PLAY/OVERDUB footswitch.
How to add multiple overdubs to a loop.
Revert the last overdub action using the REC/PLAY/OVERDUB footswitch.
Reapply the last undone overdub.
Clear all unstored recording and overdub data.
Choose a memory location and an Aux input recording mode.
Optional setup for time signature and auto-record functionality.
Cautionary note about permanent data loss during factory restore.
Steps to start the factory restore process by holding STORE.
Steps to confirm the factory restore operation.
| Brand | DigiTech |
|---|---|
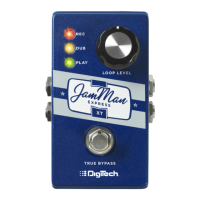
| Model | JAMMAN - MANUAL 2 |
| Category | Music Pedal |
| Language | English |