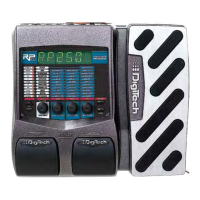
Learn-A-Lick Mode
Learn-A-Lick lets you record a 10 second passage of music and play it back as slow as 1/4 speed without a
change in pitch. This is useful for picking out the notes of a fast solo passage.
There are 6 functions for Learn-A-Lick including:
• Stop (Controlled by the Down Footswitch)
• Rewind (Controlled by the Up Footswitch)
• Play (Controlled by the Down Footswitch)
• Record (Controlled by the Amp A-B Footswitch)
• Playback Speed (Controlled with Select Button)
• Sampled Phrase Volume (Controlled by the Expression Pedal)
Using Learn-A-Lick
1. Connect your MP3/CD/tape player headphone output to the CD/Monitor input jack on the rear panel
using an 1/8” stereo plug. Set the level of the MP3/CD/tape player to a desired listening level.
2. Cue up to the passage you want to record and press pause on the MP3/CD/tape player.
3. Press and hold the Up and Amp A-B Footswitches to access Learn-A-Lick mode. The display briefly
reads: lalick.
4. When the display reads READY,release the pause button on your playback device and press the Amp
A-B (Record) Footswitch. The display reads: RCRDNG and the right two display digits provide a time
elapsed reference while recording. When recording is complete, the phrase is set to an auto-loop play-
back mode indicated by play in the display. Press stop or pause on the MP3/CD/tape player.
5. Use the Select button to choose the playback speed. Successive presses of the Select button advance
through each playback speed up to 1/4th of the original speed. Your interval choices include: 1/4, 3/8,
1/2, 5/8, 3/4, 7/8, and Full.
6. Press the Up Footswitch to step back through the loop at 1 second intervals.
7. The Expression Pedal controls the output level of the recorded phrase.
8. To stop or restart the playback, press the Down (Stop/Play) Footswitch.
9. To record a new passage, press the Amp A-B (Record) Footswitch again.
10. To exit the Learn-A-Lick mode, press and hold the Up and Amp A-B Footswitches simultaneously.
Note: Learn-a-Lick is not available when the RPx400 is connected to the computer via USB.
CD/Monitor In
The CD In feature lets you connect a CD, MP3, or tape player to the RPx400, and play along with your
favorite artists. To use the CD In feature, do the following:
1. Connect the headphone output of your MP3/CD/tape player to the CD/Monitor input using an 1/8”
stereo cable.
2. Press play on your MP3/CD/tape player. The signal from your MP3/CD/tape player is routed to the left,
right, and headphone outputs of the RPx400.
8
Introduction
 Loading...
