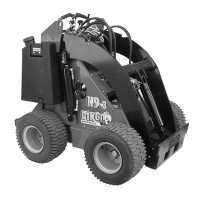
Dingo K9-3 Operation & Maintenance Manual
12
Dingo K9-3 Operation & Maintenance Manual
13
Starting the Engine
Stand on the platform. Move the auxiliary
hydraulics lever to neutral. Follow instruc-
tion on starting engine as detailed in the engine
manufacturer's manual.
Stopping the Engine
Refer to the relevant engine manual.
Note: If the engine has been working hard or
is hot, let it idle for a minute before turning the
ignition key to OFF. This helps cool the engine
before it is stopped. In an emergency, turning
the ignition key to OFF will stop the engine.
Stopping the Dingo
To stop the machine, move the drive control le-
vers to neutral, lower Dingo arms to the ground,
and turn the ignition key to OFF to stop the en-
gine. Remember to remove the key from the
key switch.
CAUTION! If children or bystanders attempt
to operate the machine, someone could be in-
jured. To avoid attempted use by children or
bystanders while machine is unattended, remove
the key from the ignition, even if just for a few
minutes.
Moving a Non Functioning
Dingo
The best way to move a non functioning Dingo
is by forklift or crane. It is also possible to push
or tow a Dingo without the use of the engine. By
adjusting the Over Centre Valve it is possible to
free up the hydraulic circuit, allowing the wheel
motors to turn freely. Please call your nearest
Dingo service centre for more information.
Using Cylinder Locks
IMPORTANT: Normal maintenance should
be completed with the Dingo arms lowered. If
maintenance or repairs requires the Dingo arms
raised, use cylinder lock provided with Dingo.
Attachments
Connecting
IMPORTANT: Use only Dingo approved at-
tachments. Attachments can change stability
and operating characteristics of the machine.
The warranty of the machine may be voided if
used with unapproved attachments.
IMPORTANT: Before connecting any attach-
ments to the machine, make sure mount plates
are free of any dirt and debris.
1 Move pump control lever to slow (turtle)
position.
2 Slowly push the attachment tilt lever forward
to tilt the attachment mount plate forward.
3 Position mount plate into the upper lip of the
attachment’s receiver plate.
4 Raise the Dingo arms while tilting back the
mount plate at the same time.
5 IMPORTANT: The attachment should be
raised enough to clear the ground and the mount
plate tilted all the way back.
6 Turn the ignition key to OFF to stop the en-
gine.
7 Engage the attachment lock pins (the lock pins
should go down 15mm as they turn). Note: Lock
pins are located on the outer edge of the mount
plate and should be turned towards the inside
to engage.
8 Note: Proceed to next step if auxiliary hy-
draulics are required with attachment.
9 IMPORTANT: Make sure all foreign matter
is cleaned from hydraulic connections before
making connections.
10 With the engine turned off move the auxiliary
hydraulics lever to the forward, backward, and
back to neutral position to relieve hydraulic pres-
sure at the hydraulic couplers.
WARNING! Dingo arms may lower when in
the raised position. Anyone under the Dingo
arms could be injured or crushed. To avoid this
hazard always install cylinder locks or a safety
stand. (Contact a Dingo representative if you
are unsure).

 Loading...