Dingo K9-3 Operation & Maintenance Manual
14
Dingo K9-3 Operation & Maintenance Manual
15
Air Filter
IMPORTANT:
The air filter is of extreme importance. It
ensures the air entering the engine is clean.
Dirty air will equate to greatly reduced engine
life. The time interval between changes of air
lter will depend on the operating conditions.
Change of air lter is recommended as opposed
to cleaning of the air lter.
Although the service schedule recommends
50 hour intervals between changes of the air
lter, if dusty conditions prevail, then 8 hours
could be too long.
Never blow out your air filter with
compressed air.
If the lter or lter housing is damaged, stop the
engine immediately and replace the damaged
components. Failure to stop work when the
air lter of housing is damaged could result in
permanent damage.
These bushes/bearings are wear parts and
require regular inspection. (Once a week)
To check the condition of the bushes/bearings:
1 Remove attachment from the front of the
Dingo
2 Raise the arms until the mount plate is at waist
height
3 Grab the mount plate and wriggle back and
forth to try and identify any movement in any
of the joints in the mount plate
4 Grab the arms and wriggle up and down to
detect any movements in joints in the arms.
It is essential that bushes/bearings be replaced
on the rst sign of wear, or costly damage will
occur. Ensure that spare bushes/bearings are on
hand at all times.
To replace bushes:
1 Undo bolt in tag of pin.
2 Slide the pin out of the joint. If any damage to
chrome coating on pin, replace pin.
3 Use bush drift (part no - 141-000-000) to punch
bush from joint.
4 Use bush drift to insert new bush. Careful not
to damage teon inner coating of bush.
5 Use emery paper or similar to clean joint
surfaces (allows pin to slide in easier)
6 Slide pin back into place. Avoid using hammer
to force pin back into position. This can damage
the bush.
7 Replace locking bolt.
Engine Oil
Refer to the engine manual for required fre-
quencies of oil changes, oil types, crankcase
capacity and viscosity.
Changing / Draining Oil
1 Start the engine and let if run for 5 minutes.
This warms the oil so it drains better.
2 Park the Dingo so the drain side is slightly
lower to ensure that the oil drains completely.
3 Then lower the Dingo arms, chock the wheels
and turn the ignition key to OFF to stop the en-
gine. Remove the key.
4 Place the end of the hose in a pan.
5 Remove bung by turning counter clockwise
while holding the nut. Allow to drain.
6 When oil has drained completely, replace the
bung.
Bushes/Bearings & Pins
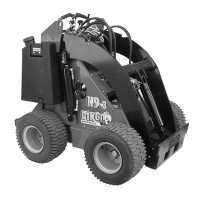
Your Dingo has 9 bushes/bearings and 10 pins.
These are located on either end of the hydraulic
cylinders and on all pivot points of the lift
arms.
Dingo Service Pack
It is recommended that some parts be kept on
hand for maintenance purposes at all times.
The following pack is excellent value, being
considerably cheaper than purchasing the
parts individually. Please phone your Dingo
representative for current pricing of this kit. It
may be necessary to add to this kit depending
on which attachments you have.
n 10 Bushes/Bearings & Pins to suit
n 6 Bearing Seals (if required)
n 1 Bush/Bearing Drift (used for changing
............bushes/bearings)
n 1 Hydraulic Return Filter
n 1 Fuel Filter
n 1 Engine Oil Filter to suit specic
motor
n 1 Air Cleaner Element Inner
n 1 Air Cleaner Element Outer
n 1 Drive chain & Joining Link