5
• Install the unit close to the outside
wall on which the supply and
exhaust hoods will be mounted.
• Have a nearby power supply 120
Volts, 60Hz. (power cord is 3
feet long)
• Mount the unit as level as
possible in order to allow proper
condensate drainage.
• Have access to a water drain for
the condensate of the unit during
defrost.
• Have a certain amount of heat
around the unit (attic installation
is not recommended).
• Installations close to the living
space, such as closets, should be
design and to minimize noise or
vibration transfers.
• Have access for future
maintenance. (10” is
recommended for removal of core)
2 Install the drain hose,
making a “P” trap
INSTALLATION
PRACTICAL TIPS
1 Install the drain nipple.
INSTALLING DRAIN LINE - Drainline not included in kit
Through normal operation and during its defrost mode, the HRV may produce some condensation. This water should
flow into a nearby drain, or be taken away by a condensate pump. The HRV and all condensate lines must be installed in
a space where the temperature is maintained above the freezing point. A “P” trap should be made in the drain line. This
will prevent odors from being drawn back up into the unit.
MOUNTING - EASY WALL MOUNT
LOCATION
The HRV must be located in a heated space where it will be possible to conveniently service the unit. Typically the HRV
w
ould be located in the mechanical room or an area close to the outside wall where the weatherhoods will be mounted.
If a basement area is not convenient or does not exist, a utility room or laundry or closet may be used.
Attic installations are not normally recommended due to:
- the complexity of work to install
- freezing conditions in the attic
- difficulty of access for service and cleaning
Connecting the following appliances to the HRV
is not recommended,
including:
-
clothes dryer
- range top
- stovetop fan
- central vacuum system
These appliance may cause lint, dust or grease to collect in the HRV , damaging the unit.
NOTE: Connecting any of these type of appliances to the HRV will invalidate your warranty
ELECTRICAL
3 prong plug-in power card.
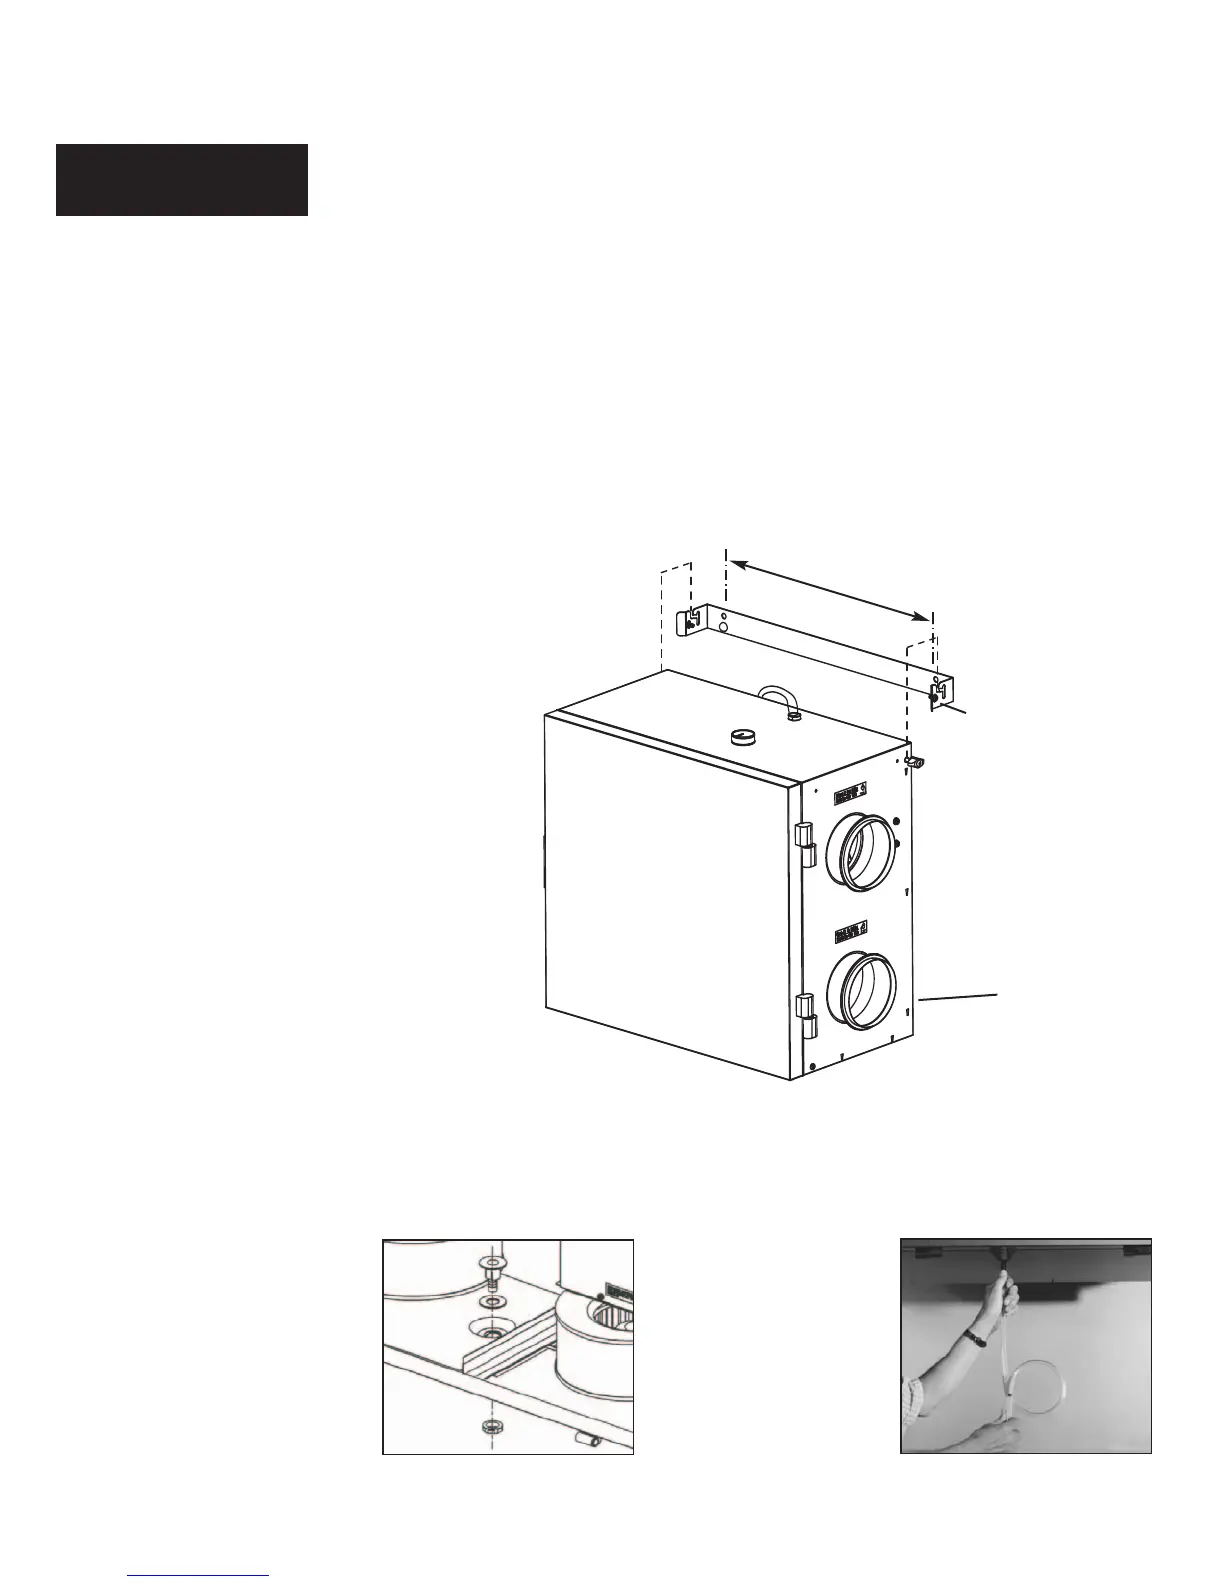
Attach bracket to wall, lift unit
(26 lbs (12 kg) PHR
V96) & slide
nuts into slots on bracket, tighten
scr
ews to secure unit to bracket.
Insert the safety screws & place
wall bumpers to level off the unit.
Safety screws (included)
Place bumpers on back
of unit (included)
16”
(406mm)