1592010870 XWEB3000-5000 EVO STP GB r1.6 12.10.2018.doc XWEB3000/5000 EVO 6/22
4. INSTALLATION
For installation, the XWEB-EVO system must not be opened in any way. If the box is opened, the warranty
will lapse.
XWEB-EVO can be installed in various ways based on the type of user interface access that you wish to
provide for the final user. Below is a description of the most complete procedure, i.e. where the system's
user interface can be used entirely in local control. If the system has already been configured and you wish
to use the interface through modem or Ethernet, points 5 to 9 may be optional. The particular features of
these types of connectivity are described herein.
To set up a local installation of the system, we recommend having the following equipment available:
• a Phillips and a slot-head screwdriver;
• a PS2 or USB mouse;
• a PS2 or USB keyboard;
• a monitor with a DVI or VGA connector. We recommend
using high definition monitors
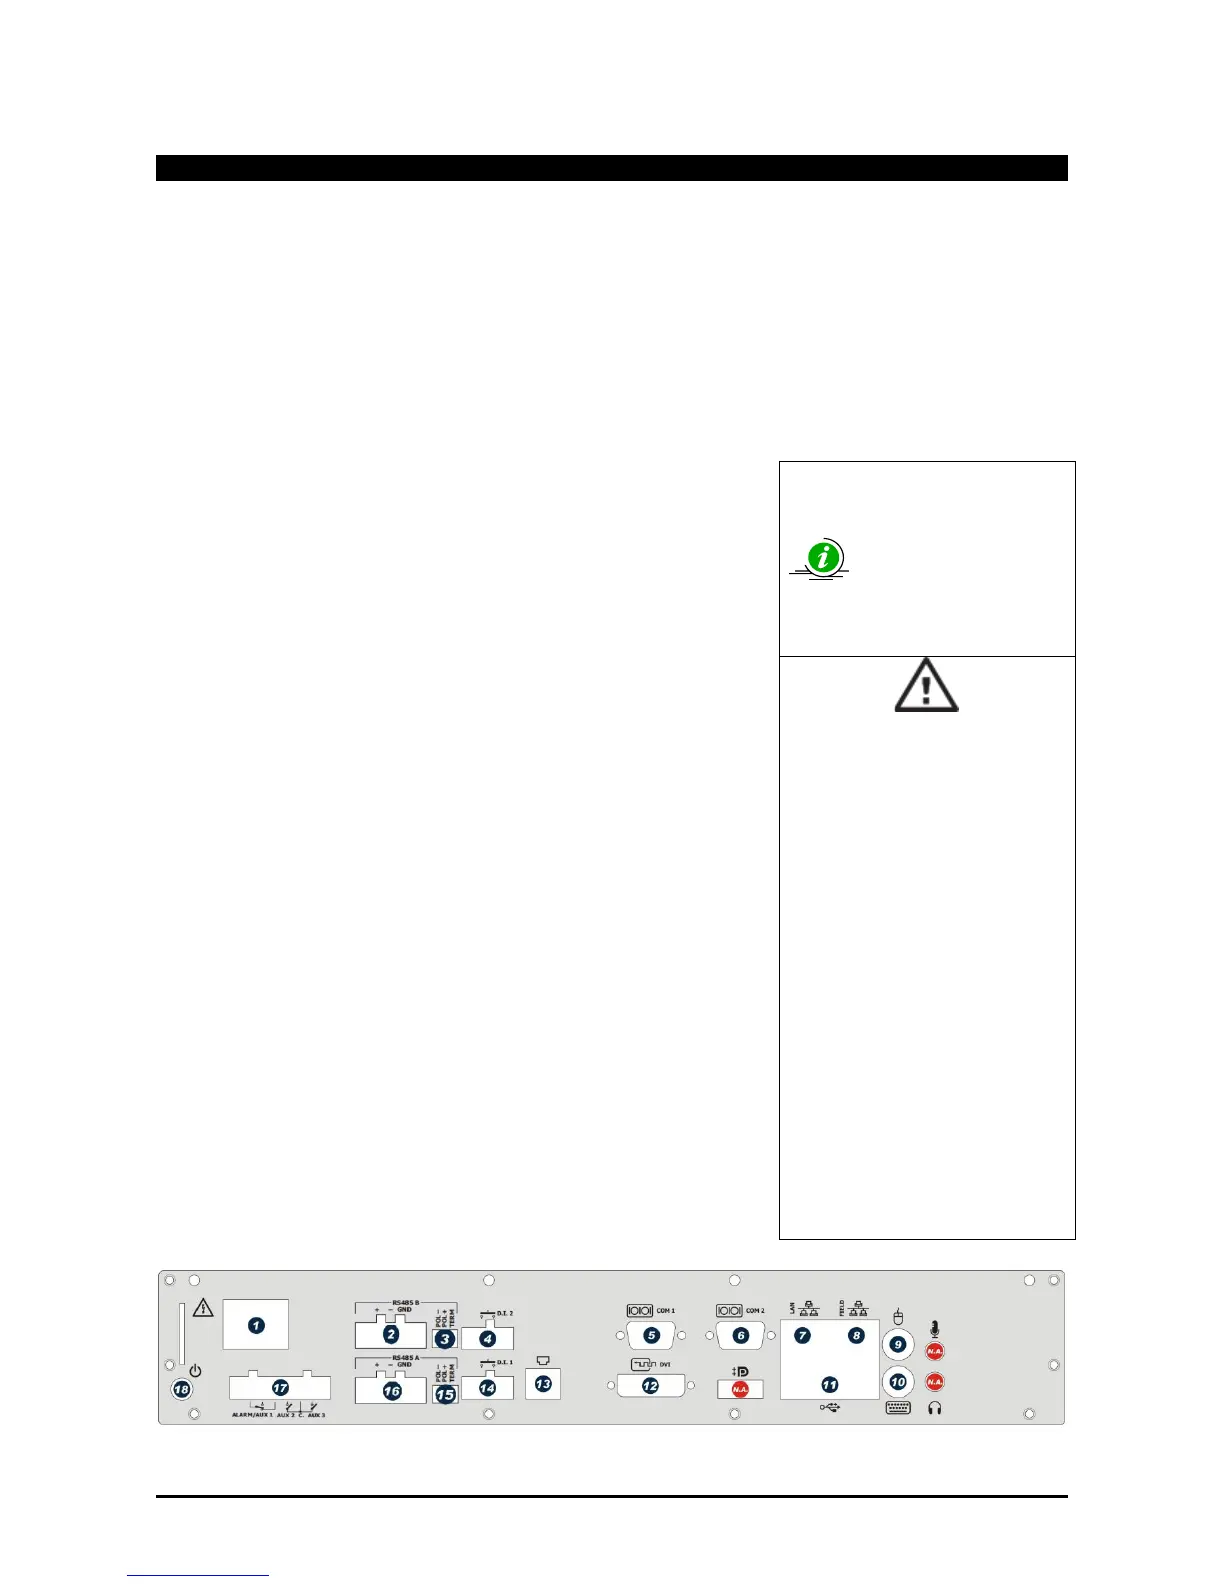
The system must be installed referring to the figure below, which
illustrates the rear XWEB-EVO panel, and following the points listed
here:
1. The product has a power plug with protective earth. Make sure that
the electrical system has a protective earth connection;
2. Attach the XWEB-EVO device in the position it will be used in. If it is
installed on a table, set the rubber feet up in the holes on the
underside of the device. For rack installation, on the other hand, use
the supplied brackets and screws.
3. Connect it to the power mains by the supplied power cord (1). Set
the power plug up so that it is easily accessible at all times. Note:
Do not turn the system on;
4. Connect the RS485, the relays and digital inputs (2)(4)(16)(14)(17),
and end and/or polarise the line, if necessary (3)(15);
5. Connect any telephone lines and/or LAN network cables (7);
6. Connect any keyboard and mouse (9)(10)(11);
7. Connect any monitors (12);
8. Connect any printers (11);
9. Connect any modem: internal modem (13) or external modems (05).
The cable must not be any longer than 10 m.
10. It is now possible to turn the system on by pressing and releasing
(18);
• Avoid direct passage between
operators as much as possible
(to avoid electrostatic induction
and subsequent discharges);
• If the electrical voltage supply
differs from the required rating,
this could seriously damage the
system;
• Connection errors (and
connections that differ from the
prescribed ones) can pose a
danger to operator safety and
cause faults in the system and
to the instruments that are
connected to it;
• Insert one or more easily
accessible disconnecting
devices to the exterior of the
device to separate the device
from the power mains;
• Do not use the device in
environments with flammable
gases.
• Do not modify the device in any
way.