©
2014 DJI. All Rights Reserved.
7
ZENMUSE H3-3D
User Manual
Installation
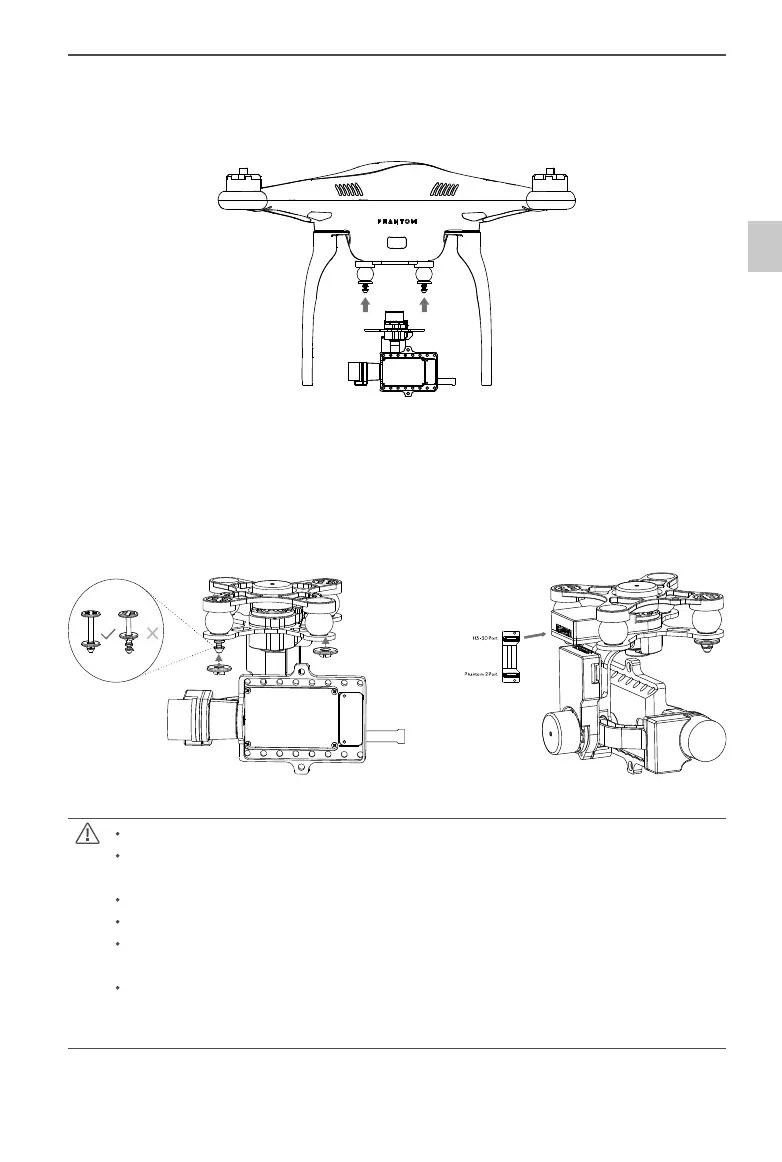
3. Cover the securing pins with washers to lock the damping unit in place. Only push the
washers past the rst nut.
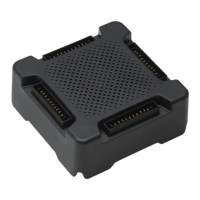
4. Plug the 8-pin cable from the Phantom 2 into the Phantom 2 port on the anti-interference
enhancement board. Then use the supplied 8-pin cable to connect the H3-3D port on the anti-
interference enhancement board to the 8-pin port on the gimbal.
2. Attach the bottom plate of the damping unit to the upper plate. To do this, insert the securing
pins on the tip of the vibration absorbers into the mounting holes on the bottom plate.
Aircraft, camera, and accessories are not included with the gimbal.
Camera must be aligned to face the nose of the aircraft, and the gimbal should be parallel
with the aircraft itself.
The gimbal is calibrated before delivery. Do not attempt to adjust or calibrate it yourself.
Do not remove any screws in the gimbal, which may result in reduced performance or failure.
Do not unplug any cable attached to the gimbal ports or change the mechanical structure of
the gimbal.
The 8-pin port on the H3-3D should only to be used to connect the gimbal to your aircraft.
Do not connect other devices (such as a 5.8G video downlink transmitter) to this port,
otherwise the gimbal may be damaged.
 Loading...