©
2014 DJI. All Rights Reserved.
11
ZENMUSE H3-3D
User Manual
3S
AV
6S
A
E
T
R
U
X1
X2
X3
M1
M2
M3
M4
M5
M6
F1
F2
+-
-+
LED EXP
2S
V-SEN
X3
EXP.
GPS
3V 5V
6S
@
NAZA
PMU
V2
2S-6S
V-SEN
LED
+ -
NAZA-M V2 Connection Diagram
NAZA-M Connection Diagram
Video Connection
The camera’s video signal is transferred to your wireless video transmission module from the
GCU by using the gimbal video signal cable. Follow the gure below to complete the connection.
3S
AV
6S
A
E
T
R
U
X1
X2
X3
M1
M2
M3
M4
M5
M6
F1
F2
NAZA
MUTI POTOR
V2
+-
-+
LED EXP
2S
V-SEN
X3
EXP.
GPS
3V 5V
6S
@
NAZA
PMU
V2
DIY power
connector
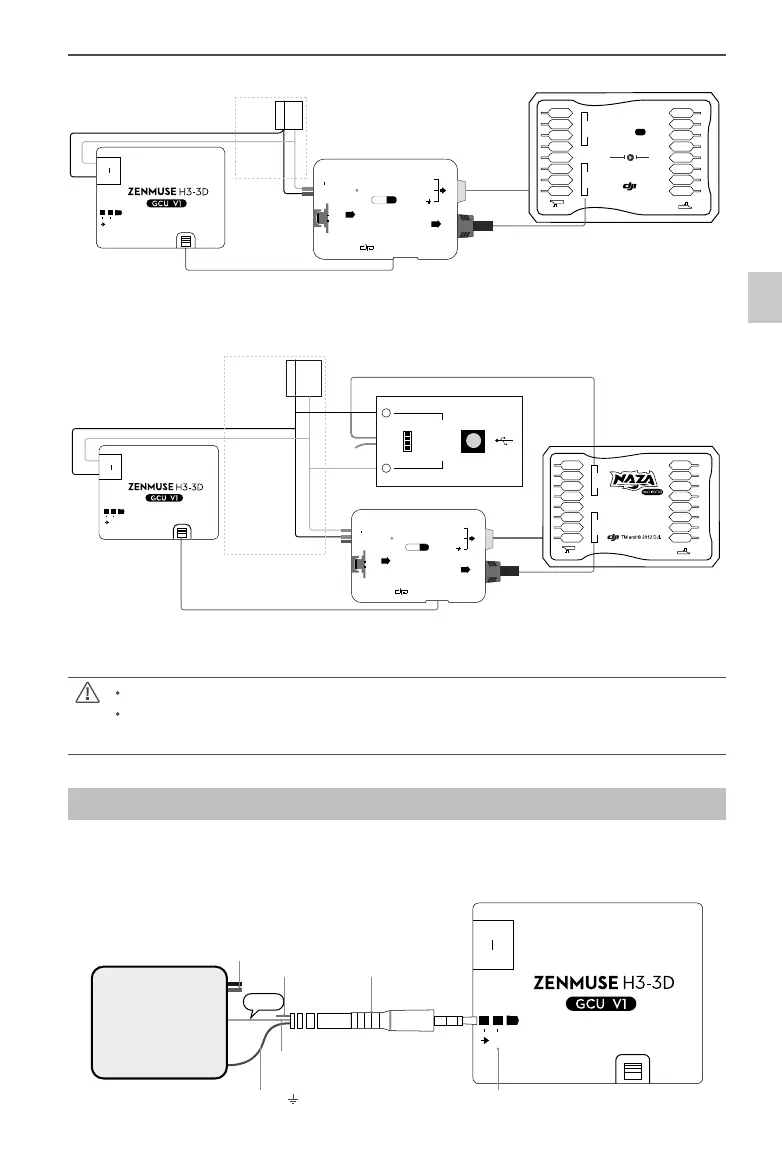
The PMU and GCU can both connect to the same battery.
Control the tilt motion via the X1 channel. Properly congure the corresponding channel on
the remote controller.
Power
Video Signal
GND
3S
AV
6S
Wireless Video Transmission Module
Air System
Yellow
External Power
Gimbal Video
Signal Cable
Leave as-is
Video Signal(Yellow:AV)
Video Signal Port
DIY power
connector
Leave as-is
GND(Black:
)
GCU Connection
 Loading...