DOLMAR GmbH
16
1
1
2
5
3
4
7
8
6
9
10
B
B
12
11
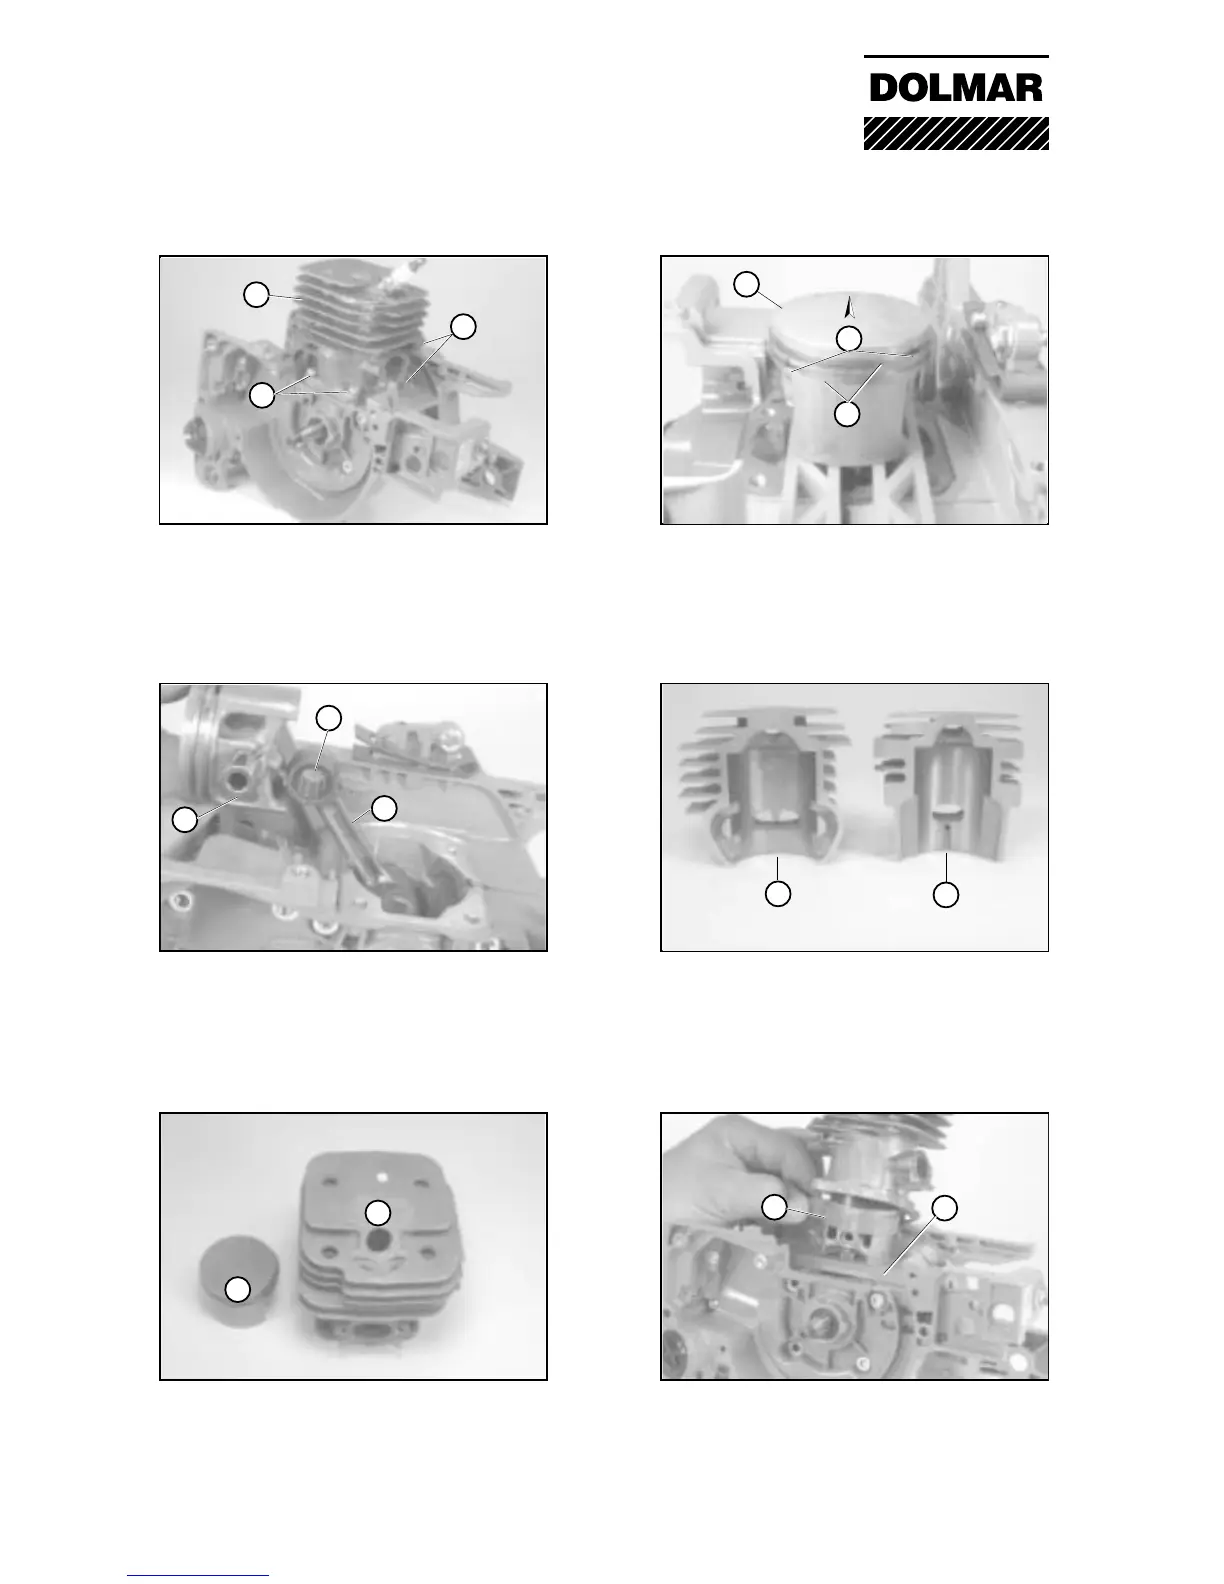
10-01 Removing the cylinder
To remove the cylinder, unscrew the four
cylinder attachment screws (1) . Lift off the
cylinder from the housing and piston.
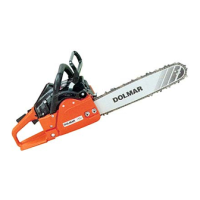
10-01 Replacing the piston rings
Spread the piston rings (3) at the ring cap (4)
and carefully remove the piston (5).
Note: When assembling, ensure that the arrow
points to the silencer.
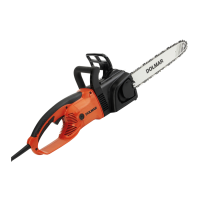
10-01 Removing the cylinder
Remove the gudgeon pin retaining ring and
press out the gudgeon pin (6). Remove the
piston from piston rod (7) with bearing (8).
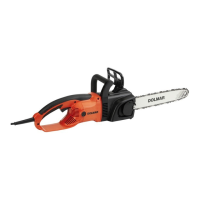
10-01 Different cylinder design
Die cast cylinder (9) for models 109/111 and
piston with one piston ring.
Henkel cylinder (10) for models110/115 and
two piston rings.
10-01 Cylinder and piston marking
In case of Henkel duct cylinders, piston and
cylinder are precision-machined to form a
single assembly. The identification A, B or C
can be found on the top part.
10-01 Installing the cylinder
Place the fork (11), no. 944 600 001, on the
crankcase, align the piston rings (3) and
compress them using the tension band (12).
Pass the cylinder over the piston while sliding
the tension band downwards.
10 Cylinder and piston