CAUTION: Before doing any work on the guide bar or
chain, always switch off the engine and pull the
plug cap off the spark plug (see "Replacing the
spark plug").Alwayswearprotectivegloves!
CAUTION: Start the chain saw only after having assembled
itcompletelyandinspected.
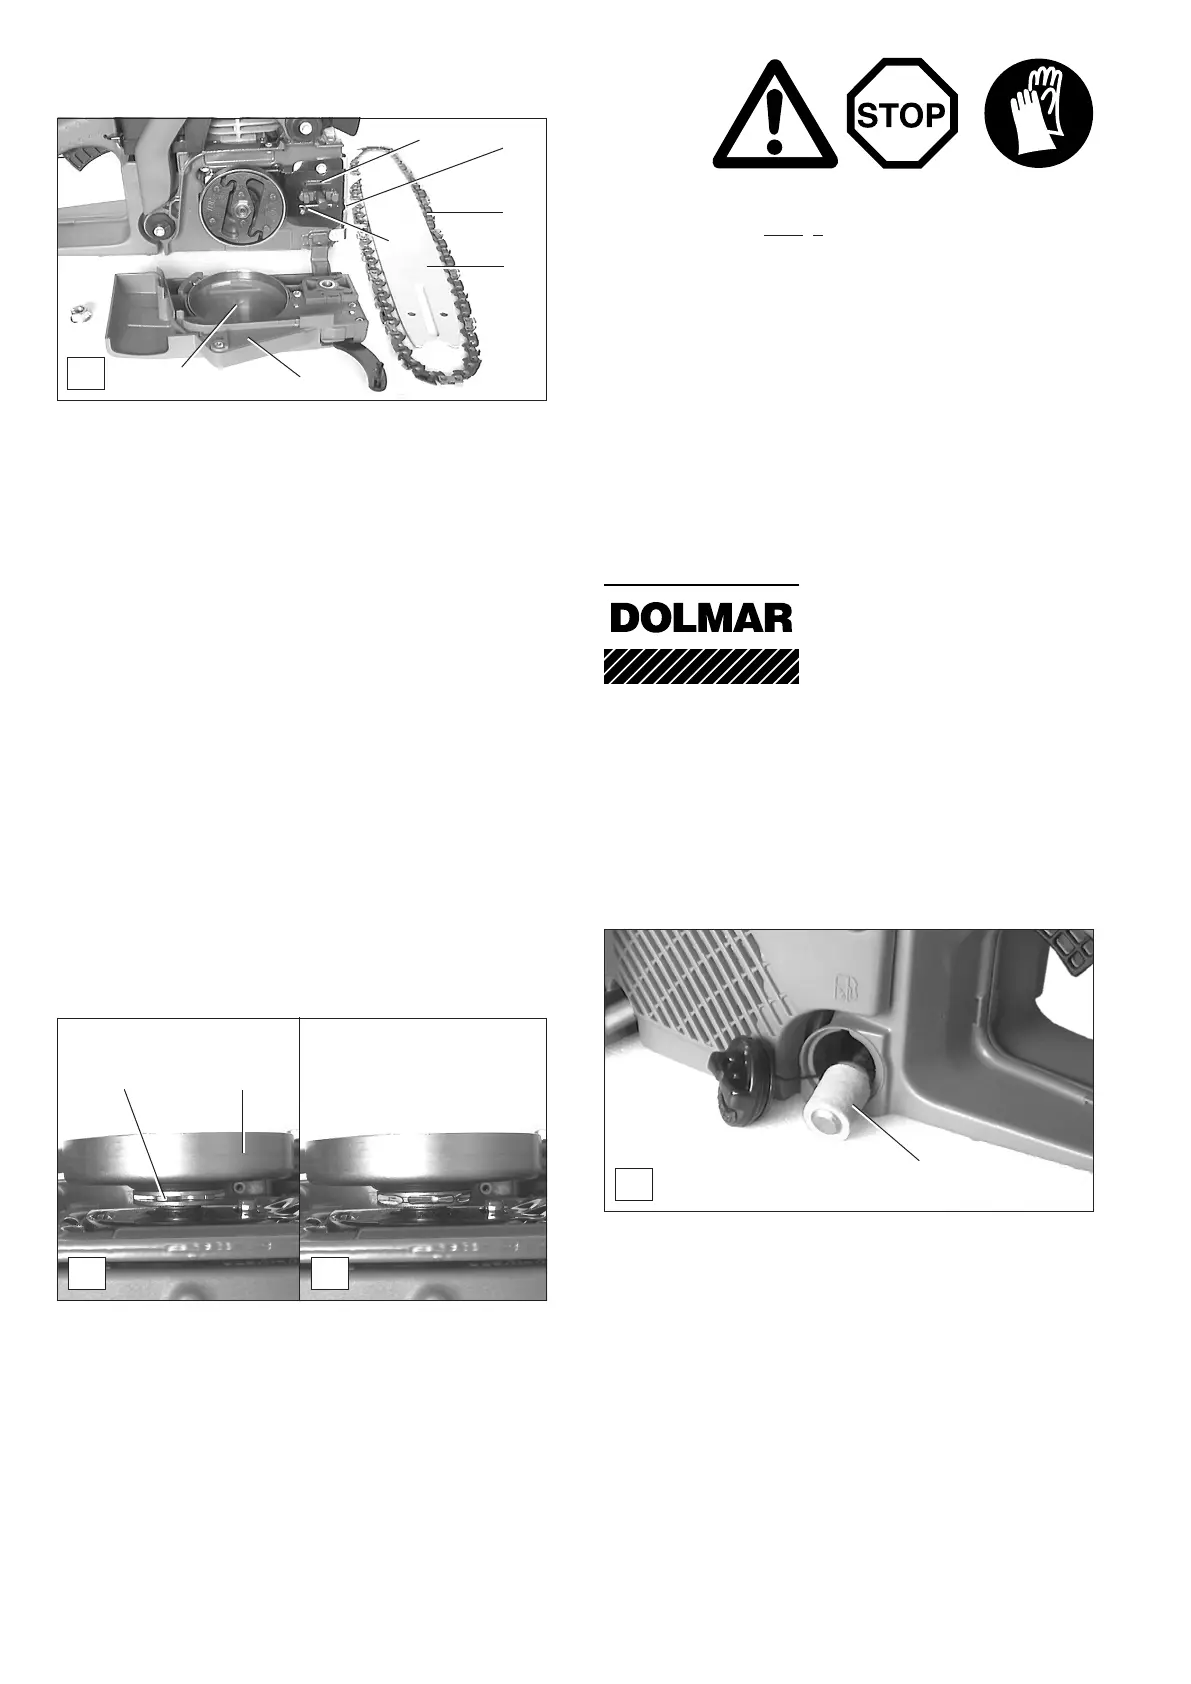
Cleaning the brake band and sprocket interior
‑ Remove the sprocket guard (A/1) (See "PUTTING INTO
OPERATION" gs. A and B).
‑ Turn the chain tightener screw (
A/2) to the left (counter‑
clockwise) until you feel resistance.
‑ Remove the chain (
A/3) and guide bar (A/4).
‑ Clean the interior with a brush, in particular the brake‑band
area (A/5).
NOTE:
Make sure that no residue or contaminants remain in the oil
guide groove (A/6) and the chain tightener (A/7).
‑ For replacing the guide bar, chain, and sprocket see
"PUTTING INTO OPERATION".
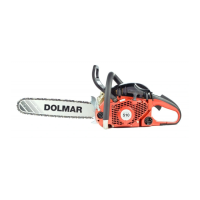
Replacing the suction head
The felt lter (D/1) of the suction head can become clogged.
It is recommended to replace the suction head once every
three months in order to ensure unimpeded fuel ow to the
carburetor.
To remove the suction head for replacement, pull it out
through the tank ller neck using a piece of wire bent at one
end to form a hook.
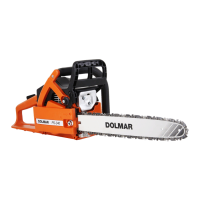
Check the sprocket (B/1) before mounting a new chain.
The sprocket is located underneath the clutch drum (B/2).
CAUTION:
Worn out sprockets (C) may damage the new chain and must
therefore be replaced.
Do not attempt to replace the sprocket yourself. Sprocket re‑
placement requires special training and tools and must be done
at a DOLMAR service centre.
NOTE:
The chain brake is a very important safety device and like
anyothercomponentsubjecttonormalwearandtear.
Regular inspection and maintenance are important for
your own safety and must be done by a DOLMAR service
centre.
Replacing the saw chain
CAUTION:
Use only chains and guide bars designed for this saw (see
the Extract from the spare‑parts list)!
SERVICE
A
1
2
3
4
5
6
7
D
B
1
2
C
1