(Bulletin
R55/7A
continued
4. Tighten screws securely to obtain proper seal.
5.
Install heating elements completely back into
the pocket and plug in (FIG.
Fl).
6. Reconnect burner assembly to chimney (FIG.
Fl
).
7. Reinstall capillary tube into proper position
(FIG. F2).
FIG. F3
REMOVAL OF COOLING UNIT:
1.
2.
3.
4.
5.
6.
Remove six (6) screws from burner cover
(FIG.
Gl).
Disconnect burner from chimney (4 screws)
(FIG.
Gl).
Remove heaters from boiler case (FIG.
G1).
Carefully pull out thermostat capillary tube
(FIG.
G1).
Remove two
(2)
evaporator screws and take
out ice tray support (FIG. G2).
Remove eight (8) screws holding unit from
rear (FIG.
G1).
Remove
two (2) screws holding gas line
gasket (FIG.
Gl).
6
/
l THERMAL MASTIC IS NOT USED
G.
Category
#7
RM182
5.
6.
7.
Tighten screws securely to obtain proper seal.
Install the heating elements completely back
into the pocket.
Reconnect burner assembly to chimney and
replace cover.
FIG.
G1
FIG.
G2
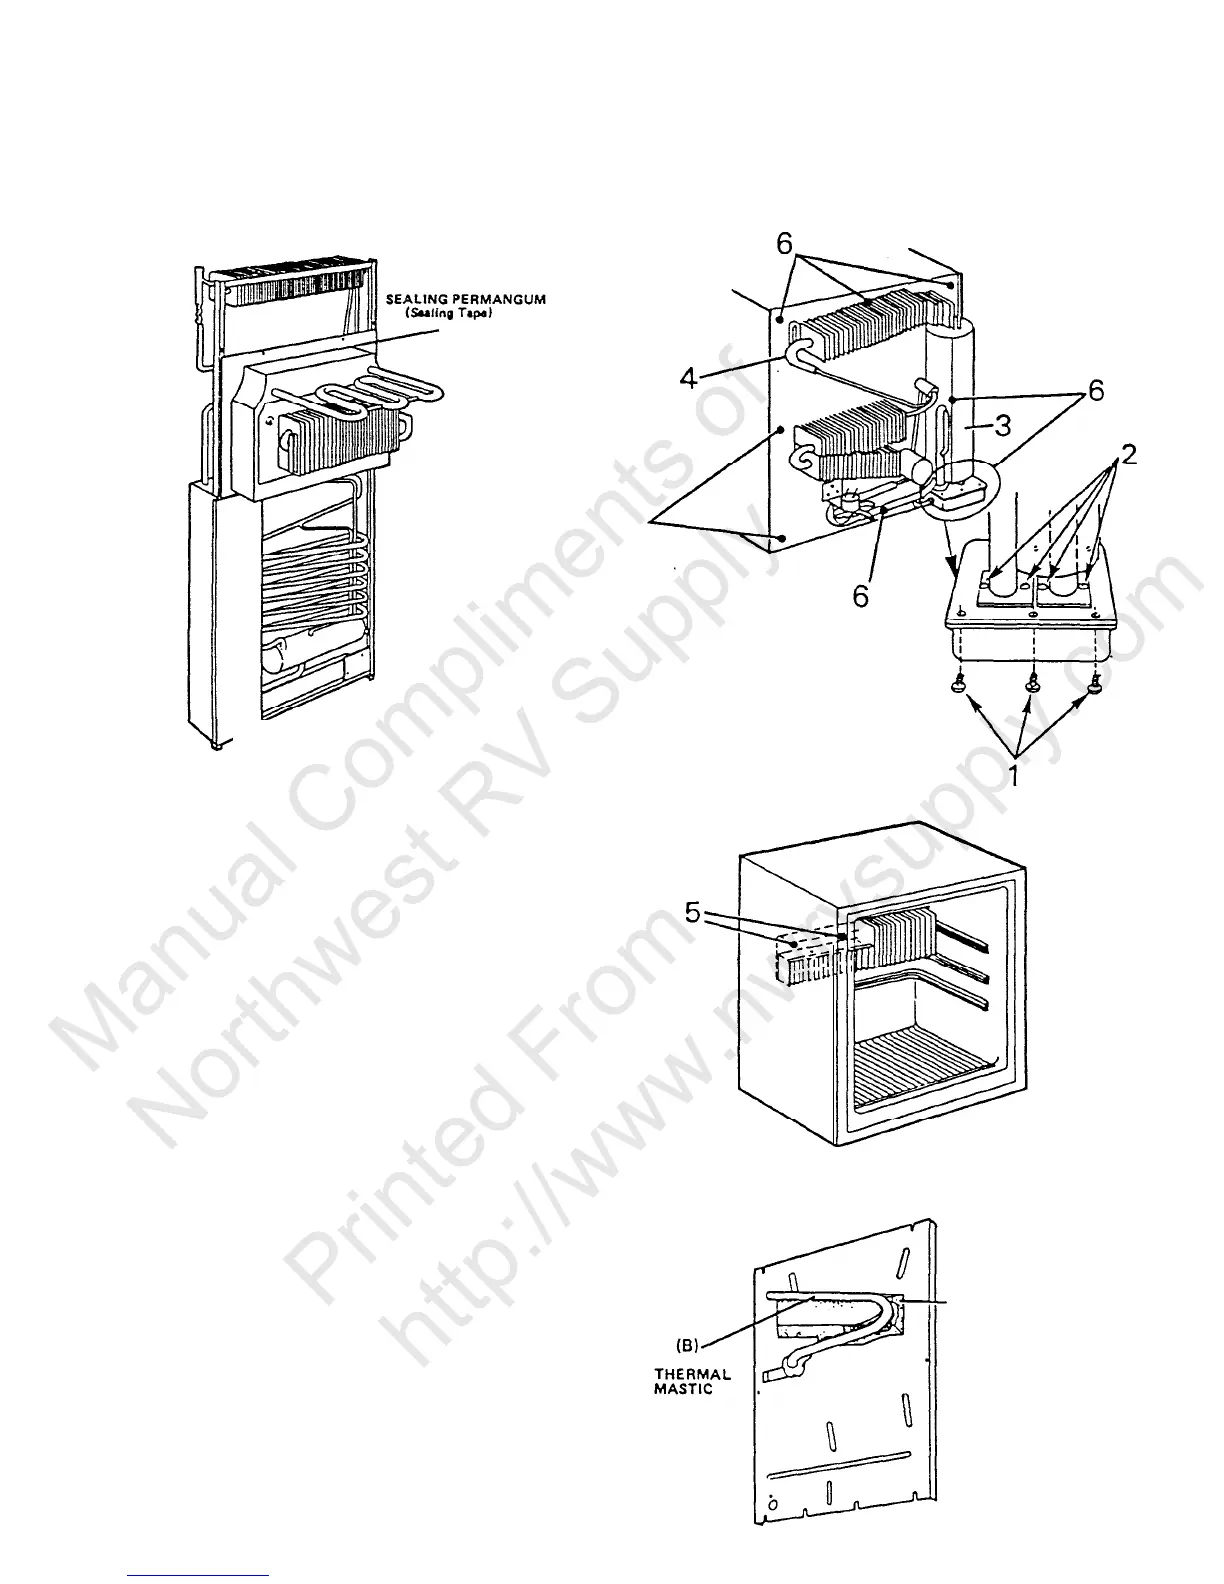
INSTALL REPLACEMENT COOLING UNIT:
1.
2.
3.
4.
Trim the Styrofoam portion of the cooling
unit if
it does not go freely into the
refrigerator.
Apply thermal mastic on the evaporator coil
(B; FIG. G3).
Apply sealing permagum (sealing tape) (A;
FIG. G3).
Reinstall thermostat capillary tube.
D-9-9
(A
SEALING PERMAGUM
(Sealing
Tape)
FIG. G3
 Loading...