13
EN
Value Air Distribution Box (ADB), Mechanical Pre-Installation
6.2.1 Using an Existing Roof Vent
Opening
I
If the roof does not have an existing roof vent, skip
to “Making a New Roof Opening” on page13.
This section describes how to prepare the RV roof when
using an existing vent.
1. Shut off the gas supply, disconnect the 115 VAC
power from the RV, and disconnect the positive (+)
12VDC terminal from the supply battery.
2. Unscrew and remove the roof vent.
3. Remove the caulking compound around the
opening.
4. Seal the screw holes and seams where the roof
gasket will be located. Use a good grade of
all-weather sealant.
5. Measure the roof opening (review “Placement
Requirements” on page9). If the roof opening is
within specifications, skip to “Routing the Wiring” on
page14.
6. If the opening needs to be resized, proceed to
“Making a New Roof Opening” on page13.
– If the opening exceeds 14.4 x 14.4 in.
(366 x 366mm), it will be necessary to reduce the
size of the opening.
– If the opening is less than 14.1 x 14.1in.
(358 x 358mm), it ill be necessary to enlarge the
opening.
6.2.2 Making a New Roof Opening
I
If the roof has an existing roof vent, see “Using an
Existing Roof Vent Opening” on page13.
This section describes how to prepare the RV roof when
making a new roof opening.
1. Shut off the gas supply, disconnect the 115 VAC
power from the RV, and disconnect the positive (+)
12VDC terminal from the supply battery.
2. Carefully mark the required roof opening. See
“Placement Requirements” on page9.
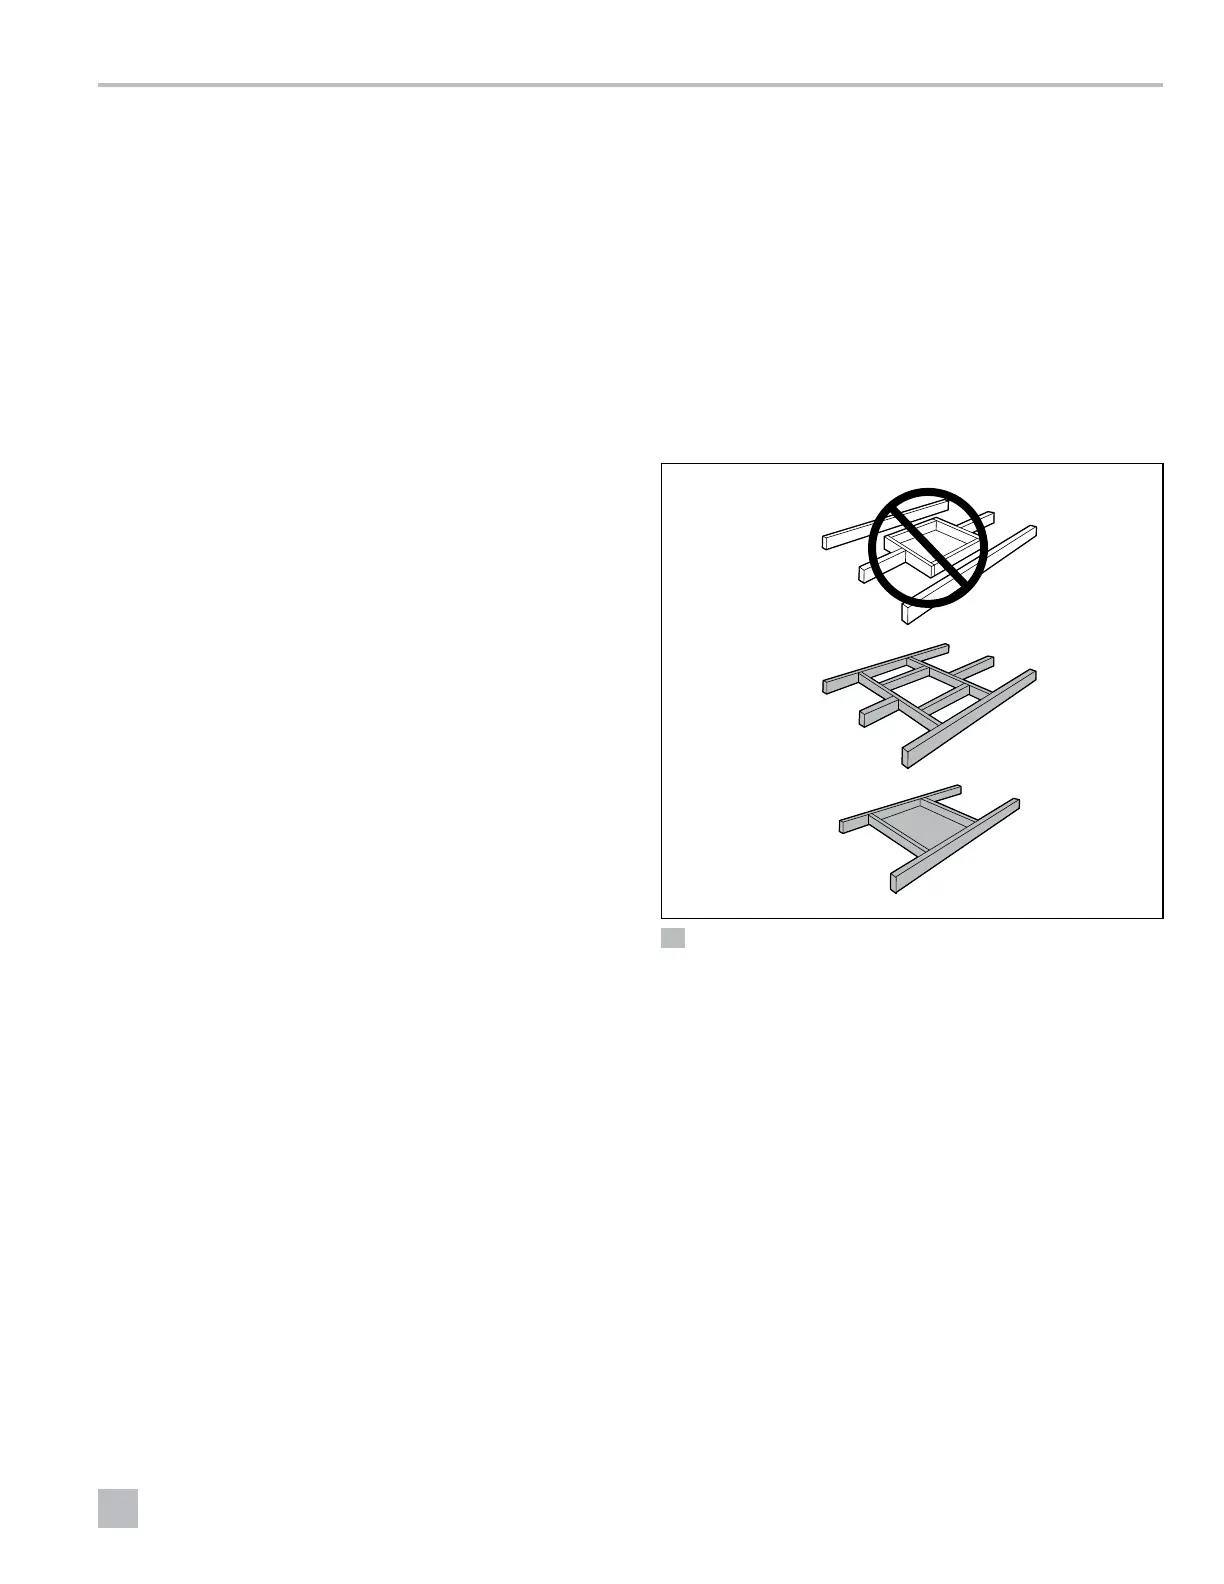
q
w
e
15 Structure for a New Roof Opening
q
Incorrect
e
Correct
w
Correct
3. Make sure the new opening does not compromise
the roof’s structural integrity.
– Do not cut the roof structure or the raers.
– The raers should remain supported by a cross
beam.
– The opening should be between the raers.
4. Carefully cut the required roof opening.
 Loading...