28
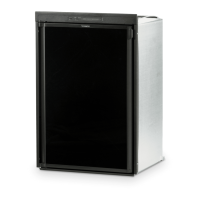
10.7 Timing Motor
This is a low-wattage, stall-type motor which is geared to
the timing cam and ice ejector. It is a one RPM motor. To
check the motor, disconnect power to the appliance and
test for continuity between the two leads. If you DO NOT
have continuity, replace the motor. If you have continuity
and the motor runs, DO NOT replace.
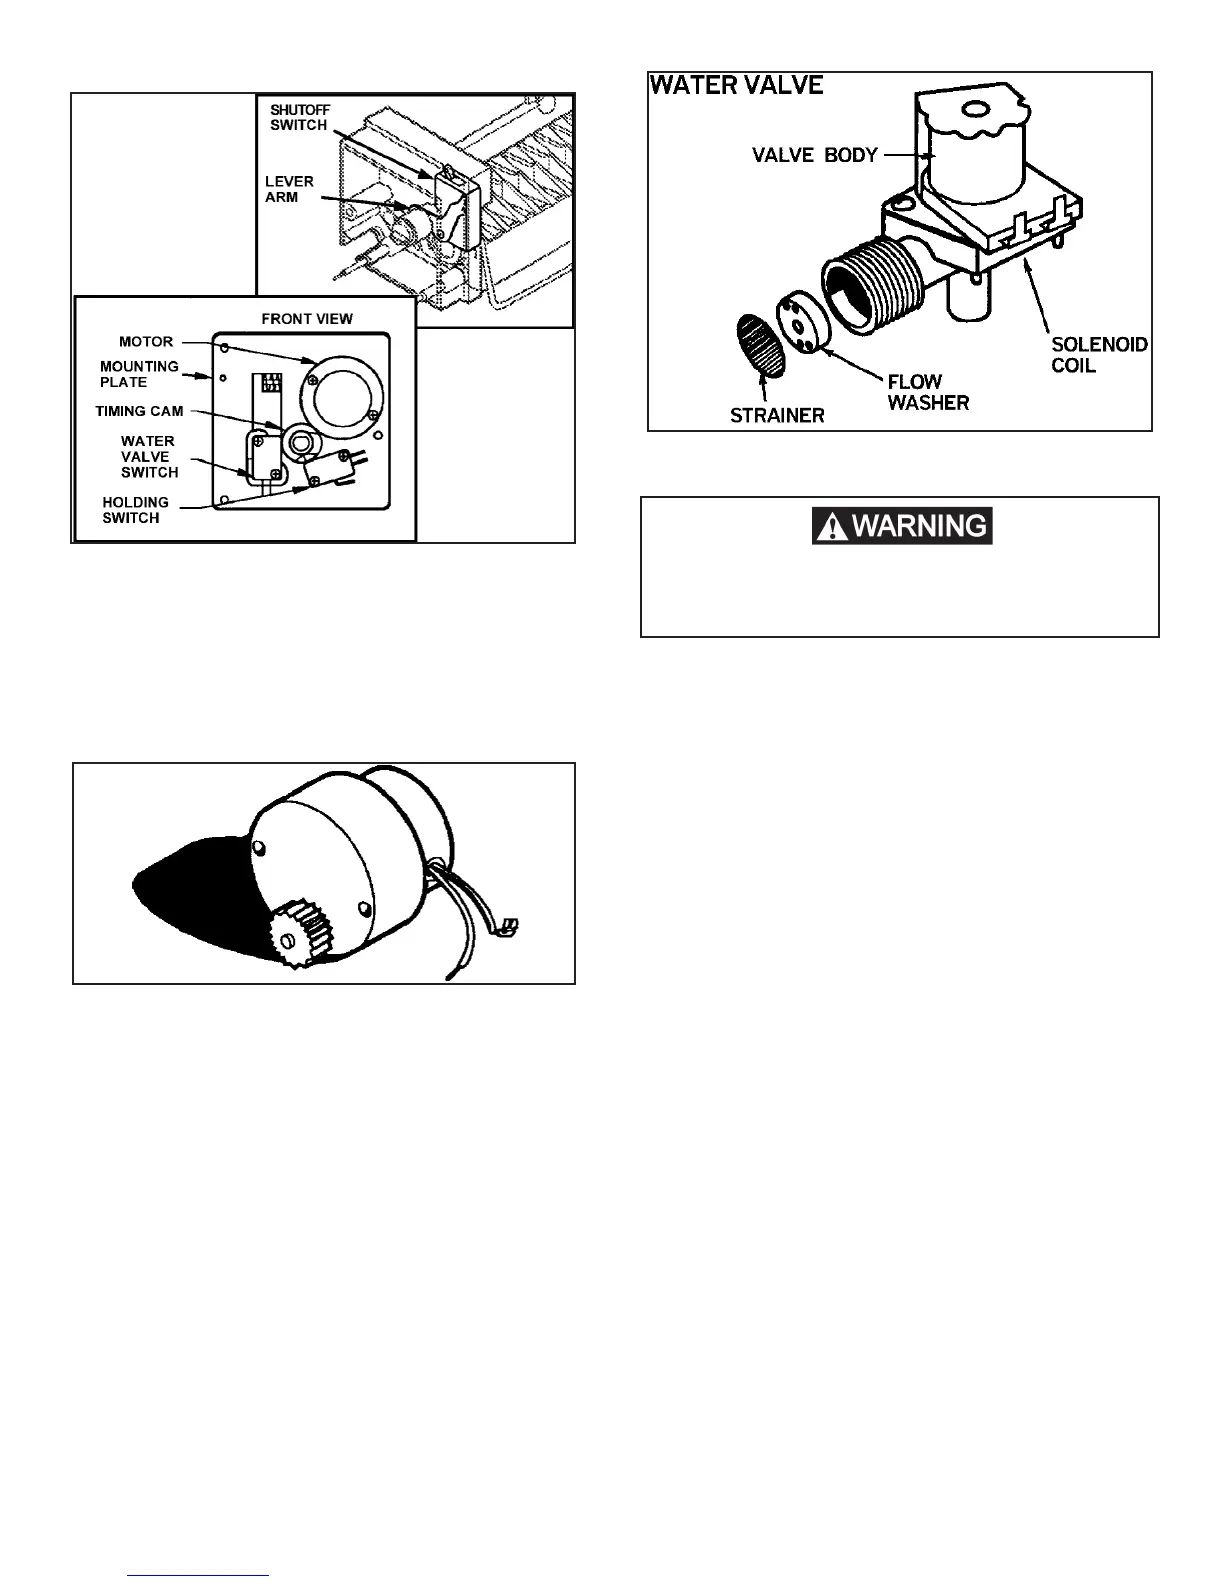
10.8 Water Valve
This valve is solenoid operated. When it is open it re-
leases water from the source to the mold. The amount
of water is proportional to the length of time the water
valve switch is held closed by its timing cam. Disconnect
power to the appliance, remove the wires to the water
valve solenoid coil, and check for continuity between the
two terminals. The ohms should be between 200 to 500.
If you have continuity, the solenoid is good. It takes 10-15
watts to energize the solenoid coil. The mold heater and
coil are in series. When the mold heater is activated, this
causes the voltage to drop to about 105 VAC at the coil.
The valve has a ow washer inside which acts as a pres-
sure regulator. A strainer is installed to prevent dirt, rust,
etc, from entering the valve. Check for any debris which
might obstruct the ow of water, or prevent the valve from
closing completely when the circuit is not energized. Re-
move any obstructions. If the valve still fails to operate
properly, replace it. If the valve has been cracked from
freezing this would not be a warranty item.
This is an energized circuit. Shock can occur
if not tested properly. Testing is to be done
by a qualied service technician.
10.9 Ice Maker Replacement
It may be necessary to replace the entire ice maker as-
sembly. Disconnect power to the appliance. Disconnect
the 4 pin connector from the ice maker unit. Check each
wire for continuity to make sure the wiring is good before
replacing the ice maker unit. If there is no continuity on
any of these wires, replace or repair them as necessary
and recheck the ice maker unit to determine whether the
problem was in the wiring or the unit itself. Remove the
three screws holding the unit to the plate. Before replac-
ing the ice maker assembly check the temperature in the
freezer. For the unit to cycle it should be 12 degrees or
cooler as the mold thermostat starts the cycle.
10.10 Water Fill Adjustment
The correct water level in the mold is important for the
proper production of ice. The size of the ice cubes de-
pends on the amount of water which enters the mold. The
cubes should be approximately 1/2” wide, 3/4” high and 2-
1/2” long. If the water overows in the mold, rst check to
see if the ice maker unit is level in the appliance. Next en-
sure that the appliance is installed level in the RV. If there
is still water overow, adjustment of the water ll screw is
necessary. Locate the screw on the ice maker assembly.
Turn the screw as necessary toward the “+” or “—” side.
One full turn of the screw will make an 18 cc change in
the amount of water. DO NOT turn the screw more than
one full turn at a time. If the water level is too high, it can
also cause the ejector blades to become frozen in the ice.
Follow the procedures above to correct the problem.
 Loading...