EDIT
Press [TRANSPOSE +] and [OCTAVE +] at the same time to enter the Edit state , the LED of
[TRANSPOSE +/-] and [OCTAVE +/-] blinking.
© CC(ASSIGN):
l
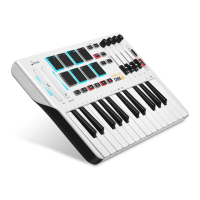
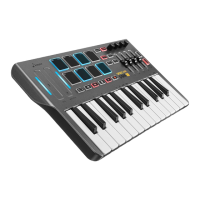
Assign each unit(Touch Bar, PAD, Button, Knob, Slider, Pedal, Keyboard)’s number of
the CC(or Note, or PC) message.
l Press [CC] to enter CC Assignment state, choose one unit you want to assign , by press
or move it , the LED beside it will light
:
F
if you choose K1~K4, the [TRANSPOSE +] blink
;
F
if S1~S4, the [TRANSPOSE -] blink
;
F if PEDAL, the [OCTAVE +] blink;
F if the Keyboard , the [OCTAVE -] blink.
l
Use the number key 0~9 to enter the number like this way: 000, 001, 002,......127.
l Choose another unit you want to assign one by one before EXIT or ENTER.
©
CN
(
CHANNEL
)
:
l
Assign each unit’s channel.
l Press [CN] to enter Channel Assignment state, choose one unit you want to assign, the
same as above.
l Press any blank key (the key without any function on it ) of the Keyboard to choose the
Keyboard.
l Use the number key 0~9 to enter the number like this way: 00, 01, 01, ......16.
l Choose another unit you want to assign one by one before EXIT or ENTER.
©
MODE:
l
Assign the mode of the Buttons.
l
Press [MODE] to enter Mode Assignment state, choose one button you want to assign.
l Use the number key 0~1 to enter the number like this way: 0 or 1.
l Choose another button you want to assign one by one before EXIT or ENTER.
© CURVE:
l
Assign the touch curve of PAD or Keyboard.
l Press [CURVE] to enter Curve Assignment state, choose PAD or Keyboard you want to
assign.
l Use the number key 0~4 to enter the number like this way: 0,1,......4.
©
EXIT: Exit the EDIT state without any change.
© ENTER: Exit the EDIT state with the change.
USBSUPPLY:5V 100mA