EasyManua.ls Logo

Dormakaba ED50LE - User Manual

Dormakaba ED50LE
2 pages
Print Icon
To Next Page IconTo Next Page
Loading...
ED50LE/ED100LE/ED900 108125350 www.dormakaba.us 09-2021
Quick Start Guide
ED50LE/ED100LE/ED900
The operator must be completely installed per the
applicable dormakaba USA Inc. ED operator
Installation Instruction Manual.
Door must be closed.
Mode switch in the CLOSE position.
Step
Directions Expected results
Power switch to ON position.
A series of numbers and letters will show
up on the display.
This will stop after two horizontal dashes
side by side move up and down several
times.
While the dashes are moving up and down,
press the bottom button on the display.
This will identify which way the unit is
mounted.
Letters and numbers will now display
right side up.
The display will show a “P“ on the right with
a rotating segment on the left.
When the braking circuit plug is in the
correct position the door will easily Press
open and close slowly. If the door is very
hard to Press open change the jumper
position.
28
A
B
> 3s Reset
< 3s Quit
> 3s
PRG
< 3s
LEARN
Fact-Setup
> 3s
> 8s
Press and hold the right button until Parameter
ID is displayed (approximately  seconds), then
release the button.
Parameter ID will appear (ex. AS).
Press the right button. Displays the current setting.
Press the right button again. Display will flash the current setting.
Press the up and down buttons to change the
setting.
Press the right button to accept the changes.
Displays the new parameter
setting.
Press the left button to return to the
programming menu.
Displays the current Parameter ID
(Step ).
Press the down button to go to the next
parameter setting (or)
Go back to Step .
Press the left button to exit programming menu.
Display will show a rotating
segment and a “”.
NOTICE
This guide is intended to be used as a reference to assist in
programming the dormakaba operator in accordance with
ANSI A. Standard for Low Energy Power Operated Doors.
Braking circuit plug position
A – Pull arm B – Press arm
Power fail closing speed.
The door must be adjusted to close in
no less than three seconds but a
minimum of five seconds is recommended.
WARNING
If braking circuit plug is inserted
incorrectly, brake circuit will not
work. The door can close at high
speed!
WARNING
Verify power fail closing speed
and braking circuit plug position
before programming the door
and completing a learn cycle.
All four required
parameter settings
(AS, rd, Tb, dL)
must be made to
flash even if the
value does not
need to be
changed before the
door will move to
the learn cycle.
Close
Question and Answer IconNeed help?

Do you have a question about the Dormakaba ED50LE and is the answer not in the manual?

Overview

This Quick Start Guide provides instructions for programming the dormakaba ED50LE/ED100LE/ED900 operator, ensuring compliance with the ANSI A156.19 Standard for Low Energy Power Operated Doors. It is designed to assist users in setting up the device for optimal performance and safety.

Function Description

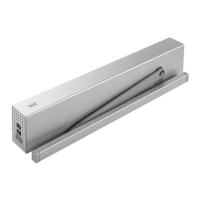
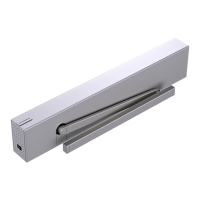
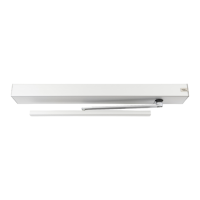
The dormakaba ED50LE/ED100LE/ED900 is a low-energy power-operated door operator. Its primary function is to automate the opening and closing of doors, providing accessibility and convenience while adhering to safety standards. The device utilizes a display and a series of buttons for programming and configuration. It supports various installation types, including pull arm with track (wall mounting on pull or approach side) and push arm with track (wall mounting on approach side). The operator can be configured for different door widths and types, including single doors. A crucial aspect of its operation is the "learn cycle," during which the operator calibrates itself to the specific door's dimensions and movement characteristics. This self-calibration ensures smooth and safe operation tailored to the installation. The device also incorporates safety features such as power fail closing speed verification and braking circuit plug position checks to prevent high-speed door closure in the event of a power failure or incorrect setup.

Usage Features

The operator's programming interface is designed for straightforward interaction. Upon powering on, the display shows a series of numbers and letters, eventually settling on two horizontal dashes moving up and down. During this state, pressing the bottom button allows the unit to identify its mounting orientation, ensuring the display text is correctly oriented. The display then shows a "P" on the right with a rotating segment on the left, indicating readiness for parameter programming.

To access the programming menu, the user presses and holds the right button until "Parameter ID" is displayed. Navigation through parameters is done using the right button to advance and the up/down buttons to change settings. The left button is used to accept changes, return to the programming menu, or exit the menu entirely. The display provides visual feedback, flashing the current setting when it's being adjusted and showing the new setting once accepted.

Key parameters that can be configured include:

  • Installation type (AS): This parameter defines how the operator is mounted (e.g., pull arm, push arm).
  • Reveal depth (rd): This setting adjusts for the distance between the door face and the frame, measured in increments of 10 mm (3/8").
  • Door width (Tb): This parameter accounts for the door's width, including the astragal, and is set in increments of 100 mm (4").
  • Door type (dL): This typically specifies if it's a single door.

After setting the required parameters, the device enters a "learn cycle." This is initiated by pressing and holding the bottom button. During this cycle, the door performs several movements, and the display cycles through letters and numbers. The user is prompted to manually push the door open to the desired angle (between 90 and 110 degrees) when the display shows "4." The operator then completes the learn cycle, calibrating its movement. Once finished, two horizontal bars appear on the display, indicating successful completion.

The device also provides feedback for potential issues. If the door closes and an "F" is displayed, it indicates that the spring force is too low. This requires manual adjustment of the spring tension.

Maintenance Features

While the guide focuses primarily on initial setup and programming, it touches upon aspects relevant to ongoing maintenance and troubleshooting.

  • Spring Force Adjustment: The "Spring force too low" indication (displaying "F") is a critical maintenance alert. If this occurs, the user is instructed to turn off the power, increase the spring force (ensuring it's between 10 and 18 turns depending on door width and weight), and then restart the learn cycle. This ensures the door has adequate closing force for safe and proper operation.
  • Braking Circuit Plug Position: Before programming, it is crucial to verify the braking circuit plug position. The guide explicitly states that if the plug is inserted incorrectly, the brake circuit will not work, potentially leading to the door closing at high speed. This highlights a key safety check that should be part of any maintenance routine or initial installation. The correct position allows the door to open and close slowly and easily. If the door is hard to press open, changing the jumper position is recommended.
  • Power Fail Closing Speed Verification: Another pre-programming check involves verifying the power fail closing speed. The door must be adjusted to close in no less than three seconds, with five seconds being recommended. This ensures that even without power, the door closes at a safe, controlled speed, preventing injury. This check is essential for maintaining the safety integrity of the automated door system.

The guide emphasizes that the operator must be completely installed according to the dormakaba USA Inc. ED operator Installation Instruction Manual before programming. This underscores the importance of proper physical installation as a prerequisite for effective and safe operation and subsequent maintenance. Regular checks of the door's closing speed and braking function are implied as part of ensuring continued safe operation.

Dormakaba ED50LE Specifications

General IconGeneral
Opening SpeedAdjustable
Closing SpeedAdjustable
Opening WidthAdjustable
Product TypeElectromechanical Door Operator
Operating ModesAutomatic, Manual
Safety FeaturesObstacle detection
FinishAnodized aluminum
Holding Force AdjustmentYes

Related product manuals