


R
ramirezlisaAug 16, 2025
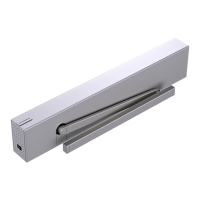
What to do if Dormakaba Gate Opener door is obstructed?
- VvwilsonAug 16, 2025
If the Dormakaba Gate Opener door is obstructed, first check the door movement while the system is deenergized and remove any obstructions. Obstructions are often caused by people using the door because the sensor's detection range doesn't match the operator's opening speed. You may need to increase the sensor detection range or the operator's opening speed. After addressing the obstruction, test the system operation.