Do you have a question about the Dormakaba ES 250 PRO and is the answer not in the manual?
Explains the manual's purpose and target audience for safe and efficient mounting.
Defines the manual's intended users as qualified assembling technicians with specific skills.
Explains hazard categories (WARNING, CAUTION, ATTENTION) and other symbols used.
Specifies suitable environments and warns against unapproved control elements causing hazards.
Technician's responsibility to comply with risk assessment and flag hazards, considering vulnerable persons.
General warnings, specifically about battery handling risks like heat, explosion, and fire.
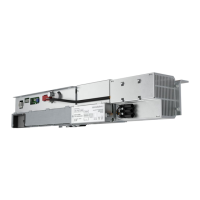
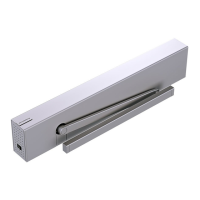
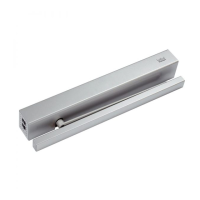
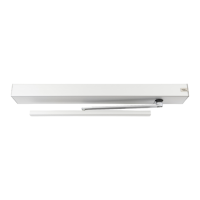
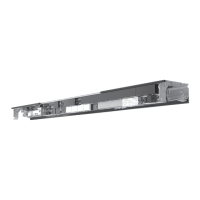
Provides a visual overview of the operator components with numbered labels.
Describes the control unit interface with keys and display and their functions.
Lists technical specifications like voltage, fuse, protection class, operating temperature, and edge protection.
Warnings about falling objects, incorrect mounting, and contamination during installation.
Covers general requirements, temperature range, electrical installation, materials, and tightening torques.
Details steps for preparing the operator profile and mounting it on the wall or in the passage.
Instructions for mounting carriers, hooking in the door leaf, and aligning it correctly.
Steps for installing engaging units, DRIVE UNIT, tensioning device, and the toothed belt.
Procedure for preparing and mounting the internal cover, including hinge profiles and holders.
Guidance on connecting accessories, ensuring current limits, and positioning sensors correctly.
Lists articles, article numbers, and maximum system quantities for CAN BUS components.
Describes CAN BUS structure, connectors, automatic detection, and sensor setting requirements.
Steps for connecting CAN BUS components, drilling holes, and installing terminating resistors.
Diagram and list of connections on the control board for various modules.
Explains multiport use for non-CAN BUS components and details default configurations and possible functions.
Details standard, time, and impulse transmission interlock setups and their input/output configurations.
Lists prerequisites for commissioning, including correct mounting, door position, and safety checks.
Cautionary note about the risk of crushing from moving parts during operator commissioning.
Warning about electric shock hazard and steps for operator commissioning, including Service Mode.
Explains how interlock works via EW I/O for two doors, including detector zones and locking sequences.
Details configuration for interlock with impulse transmission for two doors, including pulse delay.
Explains time interlock via EW I/O for two doors, including unlocking and locking sequences.
Instructions for labeling the functional parameterization sticker and applying it to the control unit.
Steps to connect the control unit, activate via 'P' parameter, and configure multiport for fire protection.
Step-by-step guide to navigate the control unit keypad to change and save parameters.
Information on setting parameters via keypad, OSI, or TMS-Soft, with labels for specific operator systems.
Lists error codes (In, E, EO), their meanings, and troubleshooting steps for various issues.
Procedure for removing the old battery and inserting a new one, including a safety warning.
| Max. door weight | 250 kg |
|---|---|
| Supply voltage | 230 V AC, 50/60 Hz |
| Operating temperature | +50°C |
| Opening Speed | Adjustable |
| Closing Speed | Adjustable |
| Hold-open Time | Adjustable |
| Control Options | remote control |
| Safety Features | Obstruction detection |
| Compatibility | Single and double leaf doors |