EasyManua.ls Logo

Doro 1362 - User Manual

Doro 1362
2 pages
Print Icon
To Next Page IconTo Next Page
Loading...
www.doro.com

Press the card’s lid carefully towards the
assistance buon unl it “clicks”. Li the lid
to an upright posion. Make sure the card’s
contacts are facing downwards. Fold down the
lid and carefully push it down, sliding it back in
place.
Note! The circuit boards (metal part) on the
cards must not be scratched or bent. Try not
to touch the circuits with your ngers.

Insert the baery by
sliding it into the baery
compartment with the
circuits facing down to
the right. Replace the
baery cover.


1. Enter the phone number. Delete with .
2. Press to dial. Press Abort to cancel
the call.
3. Press to end the call.
Note! For internaonal calls, always use +
before the country code for best operaon.
Press
*
twice for the internaonal prex +.

1. Press  to open the phonebook.
2. Use / to scroll through the
phonebook, or quick search by pressing the
key corresponding to the rst leer of the
name.
3. Press  â , alternavely, press
to dial the selected entry, or press
Back to return to standby.
3. PHONEBOOK
The Phonebook can store 100 entries with 3
phone numbers in each entry.
Add a contact
1. Press Menu â Phonebook â
-New contact- â Add.
2. Enter a  for the contact, see Enter
text. Delete with .
3. Use / to select ,
 or , and enter the phone
number(s) including the area code.
4. When done, press Save.
Doro 1362
Quick Start Guide
1. Speaker
2. Le selecon buon
3. Call buon
4. Voicemail
5. Keypad lock and
Internaonal prex/
symbols
6. Silent /
Input method
7. Scroll buons
8. End call /
Power on/
9. Right selecon
buon
10. Torch buon
11. Torch
12. Headset socket
13. Camera
14. Assistance buon
15. Loudspeaker
16. Microphone
17. Charging cradle
connectors
18. Charging socket
1. GET STARTED


Be careful not
to damage your
ngernails when
you remove the
baery cover. Do
not bend or twist
the baery cover
excessively as it may
be damaged.

GB
Remove the baery if it is
already installed. There are
two SIM card slots, SIM1
and SIM2. If you are to
use only one SIM card, we
recommend to use SIM1
slot.
Slide the card under the
metal part, with the gold-
coloured circuit board
facing down.
The cut-o corner of
the card helps to you place the card, correct
placement is indicated in the compartment.
Charge the phone
CAUTION
Only use baeries, charger and accessories
that have been approved for use with
this parcular model. Connecng other
accessories may be dangerous and may
invalidate the phone’s type approval and
guarantee.
When the baery is running low, is
displayed and a warning signal is heard.
Connect the mains adapter to the wall
socket and to the charging socket
y
.
Tip: Don’t forget to remove the protecve
plasc lm from the display.
2. GET TO KNOW YOUR PHONE

1. Press and hold the red buon on the
phone to turn it on/o. Conrm with Yes to
power o.
2. If the SIM card is valid but protected with a
PIN code (Personal Idencaon Number),
Input SIM1 PIN is displayed. Enter the PIN
code and press OK. Delete with .
Note! If PIN and PUK codes were not provided
with your SIM card, please contact your
service provider.
 shows the number of PIN
aempts le. When no more aempts remain,
 is displayed. The SIM card must
now be unlocked with the PUK code (Personal
Unblocking Key).
1. Enter the PUK code and conrm with OK.
2. Enter a new PIN code and conrm with OK.
3. Re-enter the new PIN code and conrm
with OK.
Start-up wizard
When starng the telephone for the rst me,
you can use the start-up wizard to set some
basic sengs.
Tip: You can run the start-up wizard later if
you want.

In this document the arrow (â) indicates next
acon in the step-by-step instrucons.
To conrm an acon in the phone, press OK. To
select an item, scroll or highlight the item using
/ and then press OK.
Enter text
Press a numerical key repeatedly unl the
desired character is shown. Wait a few
seconds before entering the next character.
Press
*
for a list of special characters.
Select the desired character with /
and press OK to enter it.
Use / to move the cursor within the
text.
Press
#
to cycle upper case, lower case and
numerals.
Press and hold
#
to change wring
language.

The default language is determined by the SIM
card.

1. Press to answer, or press  to
switch o the ring signal and then Reject
(busy signal).
Alternately, press to reject the call
directly.
2. Press to end the call.

Use / to adjust the sound volume
during a call. The volume level is indicated on
the display.

Silent is a xed prole with keypad tone,
message tone and ring tone disabled, while
vibraon, tasks and alarm are unchanged.
Press and hold
#
to acvate and to
deacvate silent.

During a call the so keys ( ) give access to
addional funcons.

Use
0
and
2
9
to speed dial an entry from
standby.
Press and hold the corresponding buon to
dial.

1. Press Menu â  â Phonebook â
.
2. Select
0
â Add and select an entry from
the phonebook.
3. Press OK to conrm.
4. Repeat to add speed dial entries for buons
2
9
.

As long as the phone is switched on, it is always
possible to place an SOS call by entering the
main local emergency number for your present
locaon followed by .

Received, missed, and dialled calls are saved in
a combined call log. 20 calls of each type can
be stored in the log. For mulple calls related
to the same number, only the most recent call
is saved.
1. Press .
2. Use / to scroll through the call log.
= 
= 
= 
3. Press to dial, or .

In the event of a trauma, it is crical to have
this informaon as early as possible to increase
the chances of survival. Add ICE contact to
improve your own safety. First responders
can access addional informaon such as
medicaon and next of kin from your phone in
case of an emergency. All elds are oponal,
but the more informaon provided the beer.
Press Menu â Phonebook â ICE.
5. Use / to scroll the list of entries.
6. Press Edit to add or edit informaon in each
entry. Delete with .
7. Press Save when done.
4. ASSISTANCE BUTTON
The assistance buon allows easy access to
contact your predened help numbers should
you need help. Make sure that the assistance
funcon is acvated before use and make all
necessary conguraons.Test the applicaon
thoroughly.

1. When help is needed, press and hold the
assistance buon for 3 seconds, or press it
twice within 1 second.
The assistance call begins aer a delay of
5 seconds. In this me you can prevent a
possible false alarm by pressing .
2. An assistance text message (SMS) is sent to
all recipients. The rst recipient in the list
is dialled. If the call is not answered within
25 seconds, the next number is dialled.
Dialling is repeated 3 mes or unl the call
is answered, or unl is pressed.
CAUTION
When an assistance call is acvated the phone
is pre-set to handsfree mode. Do not hold
the device near your ear when the handsfree
mode is in use, because the volume may be
extremely loud.

Press Menu â  â Assistance.
5. MESSAGES

1. Press Menu â Messages â Create new
â SMS.
2. Write your message, see Enter text, then
press To.
3. Select a recipient from 
Phonebook.
Alternavely, select  to add
recipient manually and press OK.
4. You can modify the recipients by selecng
one and press  â Edit//
.
5. When done, press  â Send.

Both you and the recipient must have sub-
scripons that support picture message. The
sengs for picture message are supplied by
your service provider and can be sent to you
automacally via text message.
1. Press Menu â Messages â Create new
â MMS.
2. Write your message, see Enter text.
3. Press  â Add picture:
 to select a le.
Take picture to use the camera to take a
picture.
Note! To keep best picture quality, send only
one picture per message.
You can also Add sound, Add video, and
Preview MMS using the  menu.
4. Press  â Add subject and enter
your subject, then press  â Done.
5. Press  â To and select recipient
from .
Alternavely, select Enter recipient to add
recipient manually and press  â
Done.
6. Press  â Send to send.

Press Menu â  â Messages.
English
Note! All illustraons are for illustrave
purposes only and may not accurately depict
the actual device. The items supplied with your
phone might vary depending on the soware
and accessories available in your region or
oered by your service provider. You can obtain
addional accessories from your local Doro
dealer. The supplied accessories provide the
best performance with your phone.
Question and Answer IconNeed help?

Do you have a question about the Doro 1362 and is the answer not in the manual?

Summary

Getting Started

Remove the battery cover

Steps to remove the SIM card and battery cover.

Insert SIM card

Steps to insert the SIM card into its slot.

Insert SD card

Steps to insert the SD card into its slot.

Battery and Charging

Charge the battery

Instructions for charging the phone's battery.

Phone Usage Basics

Turn on;off the phone

How to power the phone on and off using the power button.

Use PIN and PUK codes

Explains the use of PIN and PUK codes for SIM card security.

Call log

Accessing and viewing the call log.

Messages

Steps to create and send SMS and MMS messages.

Phone Features

Torch (Flashlight)

How to turn the flashlight on and off.

Settings Menu

Accessing and configuring phone settings like Bluetooth, tone, text size, and brightness.

Functions

Using phone functions like Alarm and Torch.

SIM card operations

Managing SIM card operations, including PIN code management.

Troubleshooting and Safety

Troubleshooting

Common issues and solutions, such as battery not installing or phone not connecting.

Protect Your Hearing

Warnings and advice on safe listening levels to prevent hearing damage.

Network safety

Information on network services and potential risks.

Safety Warnings

General safety precautions for using the mobile phone.

Technical Data and Compliance

Technical Data

Specifications including SAR, network bands, battery, and dimensions.

Specific Absorption Rate (SAR)

Information on radio wave absorption by the human body.

Warranty Information

Details on the product warranty and limitations.

Disposal of Product

Guidelines for the safe and environmentally sound disposal of the device.

Overview

Device Description: Doro 1362

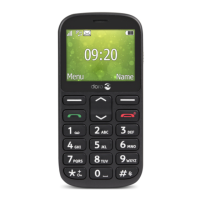
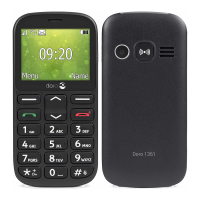
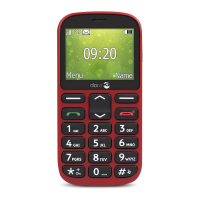
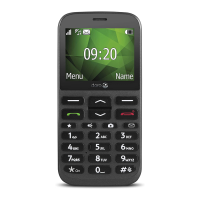
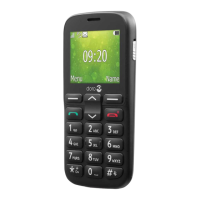
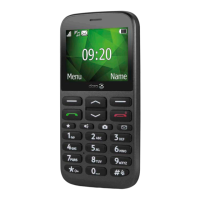
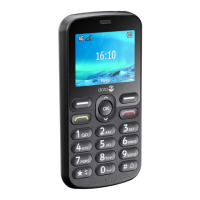
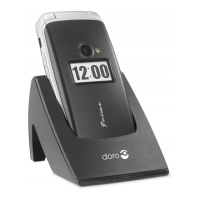
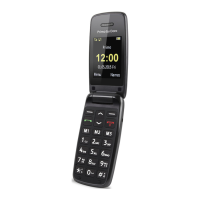
The Doro 1362 is a user-friendly mobile phone designed for simplicity and ease of use, particularly for seniors or those who prefer a straightforward mobile experience. It features a classic candy bar form factor with a clear display and well-spaced, tactile buttons.

Function Description

The primary function of the Doro 1362 is to facilitate communication through calls and text messages. It supports basic telephony features, including making and receiving calls, and sending and receiving SMS messages. The phone is equipped with a camera for taking photos, allowing users to capture and share moments.

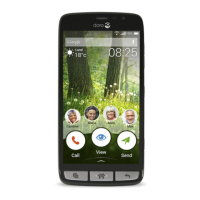
Beyond basic communication, the Doro 1362 includes several features aimed at enhancing user safety and convenience. It has an assistance button, which, when pressed, can automatically dial pre-set numbers or send an SMS to alert contacts in case of an emergency. This feature is highly customizable, allowing users to define up to five recipients for assistance calls and messages.

The phone also includes an alarm function, which can be set to remind users of important events or as a wake-up alarm. A built-in torch light provides illumination in dark environments. For entertainment, the phone has an FM radio, allowing users to listen to their favorite stations.

The Doro 1362 supports Bluetooth connectivity, enabling it to connect wirelessly to other Bluetooth-enabled devices, such as headsets or hands-free kits. This enhances the user's ability to make calls or listen to audio without holding the phone.

Usage Features

Making and Receiving Calls: To make a call, users enter the desired phone number using the keypad and press the green call button. To answer an incoming call, the green call button is pressed. The phone supports speed dial, allowing users to quickly call frequently used numbers by pressing and holding a numerical key. The call log keeps a record of dialed, received, and missed calls, which can be accessed to redial numbers or view call details.

Sending and Receiving Text Messages: Users can compose and send SMS messages by navigating to the "Messages" menu. The phone provides a predictive text input system to assist with typing. Received messages are stored in the inbox and can be read and replied to directly. The phone also supports picture messages (MMS), allowing users to send and receive photos along with text.

Camera Functionality: The integrated camera allows users to take photos. Photos can be viewed in the gallery and can be sent via MMS or transferred to a computer. The camera is designed for simple point-and-shoot operation.

Assistance Button: The assistance button, typically located on the back of the phone, is a key safety feature. When activated, it initiates a sequence of actions, such as dialing pre-set emergency numbers or sending an SMS with the user's location (if GPS is enabled and configured). Users can customize the recipients and the message sent.

Alarm Function: The alarm can be set with specific times and days of the week. Users can choose an alarm tone and whether the alarm should repeat.

Torch Light: The torch light can be activated and deactivated from the main menu or via a dedicated shortcut, providing a convenient light source.

FM Radio: The FM radio can be accessed through the entertainment menu. Users can scan for available stations and save their favorites. Headphones typically need to be connected to act as an antenna for the radio.

Bluetooth Connectivity: To connect to a Bluetooth device, users navigate to the Bluetooth settings, enable Bluetooth, and search for available devices. Once a device is paired, it can be used for hands-free communication or audio streaming.

Settings and Customization: The phone's settings menu allows users to customize various aspects of the device, including display brightness, font size, sound profiles, ringtones, and call settings. Users can also manage contacts, set up speed dial numbers, and configure security features like PIN codes.

Maintenance Features

Battery Management: The Doro 1362 is powered by a rechargeable battery. Users are advised to charge the battery fully before first use. The phone indicates battery level on the display, and a low battery warning prompts users to recharge. To prolong battery life, it is recommended to avoid extreme temperatures and to use the original charger.

Cleaning: The phone can be cleaned with a soft, dry cloth. Avoid using harsh chemicals or abrasive materials that could damage the screen or casing.

Software Updates: While not explicitly detailed as a user-accessible feature, software updates may be provided by the manufacturer to improve performance, add new features, or fix bugs. These updates are typically handled by service providers or through specific instructions from Doro.

Troubleshooting: The manual provides a troubleshooting section to help users resolve common issues, such as problems with charging, network connectivity, or sound. This often involves checking basic settings, restarting the device, or ensuring proper insertion of the SIM card.

SIM Card and Memory Card Handling: The phone requires a SIM card for network connectivity. Users need to correctly insert the SIM card into the designated slot. An optional memory card (MicroSD) can be inserted to expand storage for photos and other media. Proper insertion and removal procedures are outlined in the manual to prevent damage.

Security: The phone supports PIN codes for the SIM card and the phone itself to prevent unauthorized access. Users are advised to keep their PIN codes secure and to change default PINs for enhanced security.

Environmental Care: The manual includes information on proper disposal of the device and its battery, emphasizing the importance of recycling electronic waste to protect the environment. It adheres to WEEE (Waste Electrical and Electronic Equipment) directives.

Doro 1362 Specifications

General IconGeneral
Display Size2.4 inches
Resolution240 x 320 pixels
Battery Capacity800 mAh
SIM TypeMini-SIM
Connectivity2G
Weight96 g
FM RadioYes
Display TypeTFT
ColorsBlack, White
Bluetooth3.0
Memory Card SlotmicroSD
NetworkGSM 900 / 1800
Rear Camera0.3 MP

Related product manuals