EasyManua.ls Logo

dosatron D14MZ2 Troubleshoot Manual

dosatron D14MZ2
13 pages
To Next Page IconTo Next Page
Page #1 background imageLoading...
Page #1 background image
Page 1
800-523-8499
www.dosatronusa.com
Proper protection, such as gloves, eye wear, and aprons, are recommended when disassembling a Dosatron.
Step 3: Also, make sure the strainer is clear of debris.
Step 2: Check to see if you feel suction on your nger.
If so, just cut 1/2” off your suction hose and reattach.
Step 1: While the unit is still installed, turn the water on.
Remove the suction hose nut and suction hose.
D14MZ2 Troubleshooting - Part 1
This D14MZ2 Troubleshooting will cover: The injector is clicking, but not
drawing the solution or liquid is going down into the stock tank.
Scan the QR
code to watch
our D14MZ2 -
Troubleshooting
video.

Other manuals for dosatron D14MZ2

Question and Answer IconNeed help?

Do you have a question about the dosatron D14MZ2 and is the answer not in the manual?

dosatron D14MZ2 Specifications

General IconGeneral
ModelD14MZ2
Max Temperature40°C
Operating Pressure0.2 to 6 bar
Connection Size3/4"
MaterialPlastic

Summary

D14MZ2 Troubleshooting - Part 1

Check Suction Hose and Strainer

Verify suction, trim hose if needed, and clear strainer for proper solution draw.

Dosatron Removal and Stem Disassembly

Turn off water, release pressure, remove unit, unscrew stem nut, and remove bell housing.

Piston and Plunger Seal Inspection

Extract piston, inspect plunger seal for damage, and test seal integrity with a pop sound.

Seal Replacement and Check Valve Extraction

Roll off and install new plunger seal, remove check valve nut, and pull out check valve.

Check Valve Part Inspection and Preparation

Release check valve parts, inspect for damage/wear, clean if dirty, and prepare for reassembly.

Check Valve Assembly and Spring Installation

Slide spring over shaft, position top guide, lock it, and reinstall check valve assembly into stem.

Piston Insertion and Bell Housing Reassembly

Reinstall check valve nut, insert piston into blue body, and hand-tighten the bell housing.

Body Alignment and Suction Hose Condition

Align body notches with stem assembly, hand-tighten nut, and check suction hose for damage.

Suction Hose Reattachment and Injector Setting

Thread suction hose nut, slide onto barb, hand-tighten, and set injector to desired dilution.

D14MZ2 Troubleshooting - Part 2

Flange Inspection for Clicking Issues

Remove housing, pull piston, inspect piston shell flanges for wear or scratches.

Flange Fit Testing

Test upper flange fit in housing and lower flange fit with plunger for snugness.

Flange Replacement and Plunger Reinstallation

Replace flanges by twisting and lifting, then reinstall plunger by aligning and locking.

Final Reassembly and Video Resource

Place piston back into body, reinstall housing, and find video troubleshooting resources.
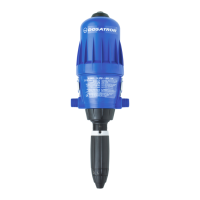