WIL-12350-E-02 13 WILDEN PUMP & ENGINEERING, LLC
Step 17
Inspect air valve gasket for nicks, gouges,
chemical attack and replace if necessary
with genuine Wilden® parts.
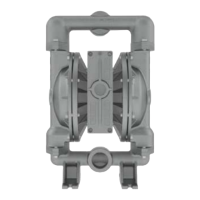
Step 19
Using a hex wrench, remove the two (2) air-valve manifold fasten-
ers.
AIR VALVE/CENTER-SECTION DISASSEMBLY
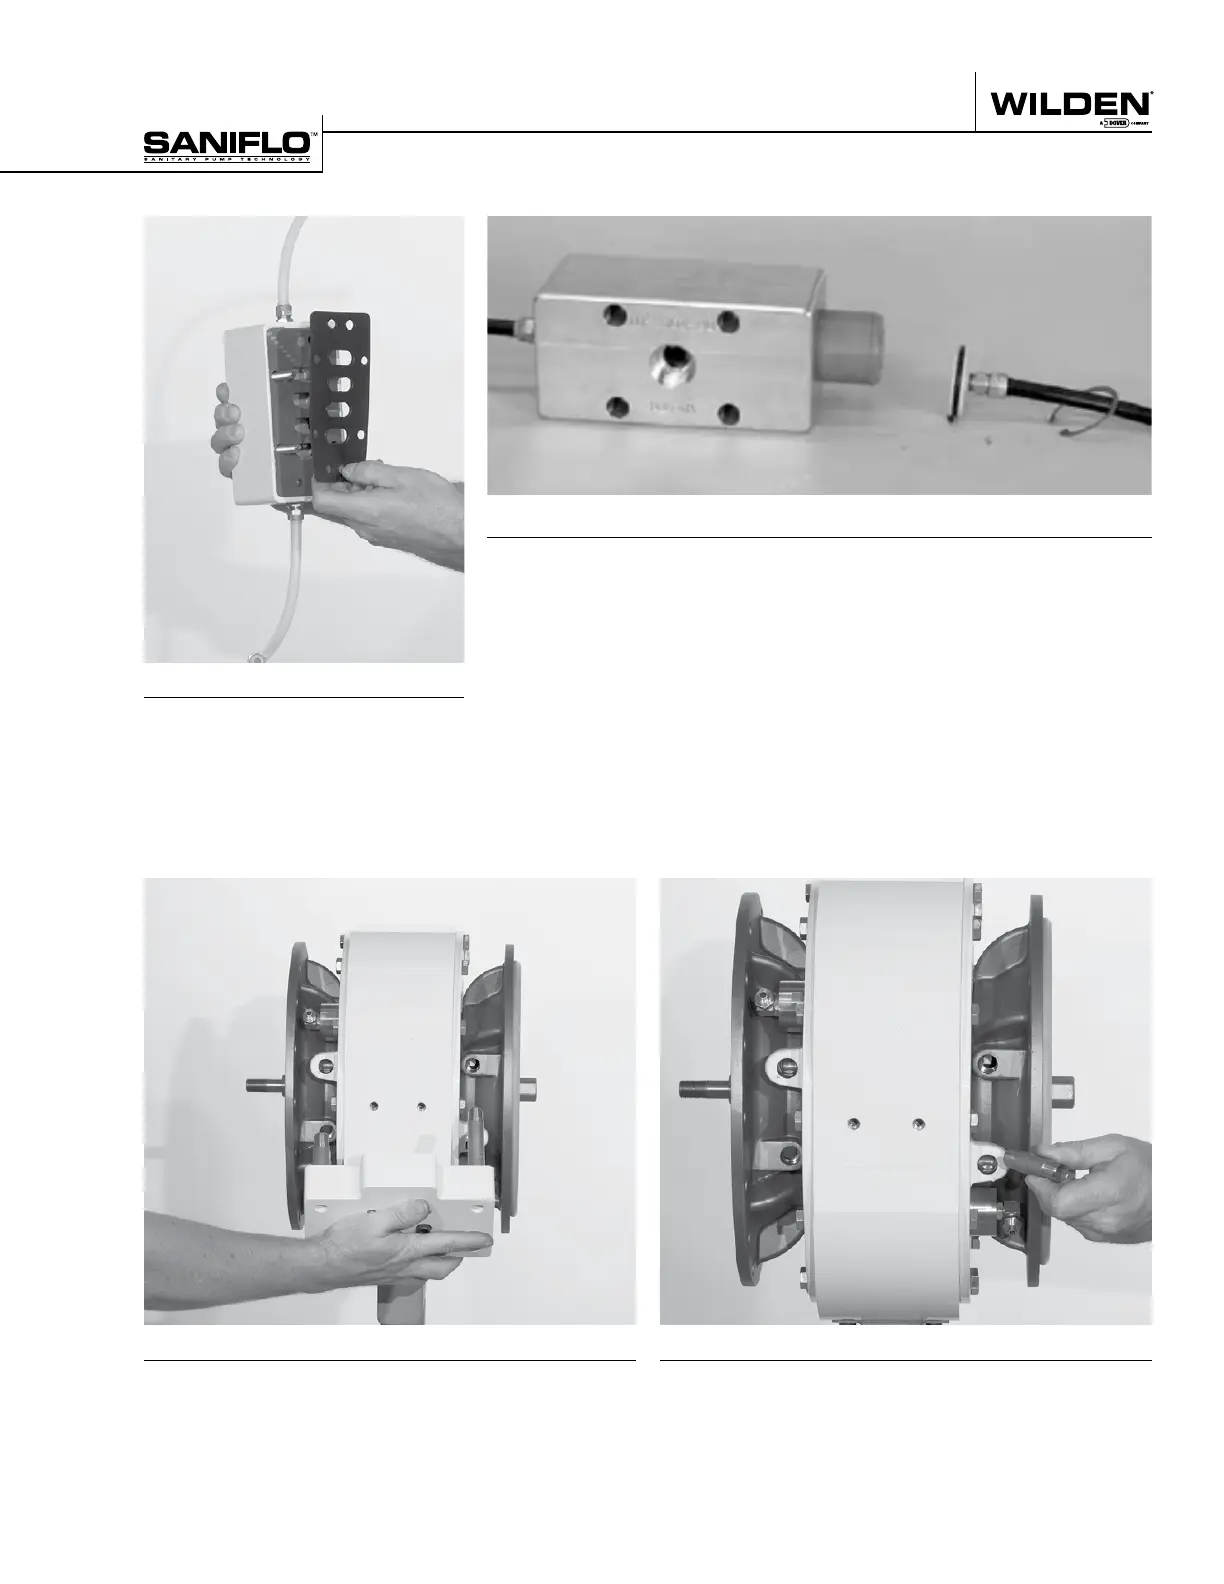
Step 18
Using a pair of snap-ring pliers, remove one snap-ring from the the air valve body. Inspect
air piston, air valve body and air valve end cap for nicks, gouges, chemical attack or abra-
sive wear.
HINTS & TIPS: Using an air nozzle, alternately pressurize top and bottom bleeder holes
until the top end cap is forced from air valve body.
CAUTION: End cap may come out with considerable force. Position a shop rag or equiva-
lent over the top end cap to ensure that the end cap doesn’t harm the pump technician
or anyone else in the immediate area of the pump.
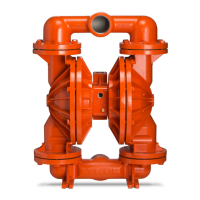
Step 20
Located behind the air valve manifold are four (4) tubes [two short
(2) and two (2) longer]. Remove all four (4) tubes from pump.