CALL TOLL-FREE 1-800-DR-OWNER 9
5. Attach the Upper Right and Left Handlebars to the Middle Handlebar using the remaining two (2) T-Handle Nuts, two (2)
Handle Clamp Bolts, and two (2) Curved Washers (Figure 2 on page 8). DO NOT over tighten the T-Handle Nuts.
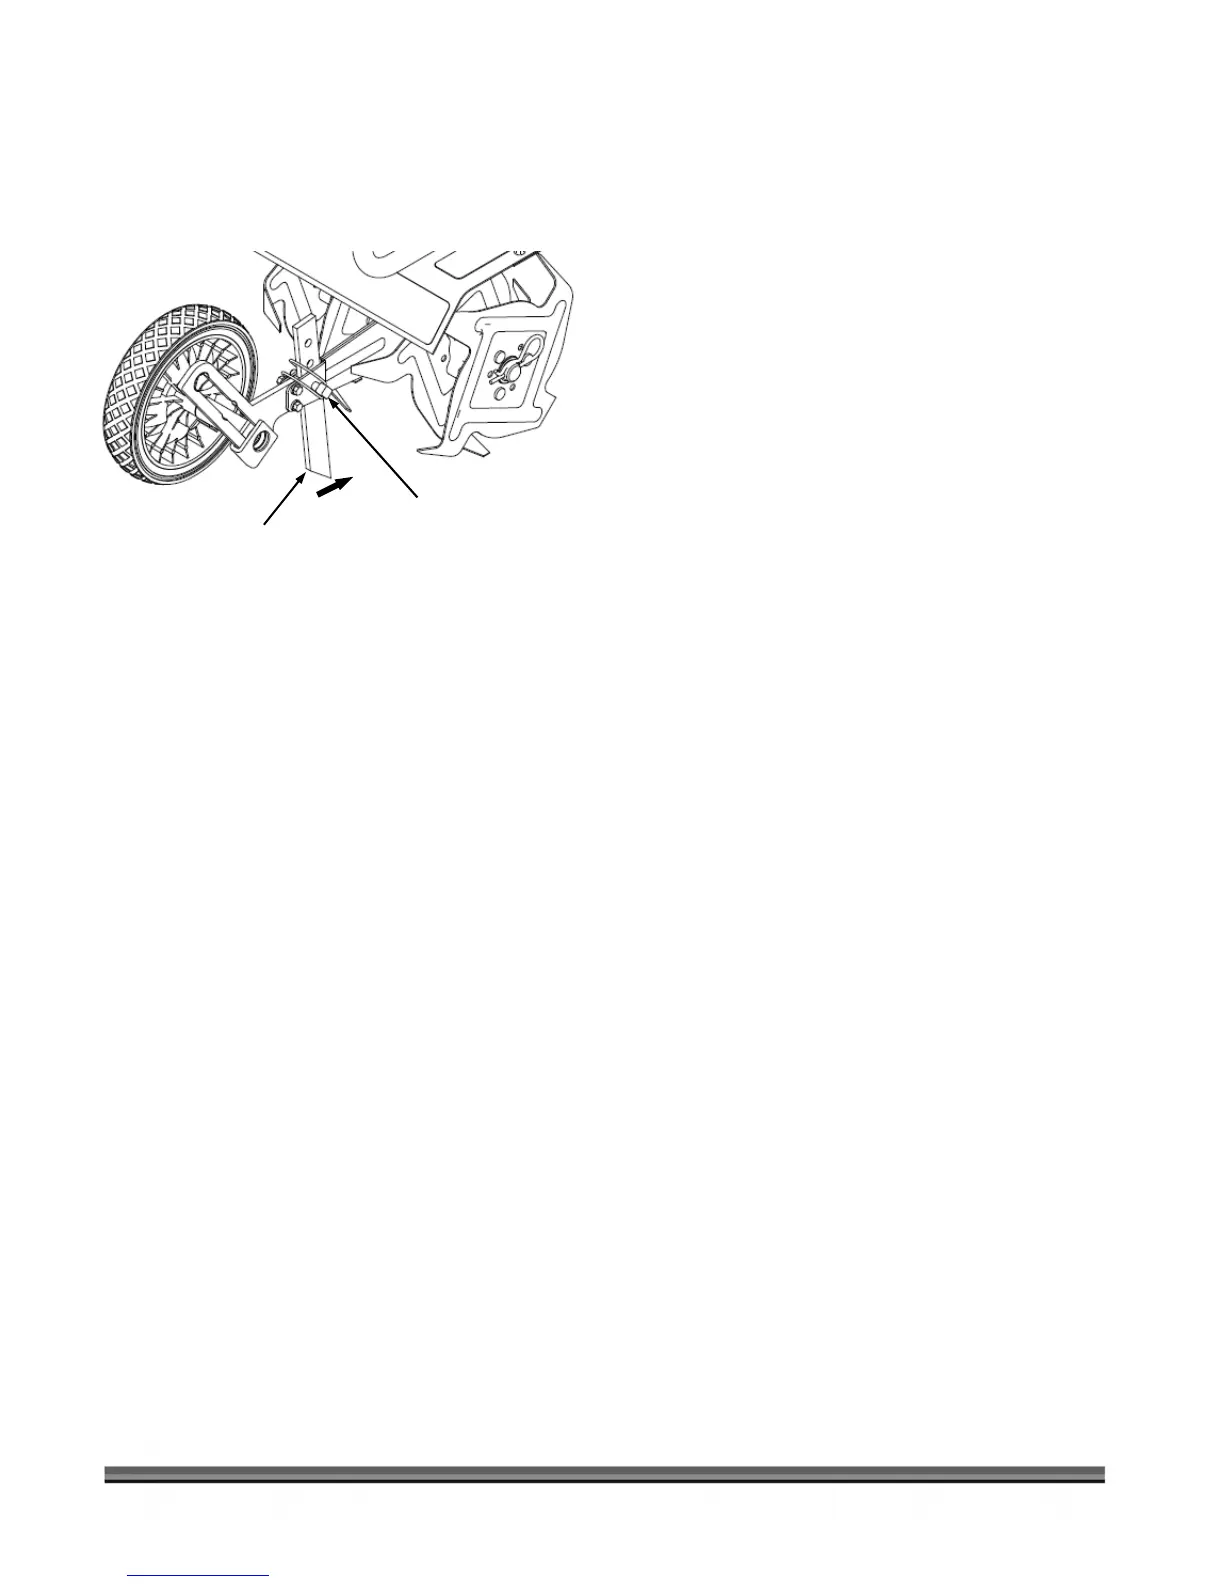
6. The Drag Stake shipped with its pointed end facing upwards. Remove the Lock Pin, turn the Drag Stake around and direct
the point in the downward position facing towards the Tines, and then reinsert the Lock Pin (Figure 3).
8. Do not discard your packaging material until you are fully satisfied with your new DR PILOT 2 Cycle Tiller/Cultivator.
Figure 3
Drag Stake Tip
pointed forward.
Lock Pin