14 DR
®
SELF-FEEDING WOOD CHIPPER
10. There may be as much as 16 feet of extra wire at each Tail Light location
(Figure 15). Cut the excess Wire, leaving enough to insert into the back of
each Light after Wires are stripped in the next step.
11. Strip (remove) 1/2" of insulation from the ends of the Yellow/Brown wires
and Green/Brown wires with Wire Strippers and twist the individual wire
ends to aid in installation.
12. At the left side of the Chipper, insert the Yellow Wire into the top left hole in
the back of the light socket. Insert the Brown Wire into the top right hole.
Note: The wires are retained in the light socket holes by spring-loaded connectors.
13. At the right side of the Chipper, insert the Green Wire into the top left hole
in the back of the light socket. Insert the Brown Wire into the top right
hole.
14. Secure the Wires to the Light Brackets with Cable Ties.
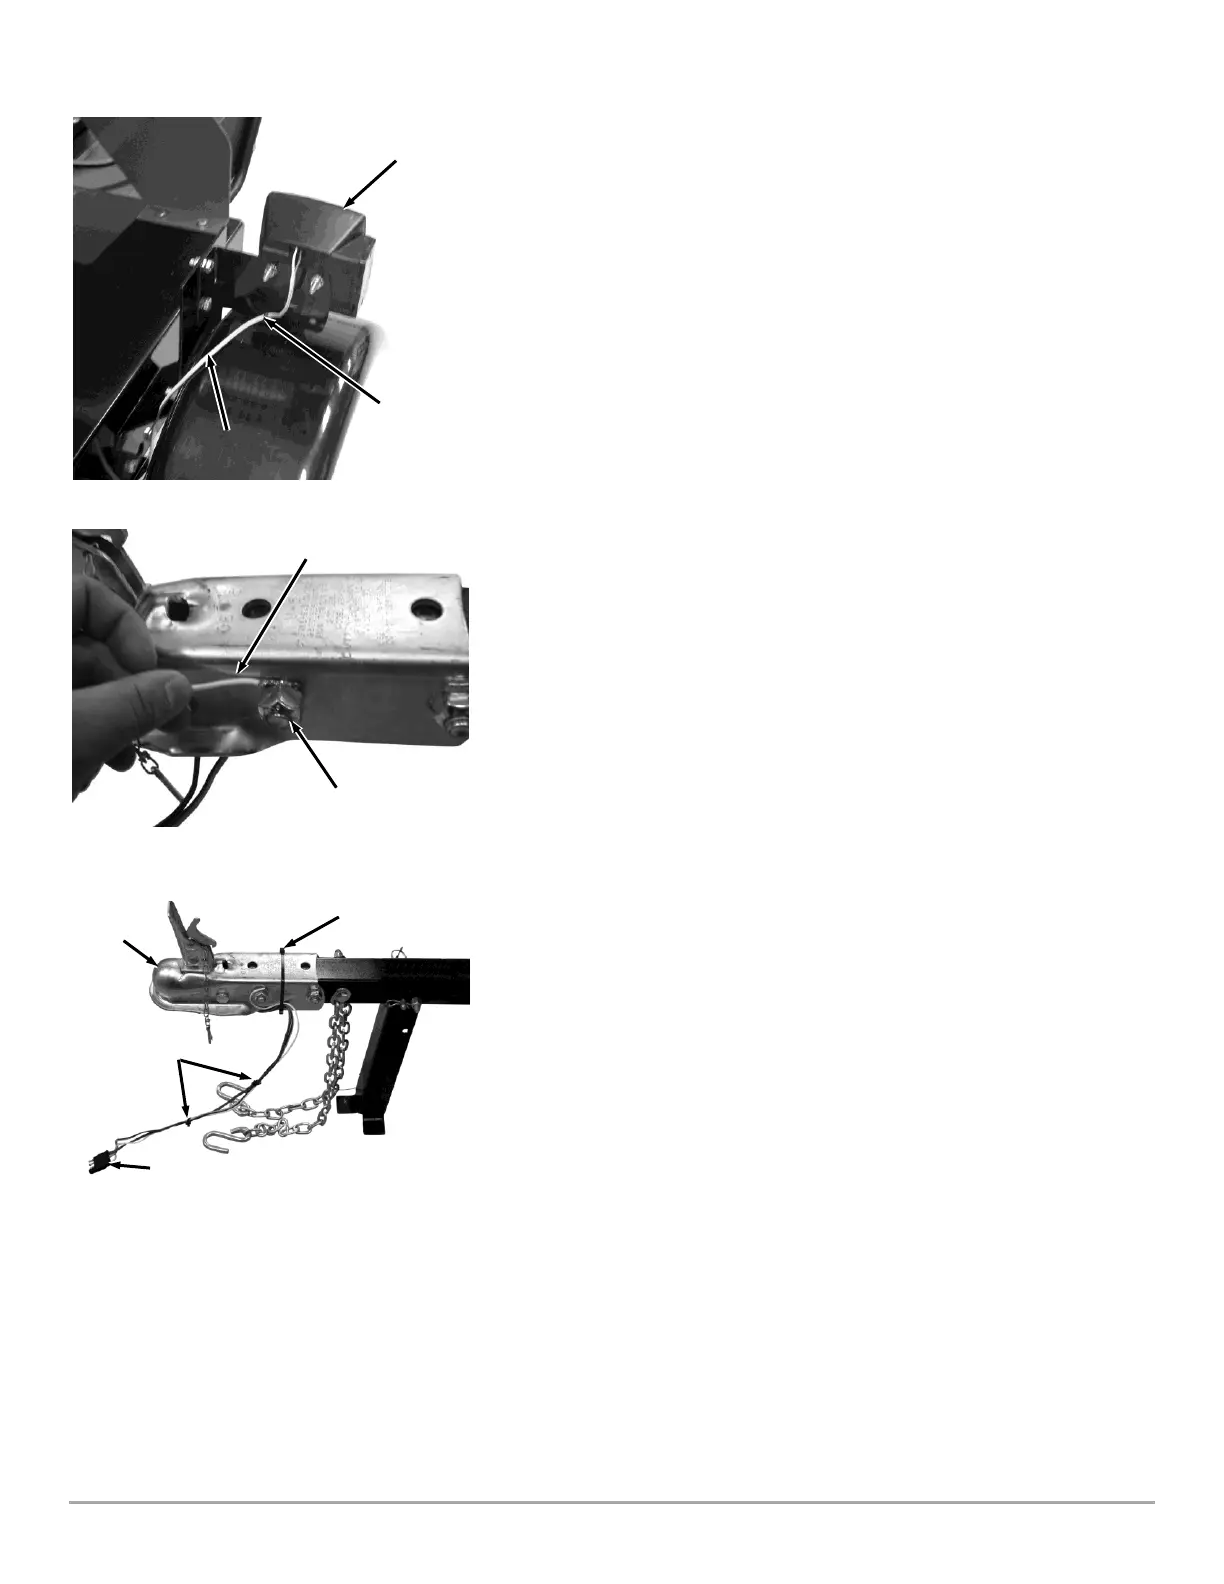
15. Reinstall the Tow Hitch and secure with the Bolts and Locknuts, but leave
the front bolt loose for the following steps (Figure 10).
16. Remove the Ring Terminal from the end of the White Ground Wire with
Wire Cutters (Figure 16).
17. Remove 1" of insulation from the end of the Ground Wire with the Wire
Strippers.
18. Wrap the White (Ground) Wire around the front Tow Hitch Bolt and tighten
the Bolt.
19. Secure the Wires to the Tongue Assembly between the two large Bolts to
ensure they will not get caught between the Tongue and Ball of the Tow
vehicle (Figure 17).
20. Secure the colored and white wires together with some Cable Ties.
 Loading...


