Routinely check the wear plate for a sharp square edge. Using a rounded or chipped wear plate will decrease performance and
cause excessive vibration that will cause damage to the DR SELF-FEEDING WOOD CHIPPER and make chipping difficult for the
operator.
VISUAL Inspection of the Wear Plate (minimum every 25 hours)
Tools Needed:
• Two 1/2" Wrenches
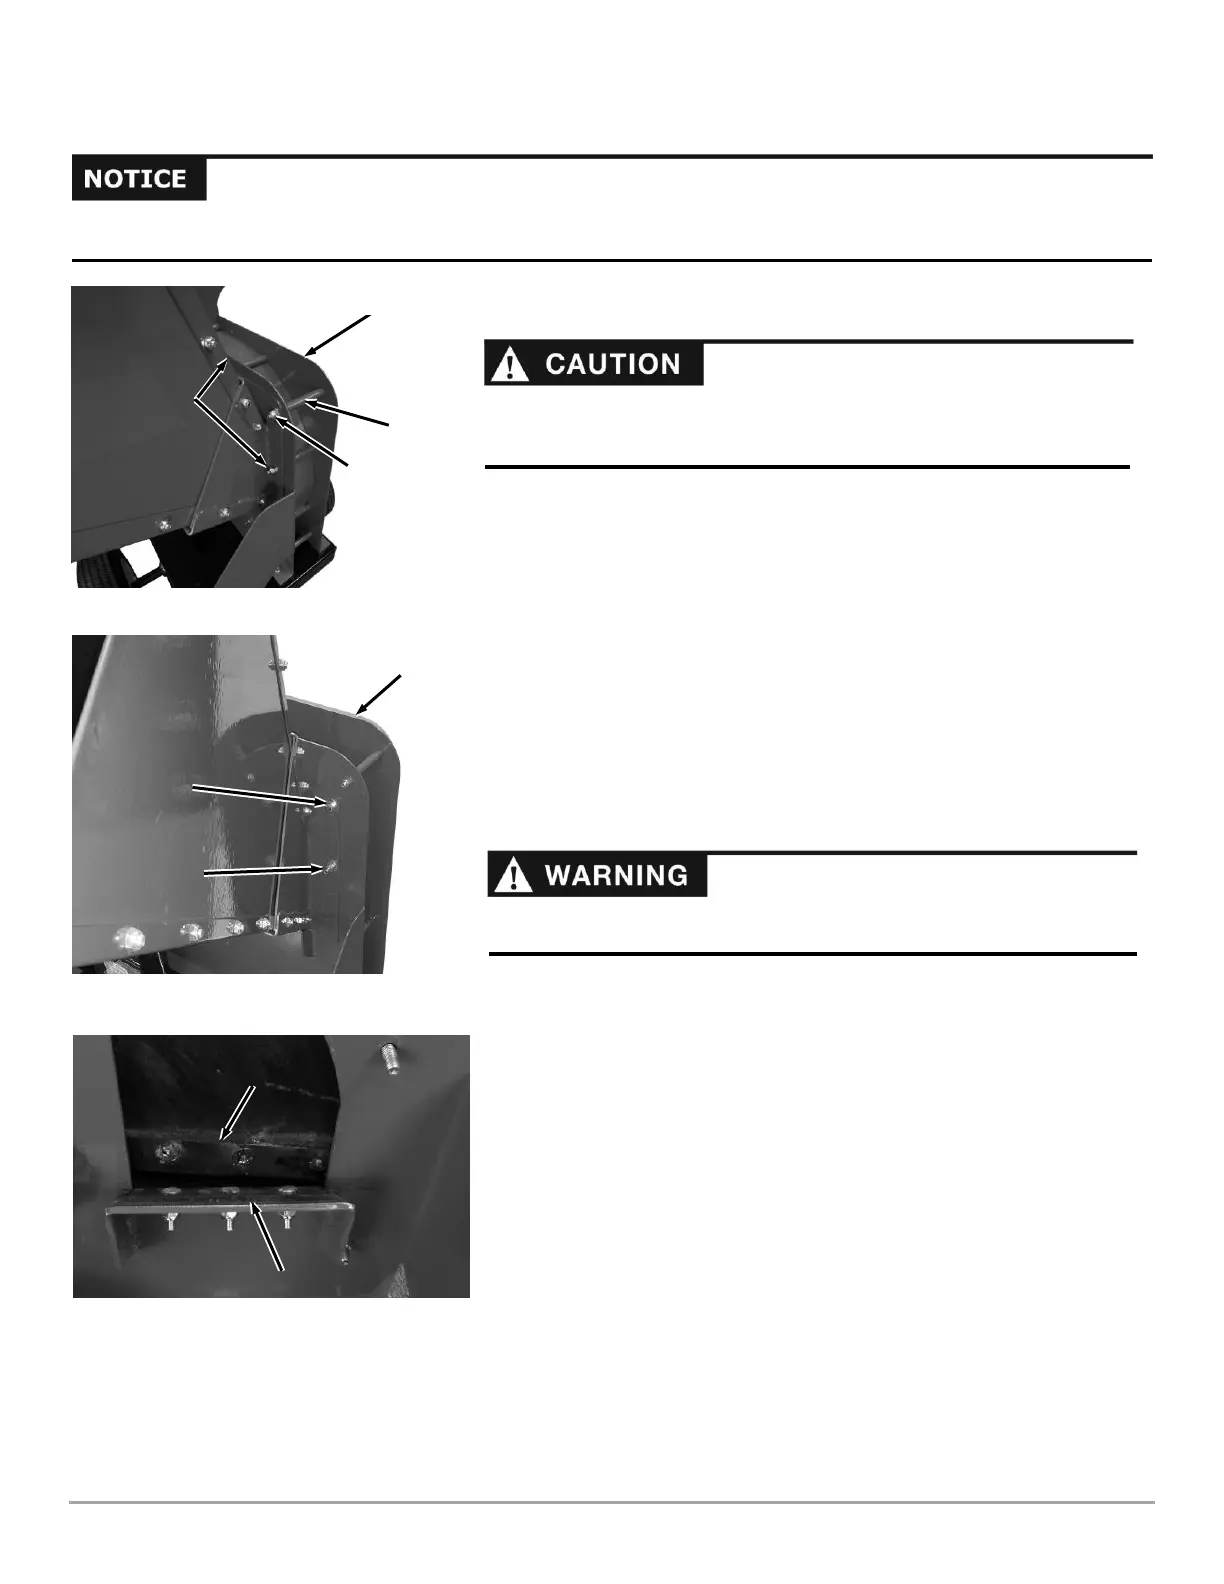
1. Remove the Hopper hardware as described below.
Pro-475
a. Remove the Locknut and Washer from the upper right Bolt and lower
left Stud of the Hopper (Figure 49a). The Bolt can be left in place and
make sure the Spacer stays in the location shown.
b. Remove the Bolt from the upper left and lower right of the Hopper.
Pro XL-575:
a. Remove the Locknut and Washer from the Bolt on the lower right side
of the Hopper (Figure 49b). The Bolt can be left in place.
b. Remove the three Locknuts and Washers from the Studs at the upper
right, upper left and lower left of the Hopper.
2. Remove the Hopper from the Chipper Assembly.
3. Use a stick to rotate the Flywheel until the Knife is next to the Wear Plate.
4. Closely inspect the Chipper Knife and Wear Plate for nicks or dull (rounded)
edges (Figure 50).
5. If necessary, repair or replace the Chipper Knife and/or Wear Plate (see
those sections in this chapter).
6. Check the Chipper Knife to Wear Plate gap (see that section in this
chapter).
Be careful and wear gloves when working near the chipper knife. The knife
edge can cut you if you come in contact with it.
The hopper should be supported when the mounting hardware is removed.
Removal of the hopper is difficult for one person. Two people are needed for
the hopper removal process.
 Loading...


