8 DR
®
TOW-BEHIND FIELD AND BRUSH MOWER
Attaching the Battery Box to the Frame
Tools Needed:
• Two ½ in Wrenches
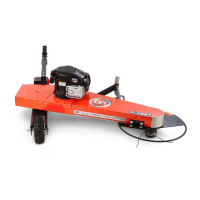
1. Install Battery Bracket with Battery Box onto Frame to Right Side
Support Wheel Bracket (Figure 5).
2. Secure Battery Bracket to Frame with two 5/16-18 X 3.75 in Flanged
Bolts PN 187571, two Washers PN: 112411, and two Flanged Locknuts
PN: 333321 (Figure 5).
3. Using two ½ in Wrenches, tighten Hardware.
Connecting the Battery Wires
We ship DR TOW-BEHIND FIELD and BRUSH MOWER Electric-
Starting machines with the Battery Wire disconnected. This
prevents the Battery from discharge during shipment. Before
using the DR TOW-BEHIND FIELD and BRUSH MOWER, connect
Battery Wires.
Tools Needed:
• One 3/8 in wrench and two ½ in wrenches.
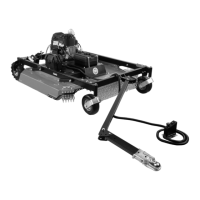
1. Remove Battery Box Strap and Bolts using 3/8 in Wrench (Figure 6).
2. Open Battery Box and first connect red wire to the positive (+) terminal.
Next, connect the black wire to the Negative (-) terminal. Connect
terminals using two ½ in wrenches, two Bolts PN: 123211, and two Nuts
PN: 110761 which can be found in product pack.
3. Close Battery Box lid and re-secure the Battery Strap over the top of
box with the previously removed hardware (Figure 6).
4. Using a 3/8 in Wrench, tighten down battery strap to ensure Battery Box
is secure.
Attaching the Control Panel to the Frame
Tools Needed:
• 3/16 in Wrench
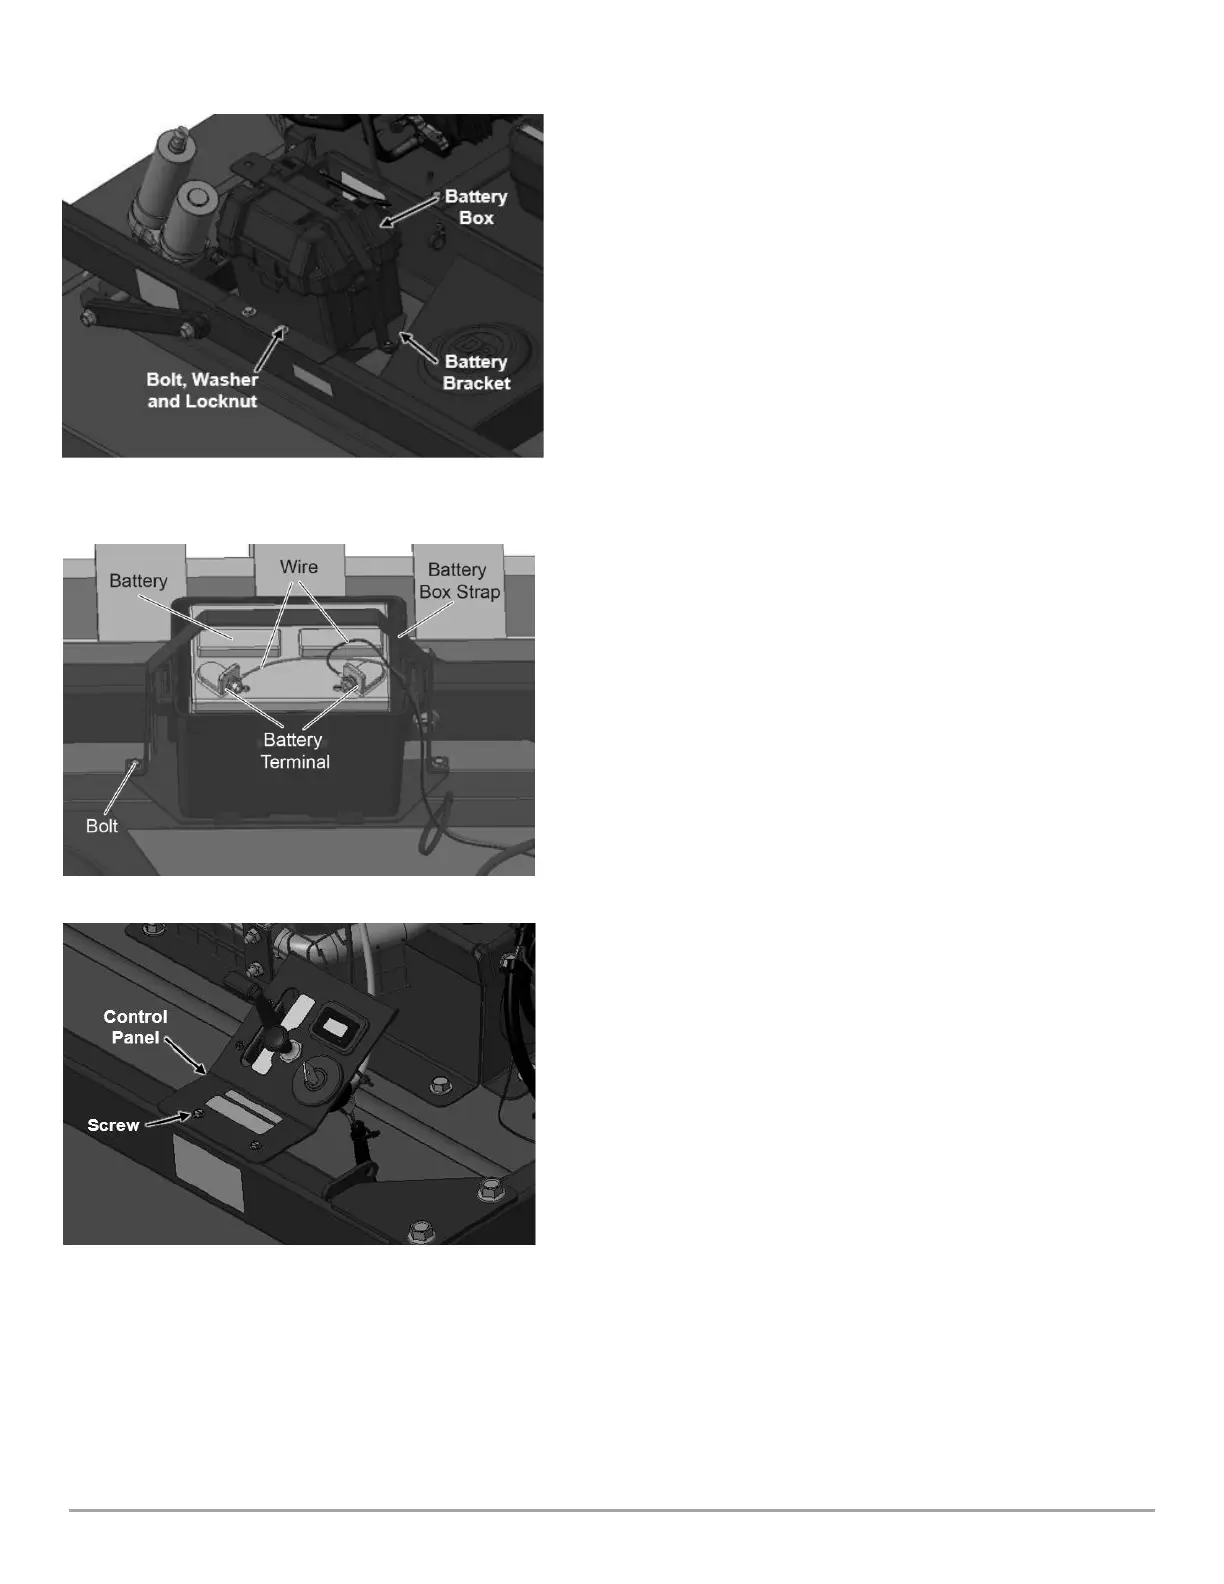
1. Install the Control Panel to Frame Rear Side (Figure 7).
2. Secure Control Panel to Frame using of two 10-32 x 0.5 in self-tapping
screws PN: 111701 (Figure 7).
3. Using 3/16 in Wrench, tighten Hardware.
Note: Ensure Throttle control cable and Choke cable are
routed properly with no kinks or twists going to the Engine.