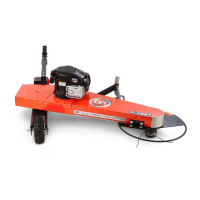
Ensure Cotter Pins for each actuator bend and lock correctly with frame to
ensure actuator is secured properly to deck (Figure 9).
Attaching the Actuator to the Frame
1. Align the Frame with both the Actuators (Figure 8).
2. Raise/Lower the Actuators using the remote-control box until
the Actuators mounting holes line up with the Frame.
3. Insert the Actuator Pin PN: 397351 through the Actuator and Frame and
secure with the use of the Cotter Pin PN: 235001 (Figure 8 & 9) Do this
for each Actuator.
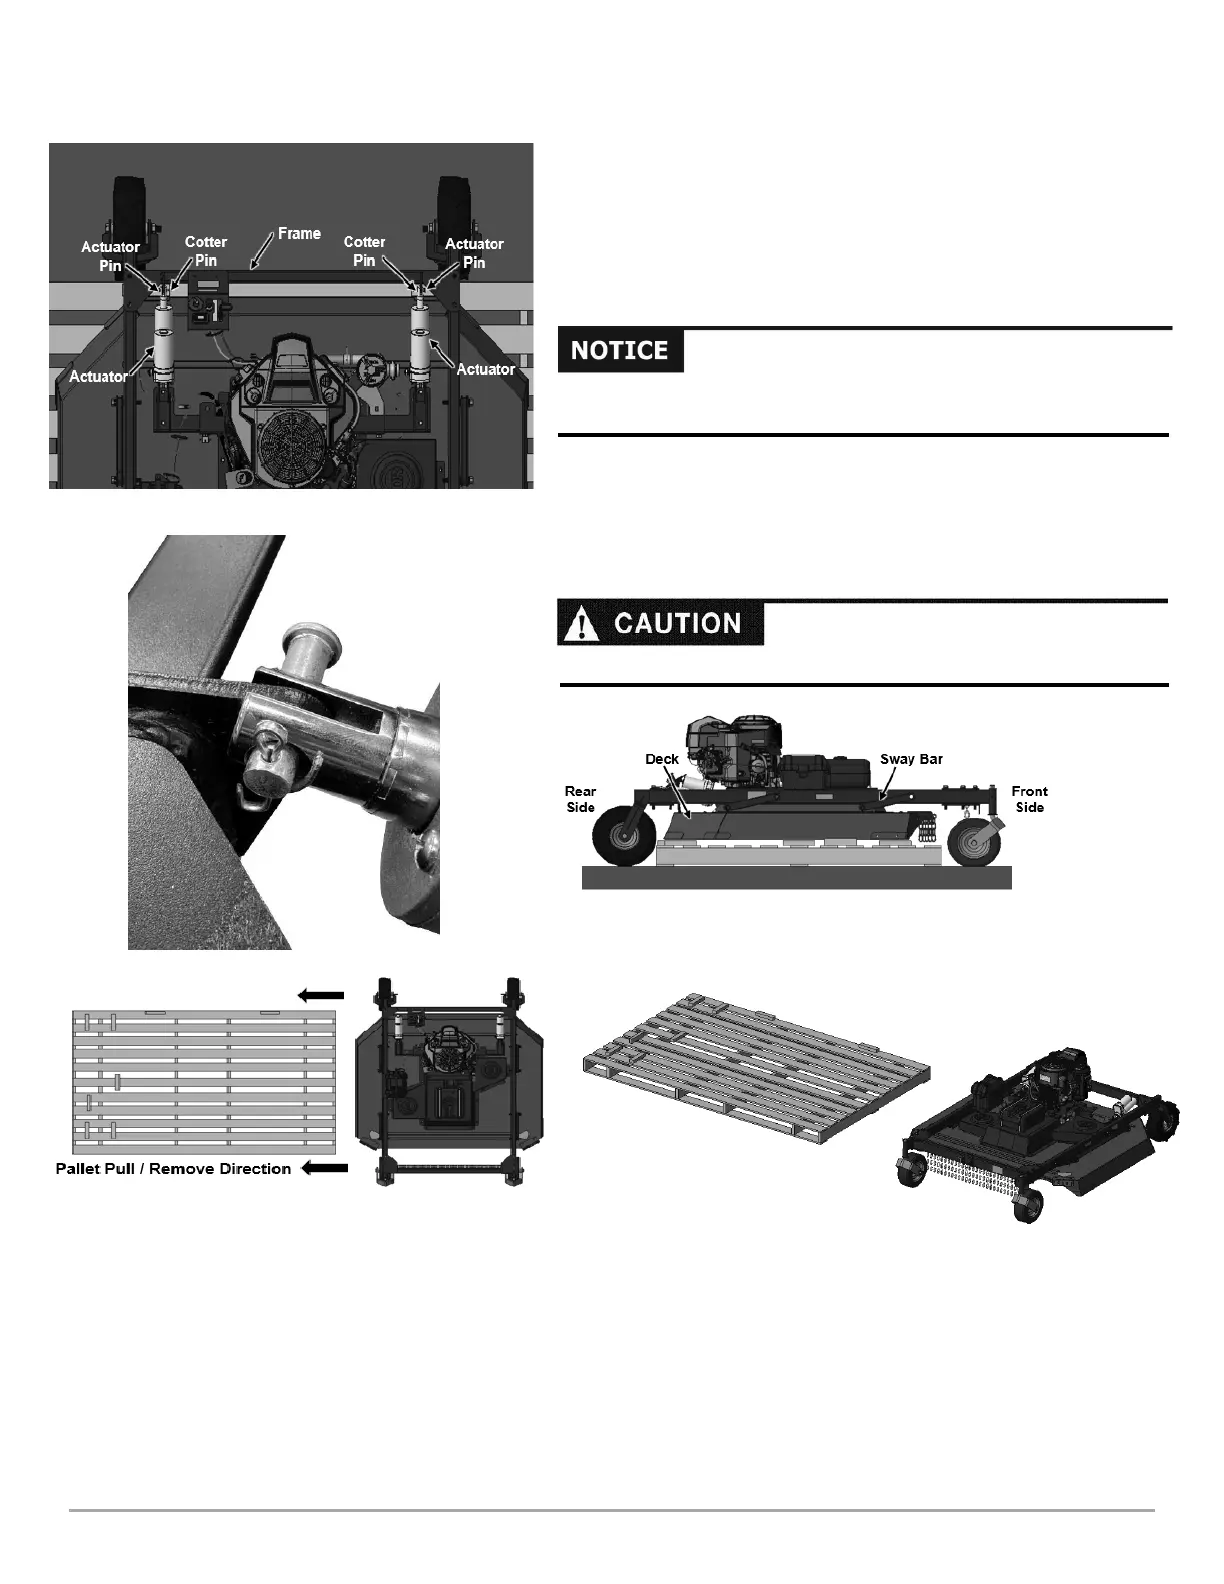
Removing the Wooden Pallet
1. Raise the actuators until the Deck lifts off Pallet (Figure 10).
2. Pull Pallet out from underneath Machine in direction shown
(Figures 11 & 12).