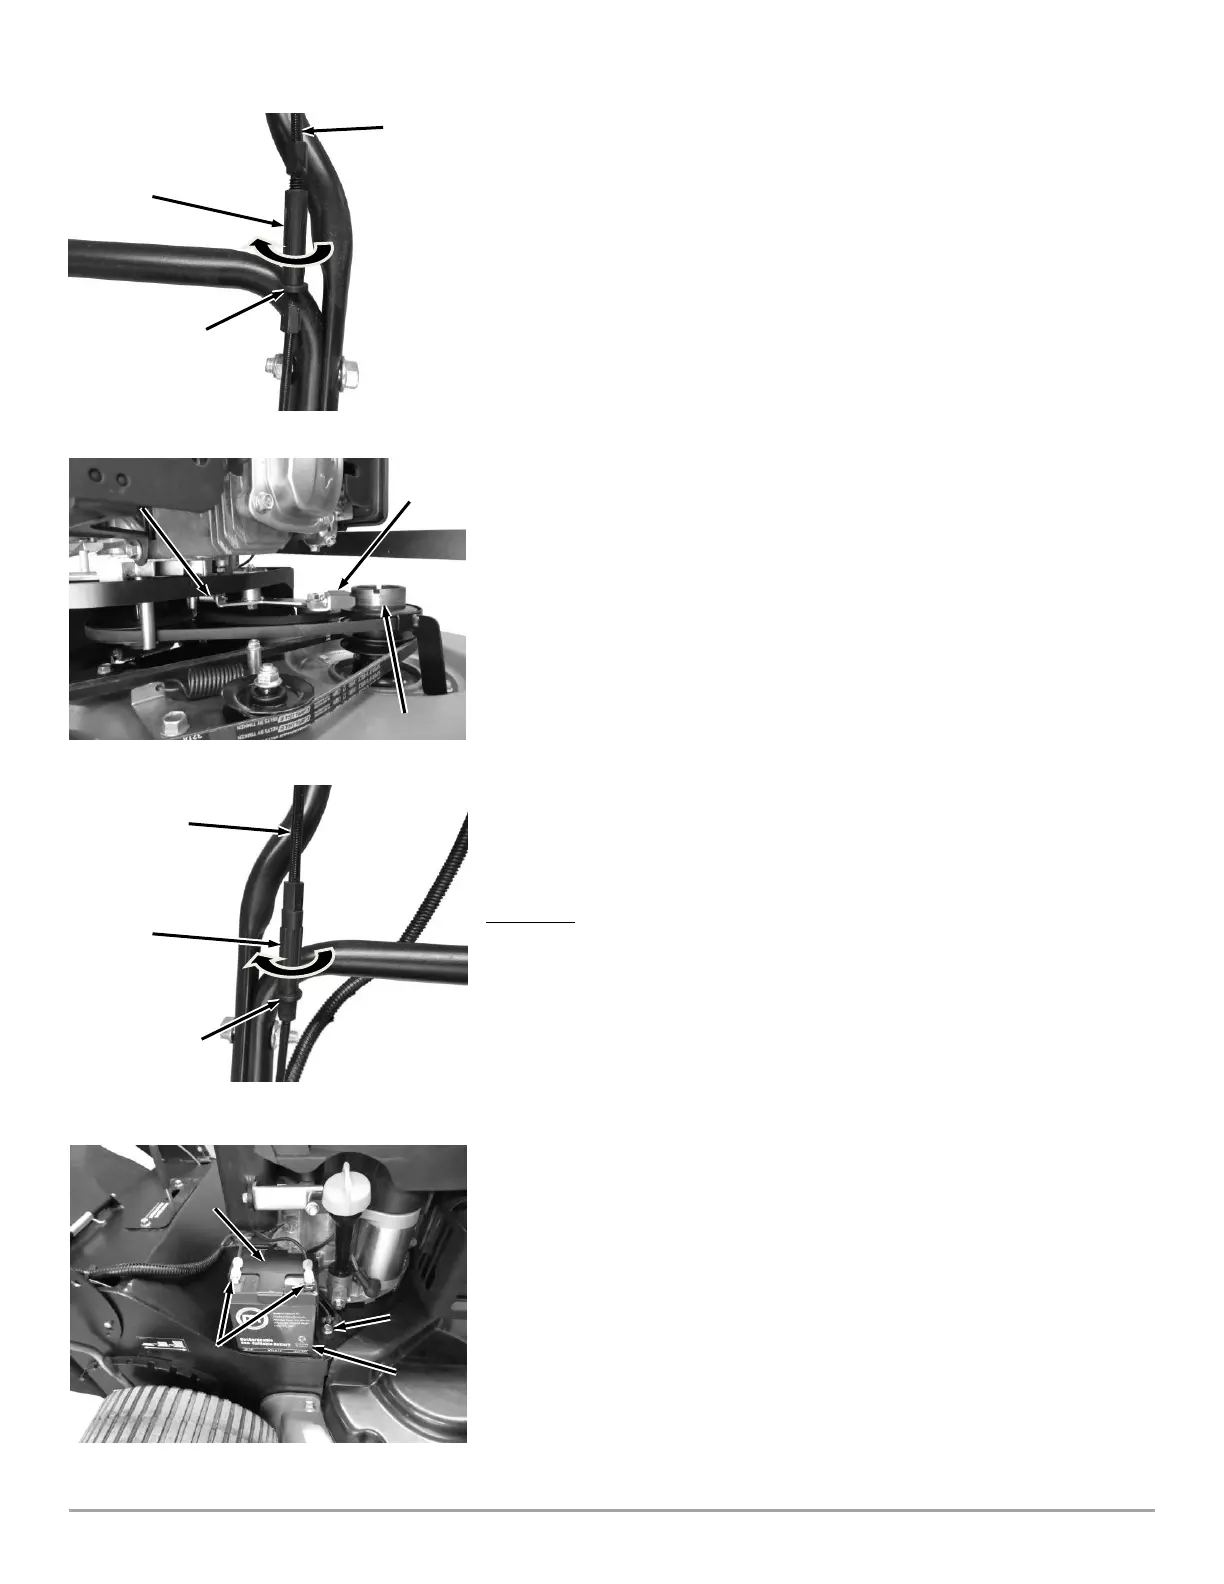
3. Remove Excess Slack in the Cable: Rotate the center section of the In-Line
Adjuster until very little movement of the Bail Bar is needed before the Idler
Arm begins to move. (Figure 38). IMPORTANT: Do not over adjust. Make
sure when the Bail Bar is released the Brake Pad is contacting the Blade
Pulley (Figure 39)!
Note: A new Belt will stretch over time. The above Cable adjustment should be
performed again after 5 hours of use.
4. Reinstall the Belt Cover.
Adjusting the Traction Drive Cable
If the Traction Drive appears to be losing speed, the Traction Drive Cable must
be tightened to restore maximum speed. Avoid over tensioning the Cable
because it may cause the Transmission to engage even if the Drive Lever is fully
released.
If the Mower is difficult to push forward when the Traction Drive Lever is fully
released, the Cable tension will need to be loosened to disengage the
Transmission.
Note: When properly adjusted, tension on the Traction Drive Lever should increase
when the Lever is about parallel to (almost touching) the Handlebar Grip.
1. Locate the Traction Drive Cable on the Handlebar (Figure 40). There is an
In-Line Adjuster to change the length of the Cable.
2. Rotate the center portion clockwise while holding the ends stationary to
expand the In-Line Adjuster and remove slack from the cable as needed.
Counterclockwise rotation will add more slack in the Cable.
Replacing the Battery
Tools and Supplies Needed:
• 3/8" Wrench
REMOVAL
1. Remove the Battery Wires form the Terminals (Figure 41).
2. Remove the Bolt that secures the Battery Bracket.
Note: There are wire terminals secured by the Battery Clamp Bolt. These wires must
be secured by the bolt when the Battery Clamp is reinstalled.
3. Position the Battery and install the Battery Clamp.
4. Install the wires onto the Bolt and install the Bolt to secure the Clamp.
5. Reinstall the Battery Wires.